
DC Split-Core CTs (eGauge DC CTs)
Visit the online store page
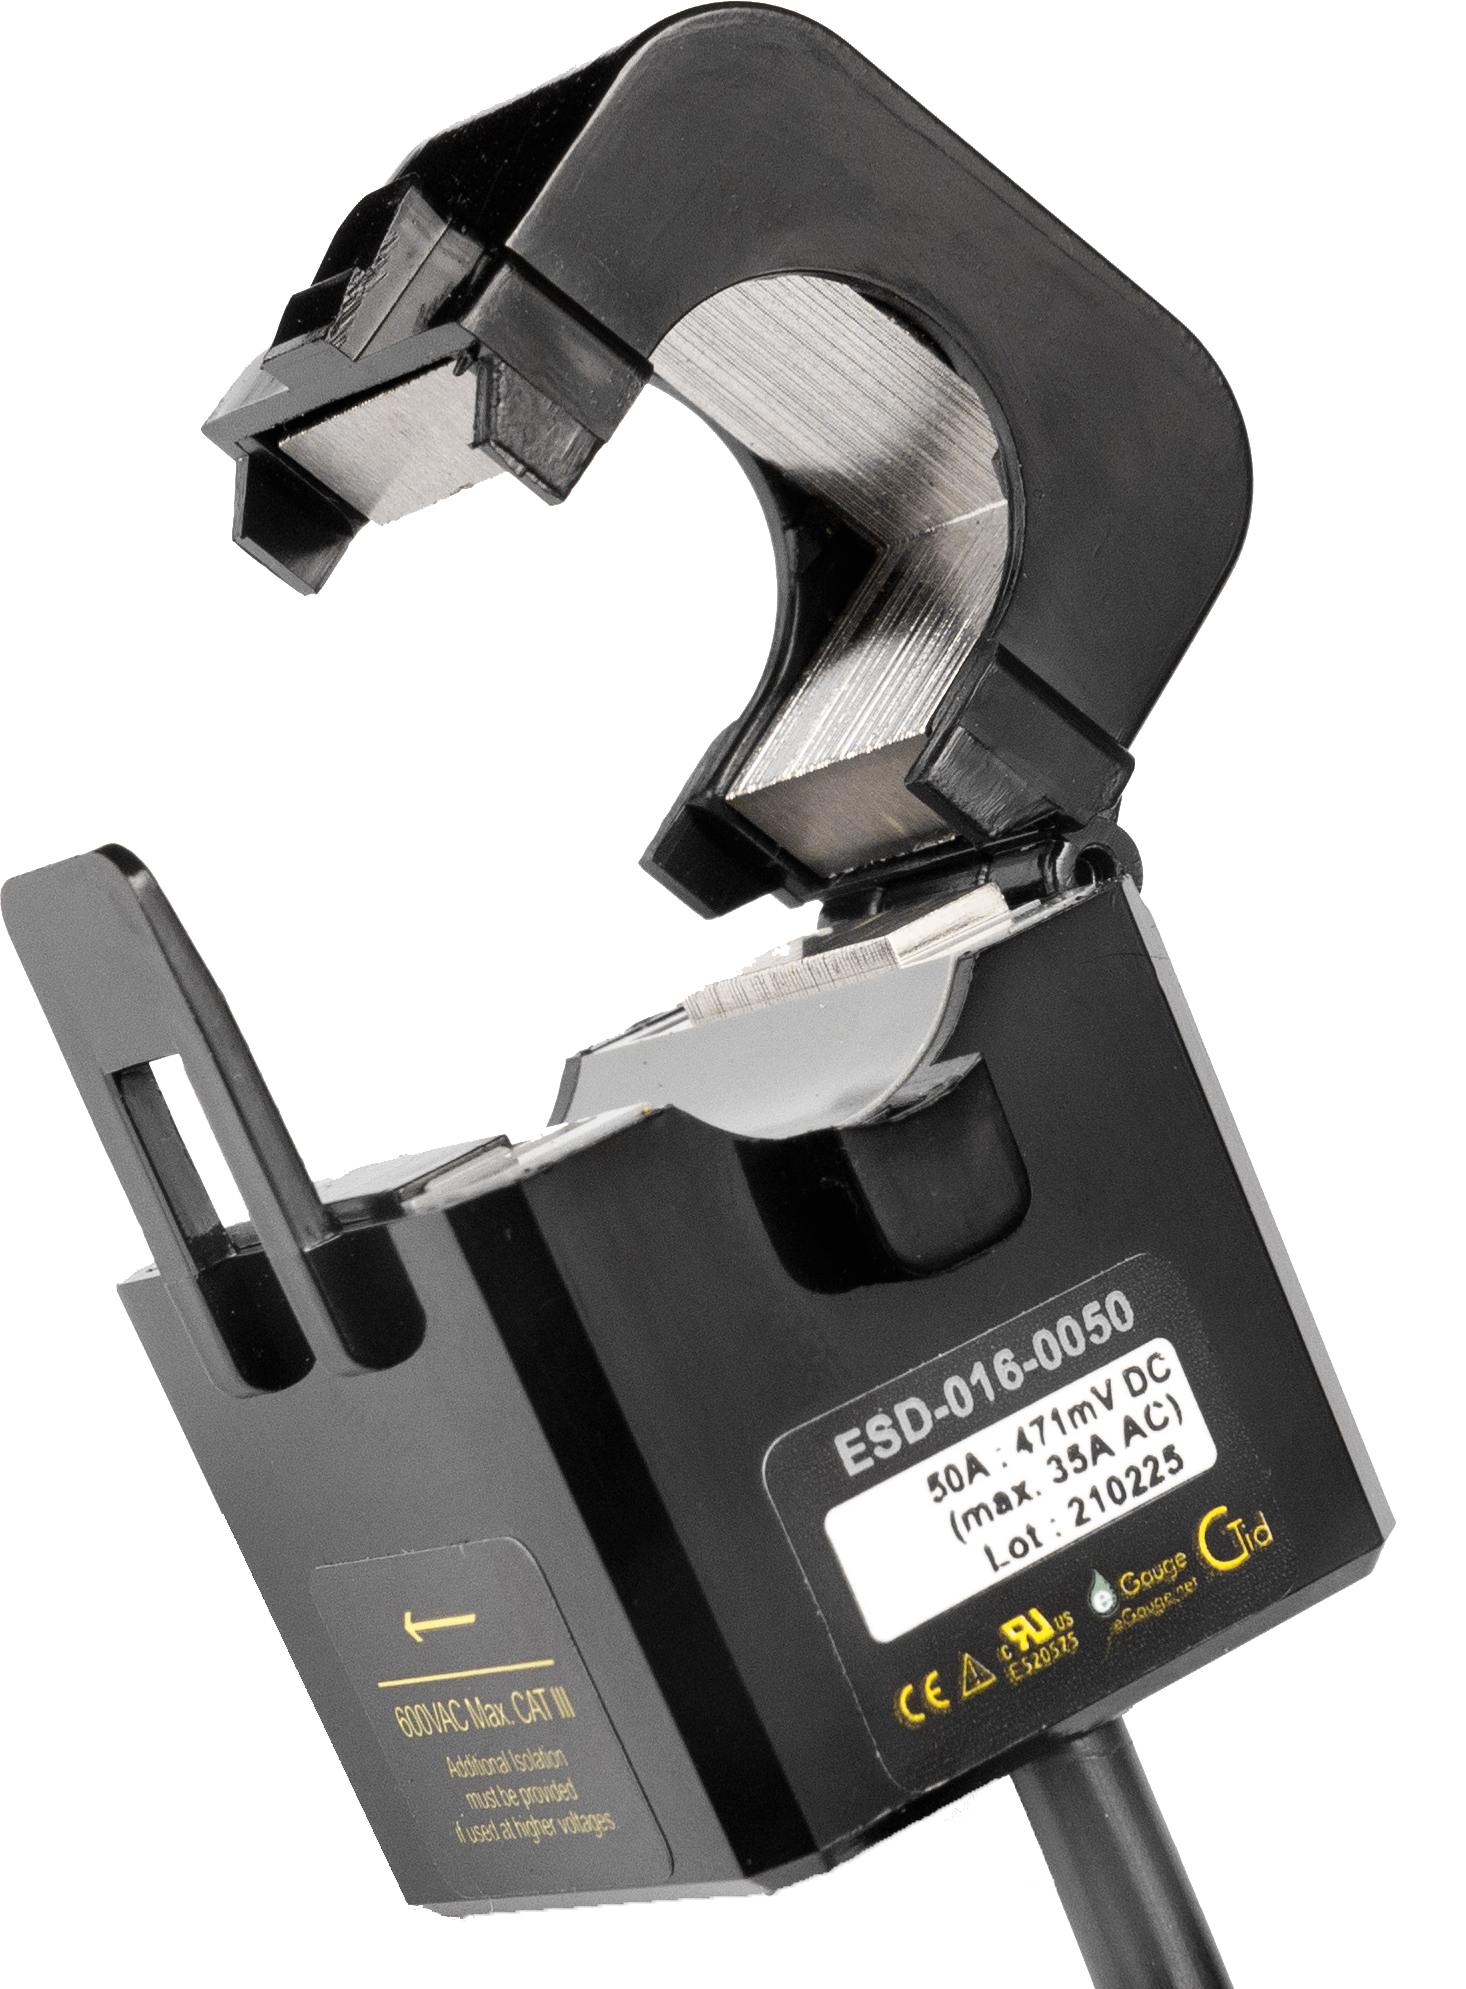
eGauge DC CTs (model ESD-xxx-yyyy) measure the amperage on the conductor of a DC (direct current) system. Combined with DC voltage measurements (through the DC port on the eGauge meter, or the high voltage EV1000 sensor) this allows DC power and DC energy calculations. DC CTs do not need to be used in conjunction with DC voltage measurements to simply measure amperage.
eGauge Systems currently offers 16mm 50A, 24mm 100A, and 36mm 300A DC CTs.
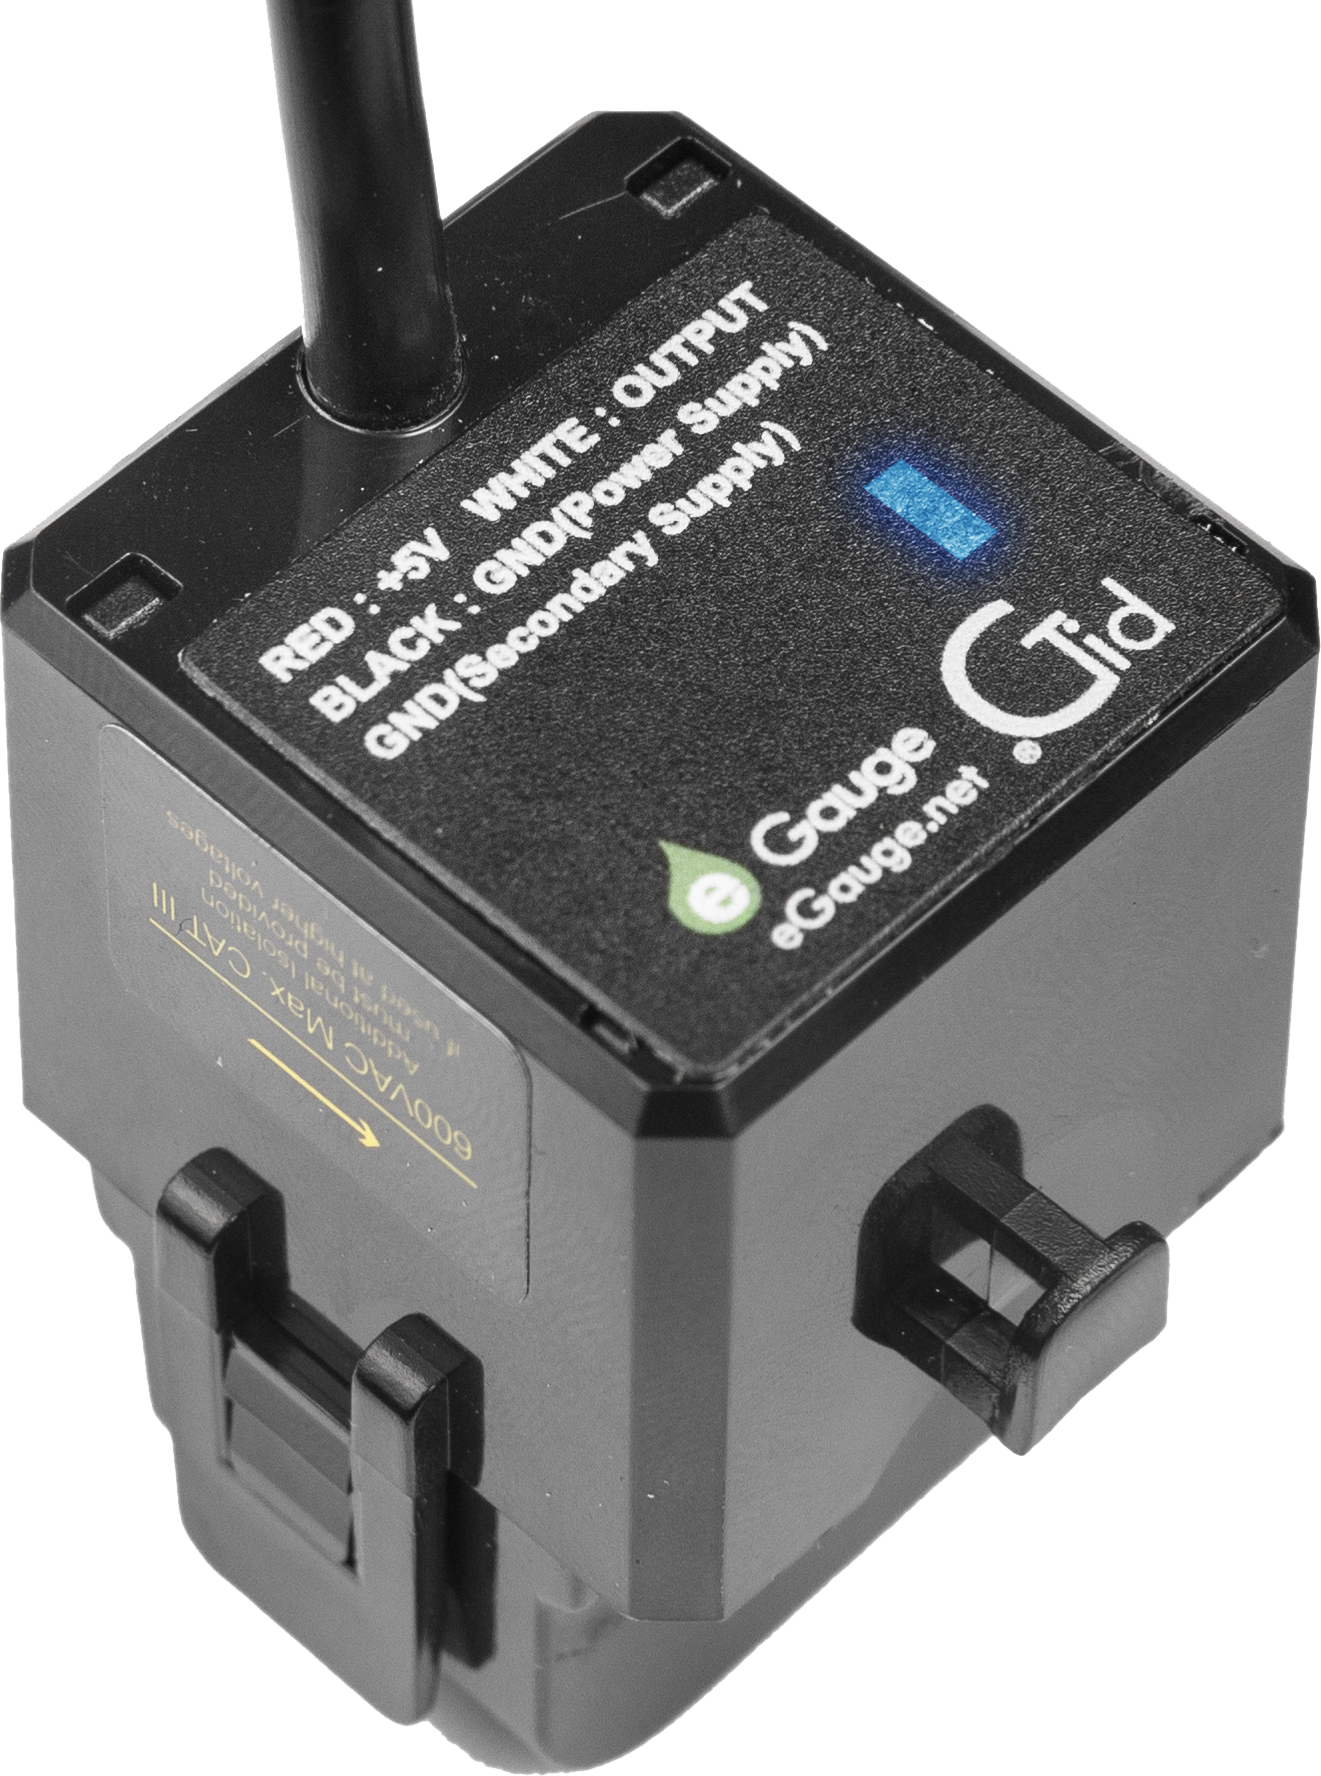
The eGauge DC CTs contain CTid for auto-detection and has an onboard LED that can be used to identify which CT is connected to a given sensor port, which can be useful if the CT leads cannot be traced from the meter to the conductors being monitored.
eGauge DC CTs require a Sensor Hub and are compatible with EG4xxx (Core and Pro) series. Legacy model meters (eGauge2, EG30xx) are not compatible.
|
||
| eGauge Split-Core DC CT model ESD-016-0050. The CTid LED can be seen on the bottom of the CT illuminated in blue. |

Specifications
Full specs (data-sheet PDF)
- Linearity: Better than 2%
- Offset Error: Better than 1.5% of range
- Operating Temperature: -25 °C to 75 °C, 85% RH non-condensing
- 5' lead (RJ-11 terminated to connect to Sensor Hub)
Hardware included
- 1x ESD DC CT w/ attached 5' lead
Assembly/installation information
When current flows with the direction of the arrow, a positive amperage will be read. When current flows against the arrow, the amperage will read negative.
Be sure to see the Installation Overview Tips to get started.
- To reduce risk of electric shock, open or disconnect circuits from the power distribution system (or service) of the building before installing or serving CTs.
- Open the CT by gently pulling on the latch and then rotating the top open. Do not touch the polished ferrite core surfaces. Any oils or debris in that area worsens accuracy.
- Slide the CT over the conductor of the circuit to be measured. Make sure the arrow on the CT points in the direction of the primary current flow (the current flow that should yield a positive power reading).
- Close the CT by gently pushing down on top of the CT until the latch engages.
- Verify that the CT is fully closed by squeezing together the top and bottom parts of the CT.
- Optional: secure the CT to the conductor with a cable tie.
- Route the RJ-11 cable of the CT to the Sensor Hub such that they do not directly contact live terminals or bus bars.
- Follow these instructions for Sensor Hub connection. Note: The DC CT is a powered sensor and the Sensor Hub requires +5V or a USB for power (the USB port on the eGauge meter may be used for this).
- Use the CTid® scanning feature to automatically detect the sensor type and its current rating.
Documents
Related Information