
Sunspec Support
Sunspec is a communication standard used by many types of devices (including inverters). It is intended to ease configuration when working with hardware from different manufacturers by providing common addressing block for different device types and allowing devices to query for applicable address blocks. Essentially, Sunspec allows a Modbus master (such as the eGauge) the ability to read the list of available registers from a device, eliminating the need to create inline definitions manually.
It's fairly easy to configure a Sunspec remote device:
1. Create a new remote device entry.
2. Name the entry (names are arbitrary but should make sense to the user).
3. Select the appropriate protocol. "Serial" for Modbus RTU, and "Modbus TCP" for Modbus TCP.
4. Enter the device address. This is in the form "modbus://sunspec.<id>@<addr>" where <id> is replaced with the Modbus slave address of the remote device and <addr> is replaced with the address of the remote device.
4a. With Modbus RTU, the address will be a USB port (USB1 or USB2) along with serial settings in the form ": baud / databits parity stopbits". For example, @USB1:9600/8n1 would indicate USB port 1, 9600 baud, 8 data bits, no parity, 1 stop bit.
4b. With Modbus TCP, the address will simply be the IP address of the Sunspec device on the local network. For example, @192.168.1.25 would indicate the remote device is located at 192.168.1.25.
5. Click the grey "?" to the left of the device address. This will cause the eGauge to query the remote device for a full list of registers, and a green checkmark will appear if the query was successful. A red "X" will appear if the address is invalid or incorrectly entered. Click the blue info button to see detailed information on the state of the query (shown below).

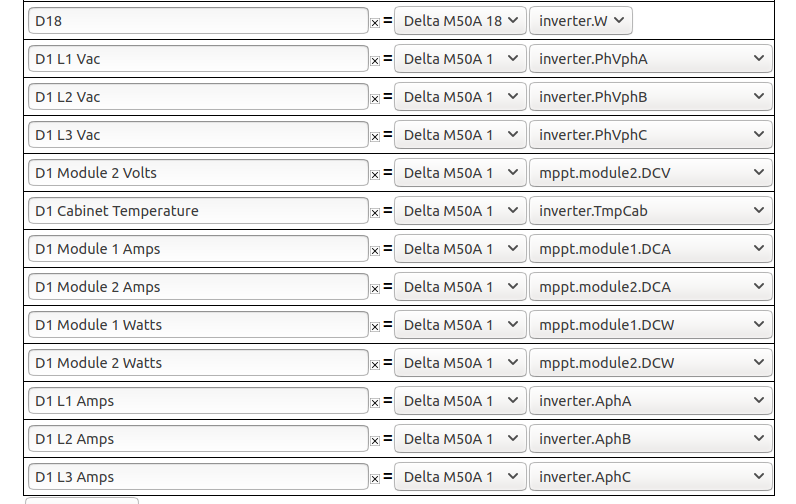
6. Once the register list has been retrieved, the eGauge needs to be configured to store registers of interest. To do this, create a new physical register, set the register type to the remote device name used in step 2, and then use the dropdown menu to select the remote register to record. The eGauge will only record the registers configured in this step, regardless of how many registers exist on the remote device.
7. Click the "Save" button at the bottom of the page to save these changes. The eGauge must be rebooted after adding new registers (this process typically takes about 30 seconds).
To add additional registers from a remote device, repeat steps 5 and 6.