
EG42xx Wifi Connection
You'll need either a Wi-Fi enabled laptop computer or cell phone/tablet to complete this process. Make sure your computer is not using any other network connection such as Ethernet before beginning.
Connecting the EG42xx meter to a Wifi Network
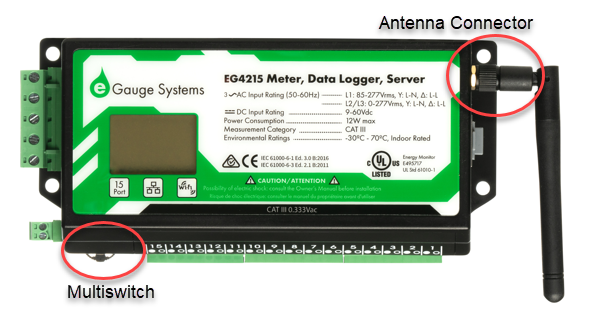
After powering the eGauge meter and making sure the included WiFi antenna is securely screwed into place on the antenna connector, press the LCD multi switch to display the Main Menu. The multiswitch can be pressed to make a selection or moved from side to side to move the on-screen highlight cursor.
Move the switch to highlight Settings and press to enter the settings menu.

Move the switch to highlight Wireless and press to enter the wireless settings menu.

Move the switch to highlight Setup via AP and press to activate the eGauge Access Point.

The AP will remain active for 60 minutes (3600 seconds). If you wait longer than this time frame to connect, you'll need to repeat the previous steps to reactivate the AP.

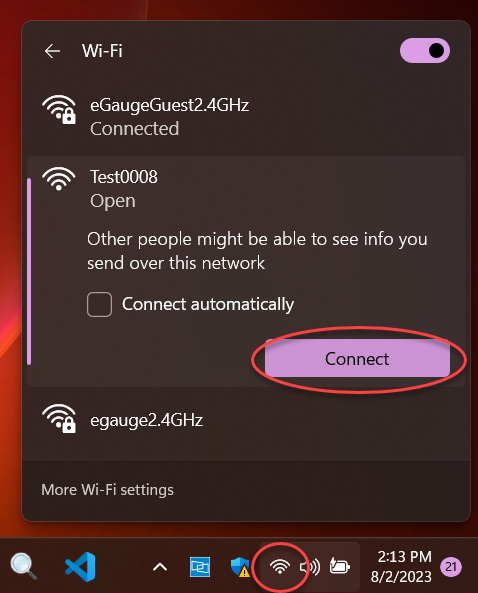
Use your laptop or mobile device Wifi connection to connect to the AP displayed on the eGauge LCD screen.
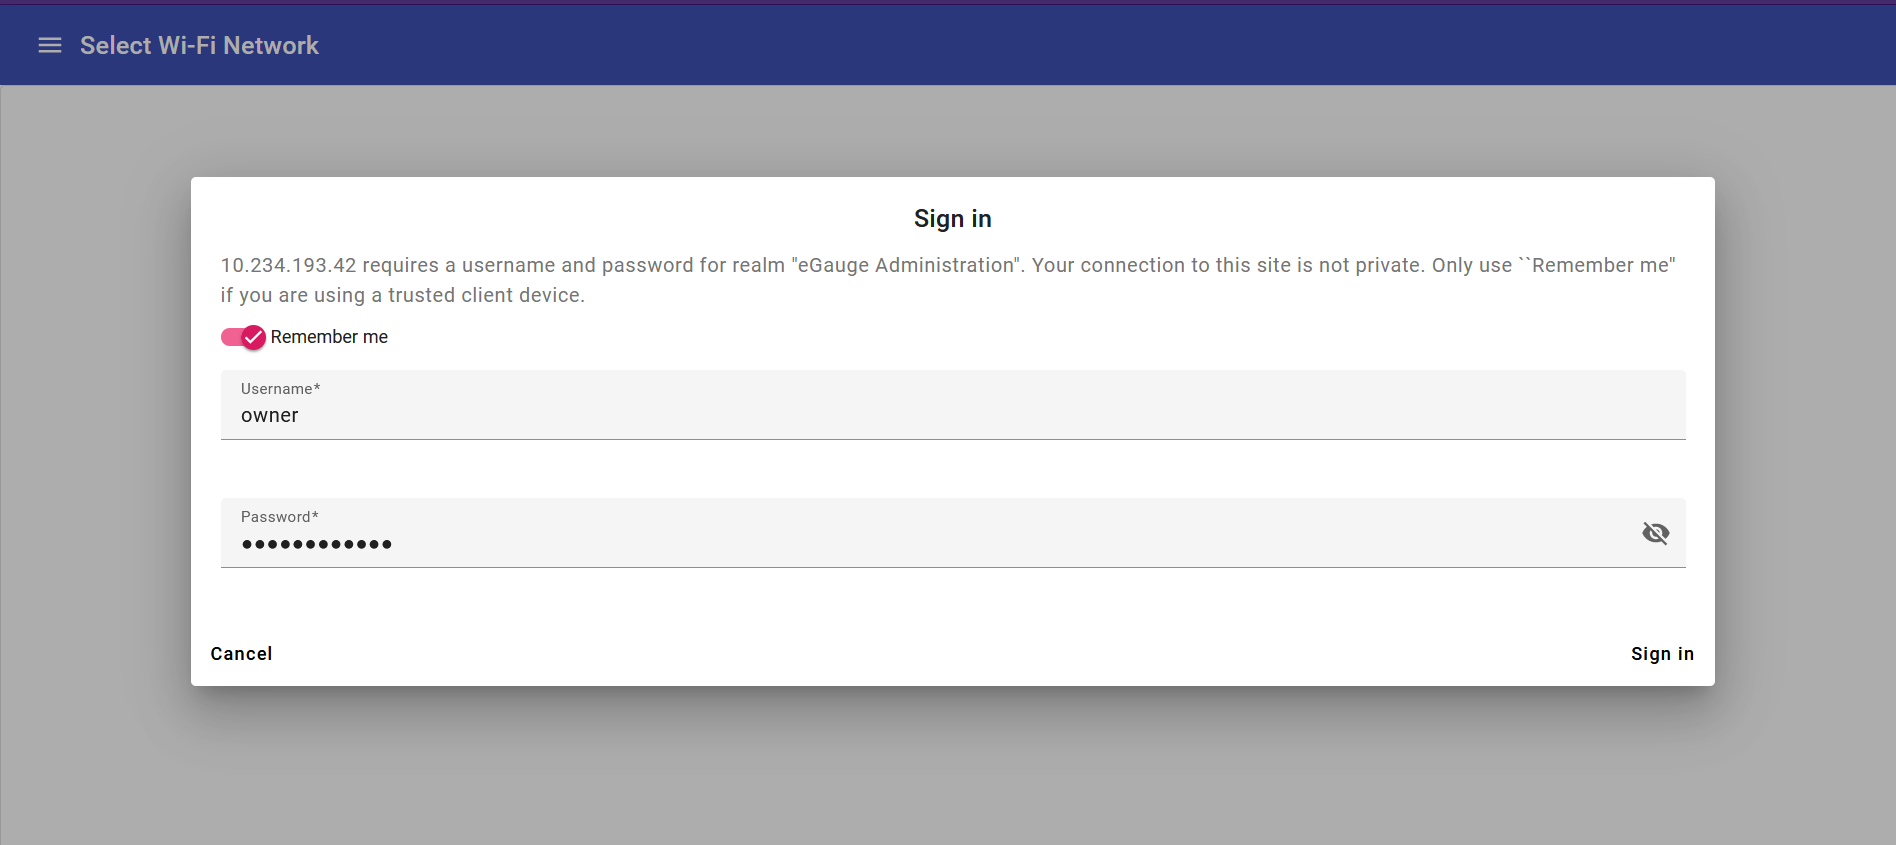
After you connect to the eGauge Wifi AP, your browser should launch automatically showing the device login screen. Enter the owner account login credentials found on the label affixed to the side of your meter, and click Sign in.
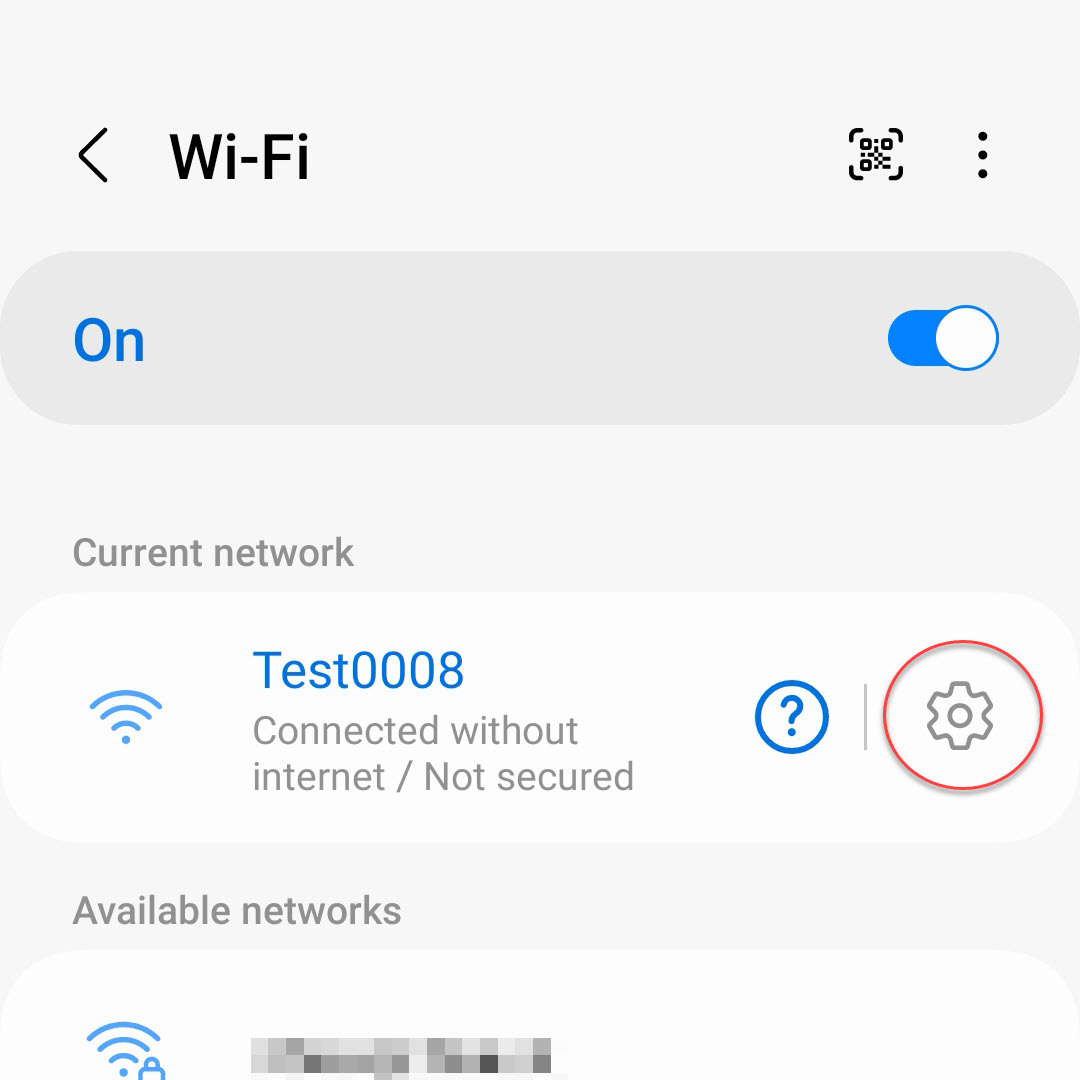
Additional step only for Samsung mobile devices
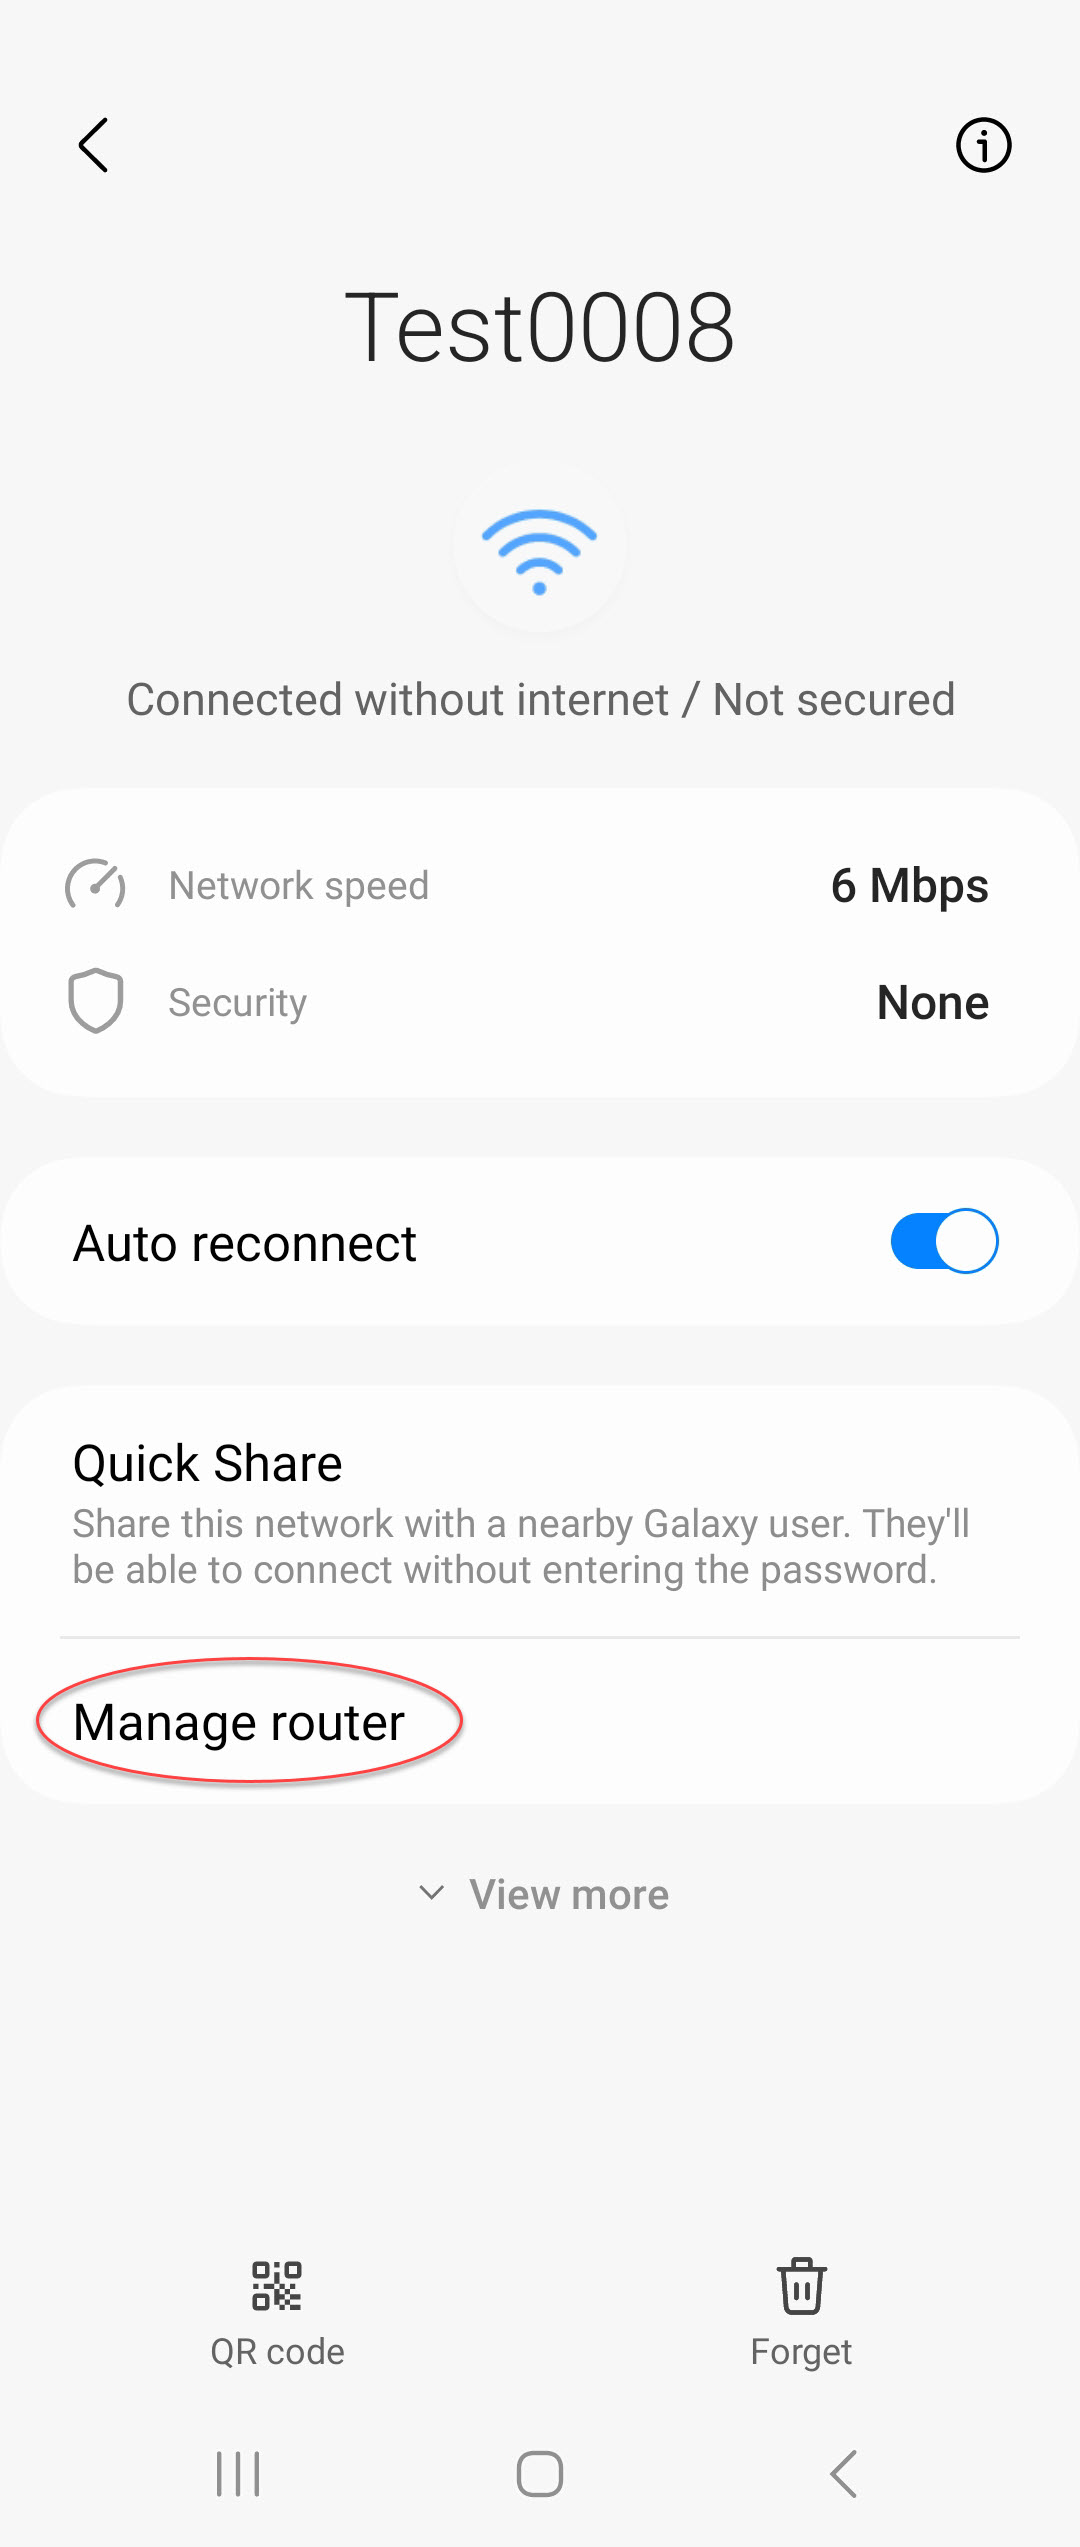
When connecting to the eGauge AP with a Samsung device, the browser will not launch automatically as it does with other devices. After connecting to the eGauge AP via Wifi, click the 'Settings' icon next to the network name., then click on Manage Router. You may then move on to the next steps.
If the 'Manage Router' option is not available on your device, you can follow the steps linked here, or attempt to connect to the eGauge by opening your browser and entering the IP address: 10.234.193.42
If you don't plan to connect the eGauge to a Wifi network at this time and would like to continue with configuring the meter, click on the Main menu button in the upper Left of the screen and choose Setup >> Other Settings, then continue with the configuration process.
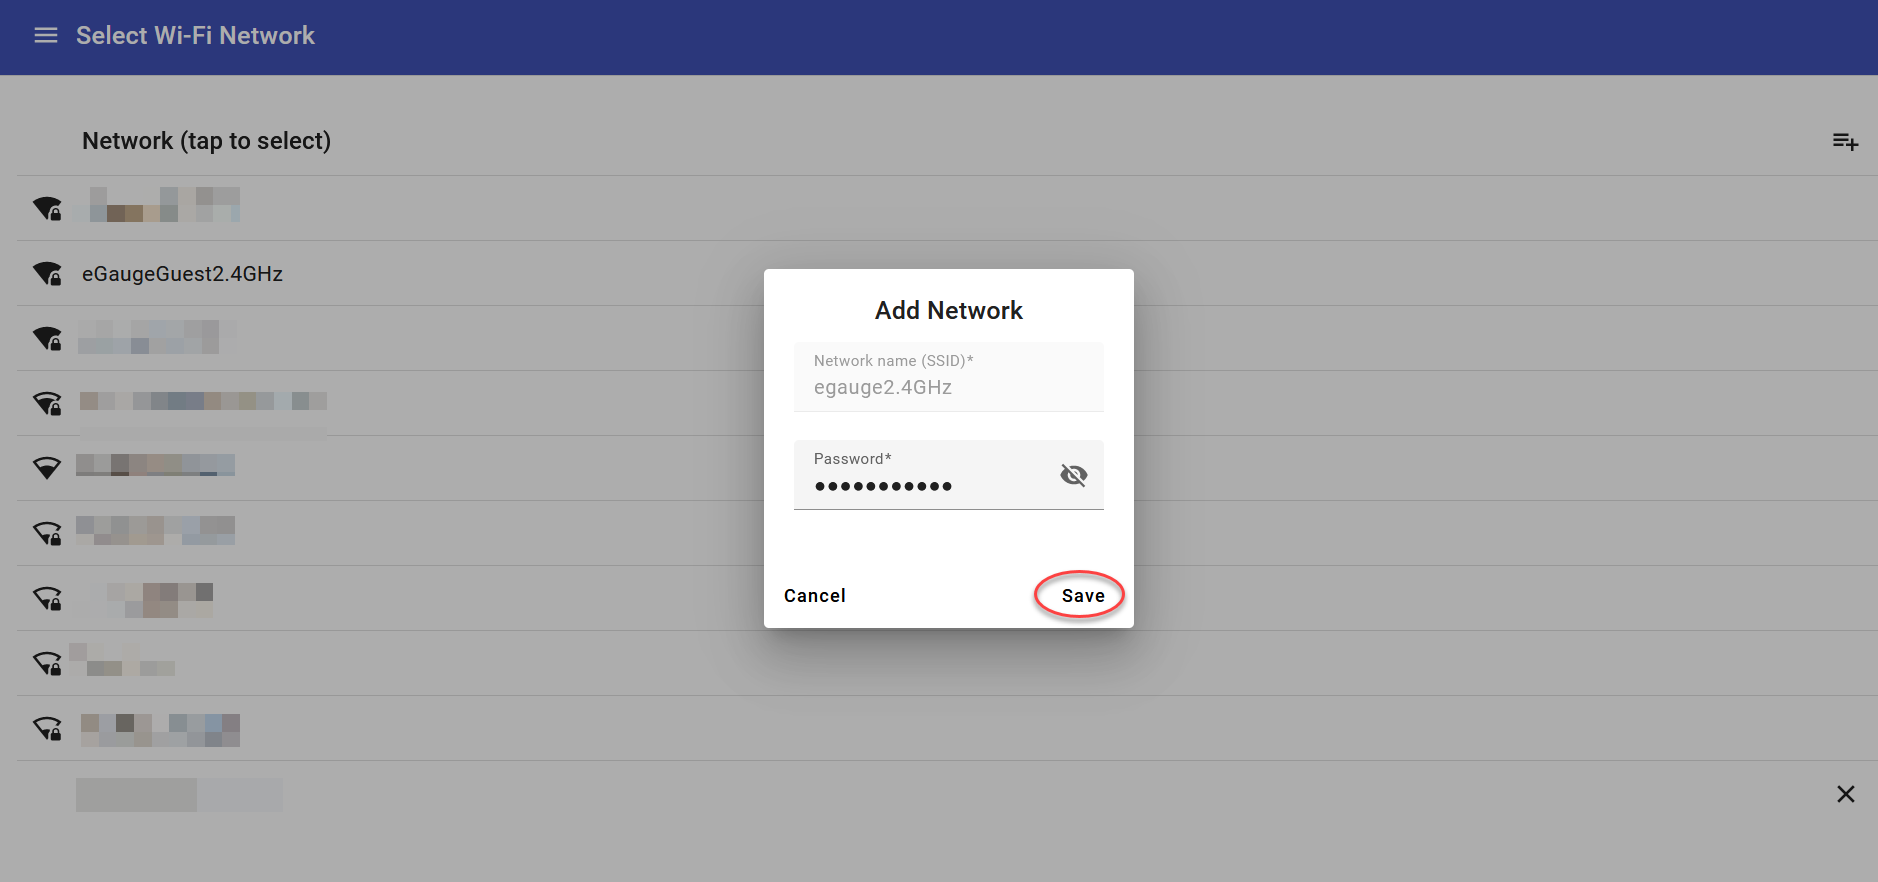
After logging in you will have the opportunity to connect the meter to an available Wifi network. Click to choose your preferred network and enter the Wifi network credentials and click Save to connect.
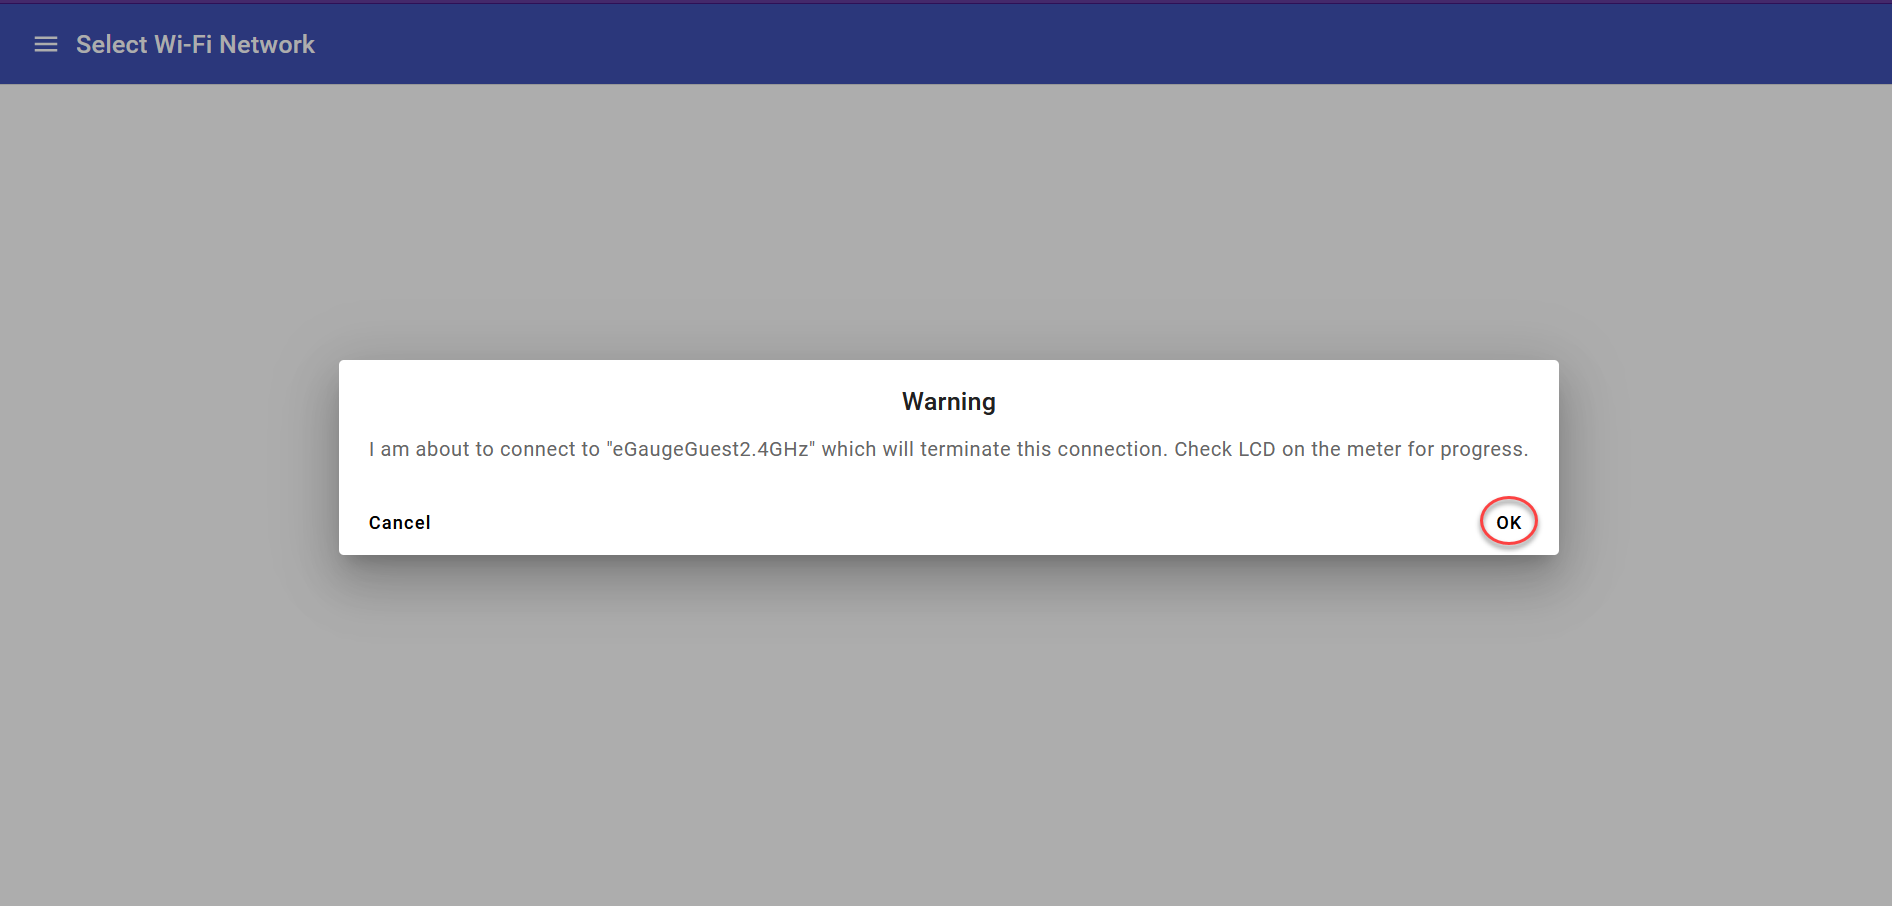
Click OK to connect to the local Wifi network, or click Cancel to go back and choose another network. When the eGauge connects to the local Wifi network, the AP function will end and you will lose connectivity to the meter. Check the eGauge LCD screen for progress.
You should now be able to connect to the device via its eGauge proxy URL or at its local IP address on the LAN and continue with the configuration process.