eGauge App Overview (Android and IOS)
Overview
eGauge Systems offers a mobile app for accessing and viewing meter data. The app is free and available on Android and iOS.
This article is intended to provide a basic overview of the app functionality. For additional information on the mobile-friendly view (app style layout available in a standard desktop browser) see this article.
For best results, use firmware v4.5 or newer with Modern Interface support. See the latest firmware version and the changes here.
Contents
Initial Setup
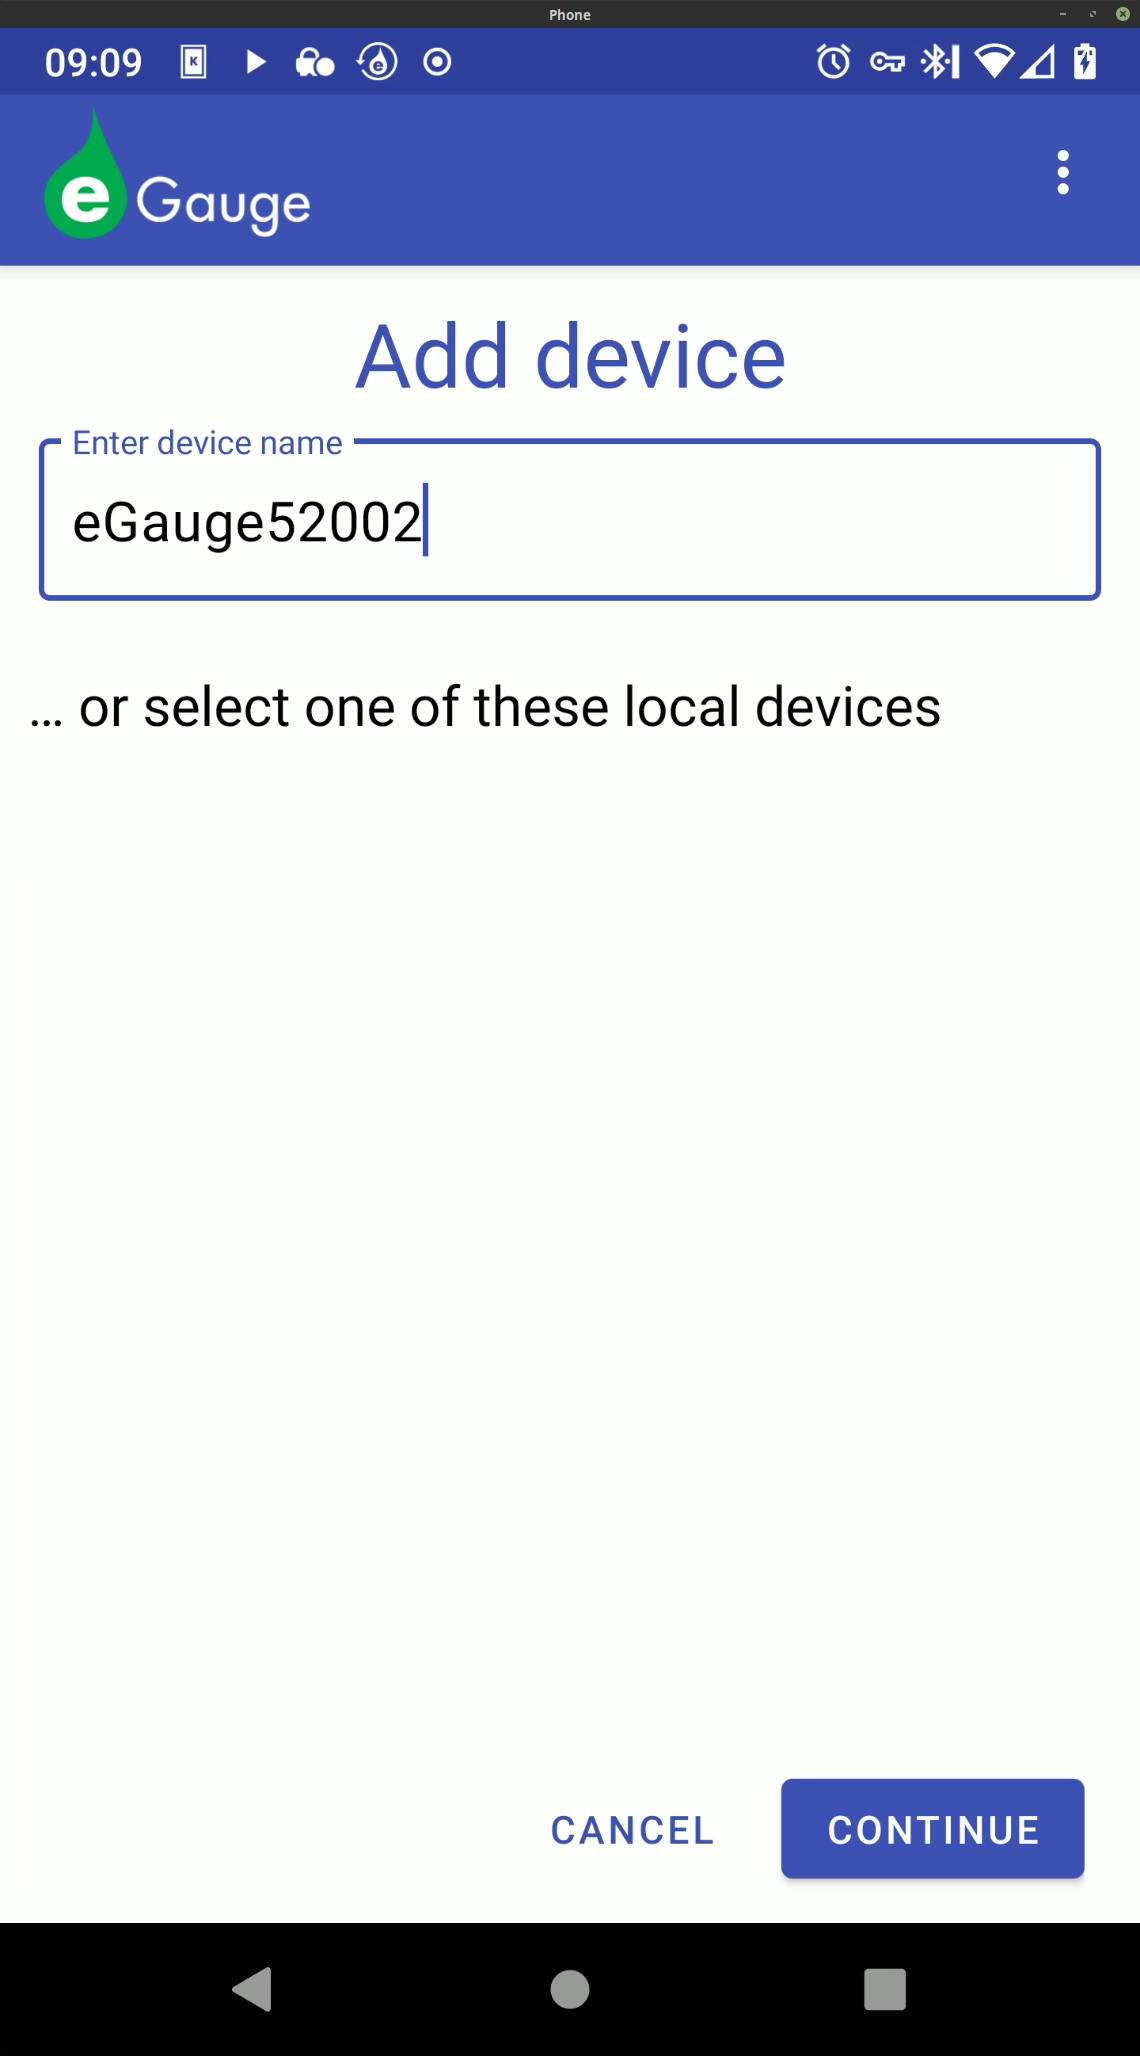
On first launch, the eGauge app will prompt the user to add a device. Assuming the mobile device running the app (phone or tablet) is on the same network as an eGauge meter, that meter will appear in the list of local devices. However, if no devices are present in the list it may be necessary to add the device manually by entering the device name in the eGauge app. In the screenshot below, no local devices are visible and so "eGauge52002" is being added manually.
Partial names are not accepted. The entered device name must be complete. Capitalization is ignored.
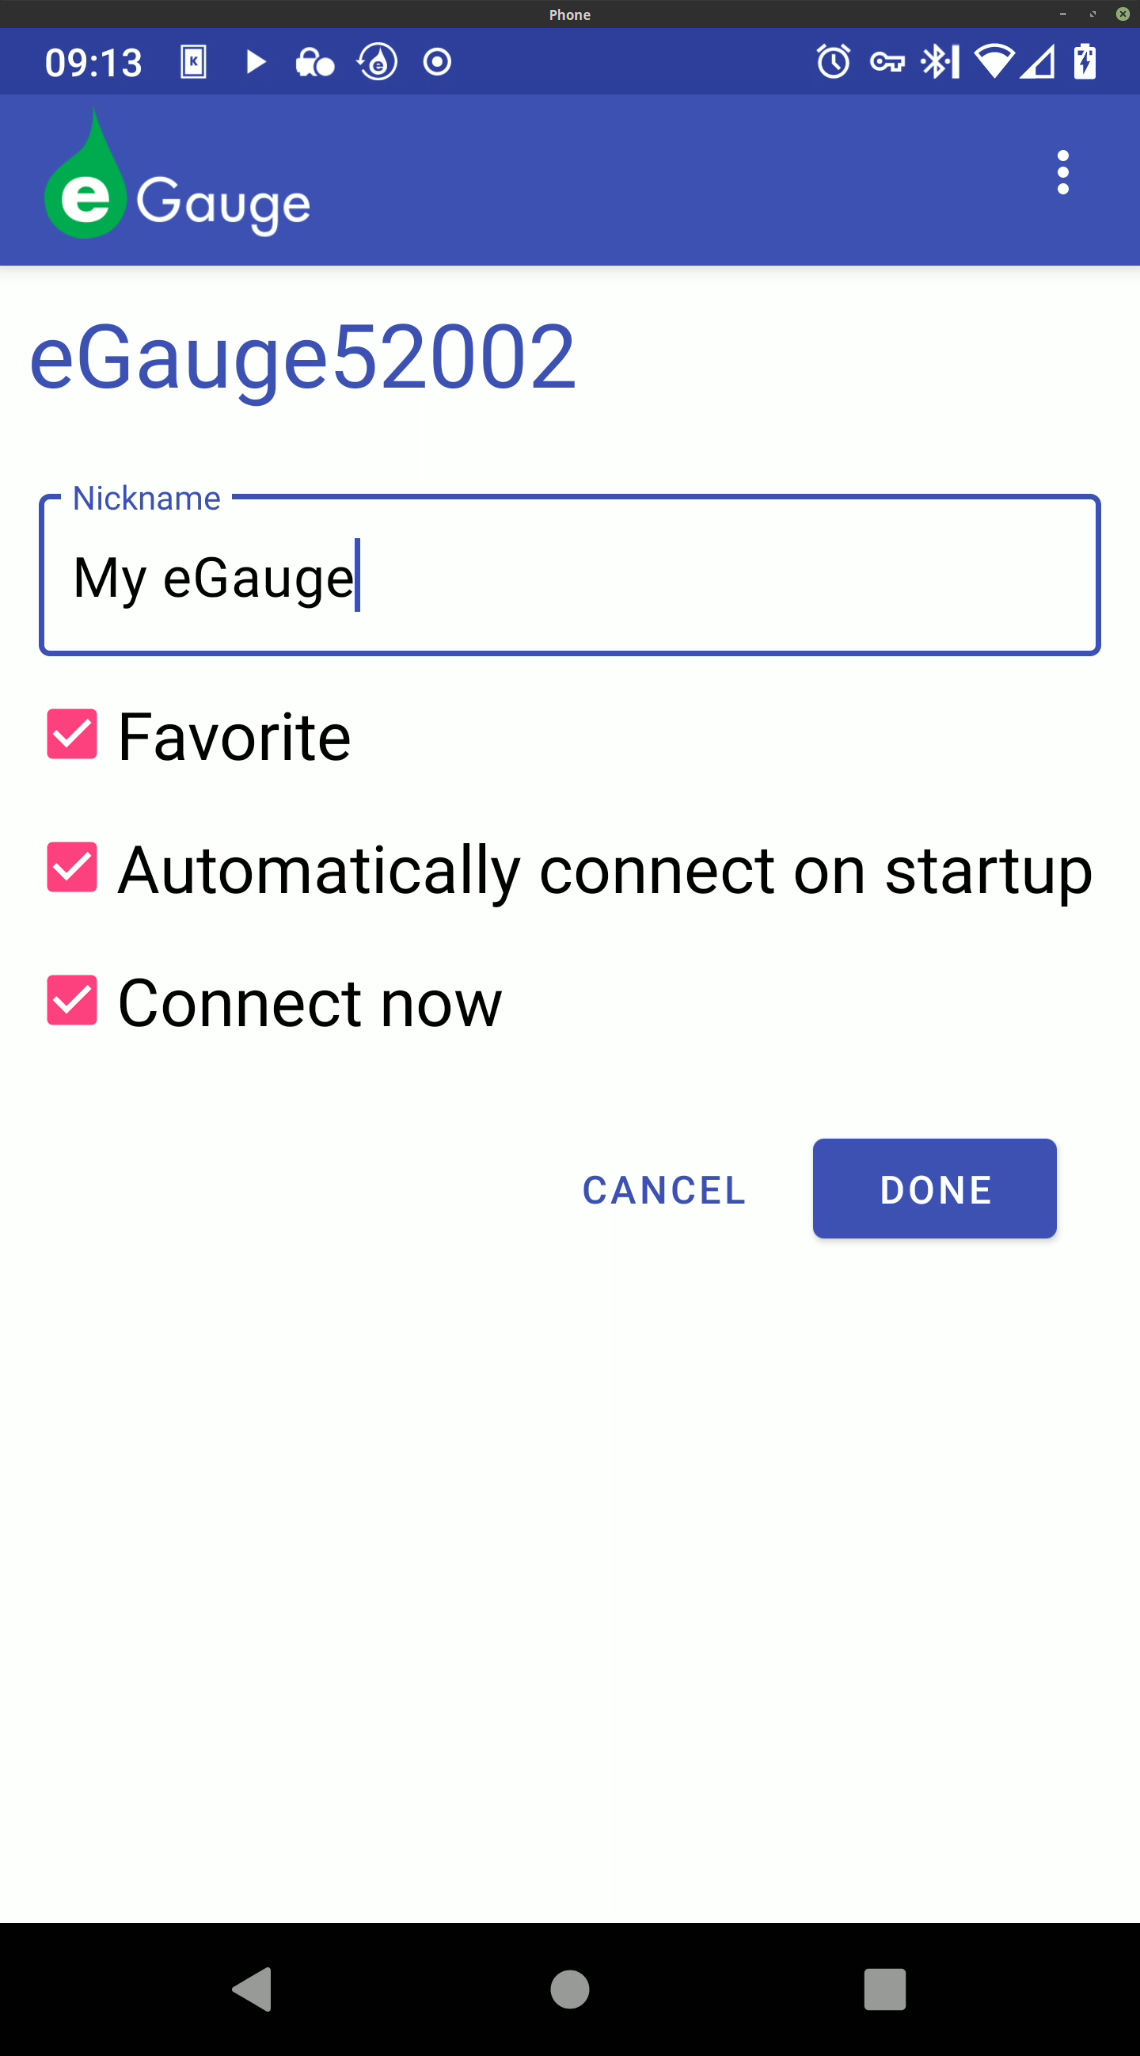
Once a device has been selected or manually entered, press the "Continue" button. The app will attempt to establish a connection to the specified device. If it is successful, the user will see the following page:
Nickname - Friendly nickname for the meter. Only applies to the app (does not change the public device name of the eGauge meter).
Favorite - Adds this meter to the list of favorites. This list allows the user to rapidly switch between meters of interest.
Automatically connect on startup - automatically opens this specific meter when the app is started. The most recent meter added with this option will become the meter which loads on startup (replacing the previous meter set to load on startup).
Connect now - connects to the newly added meter after the meter is added (by clicking "Done").
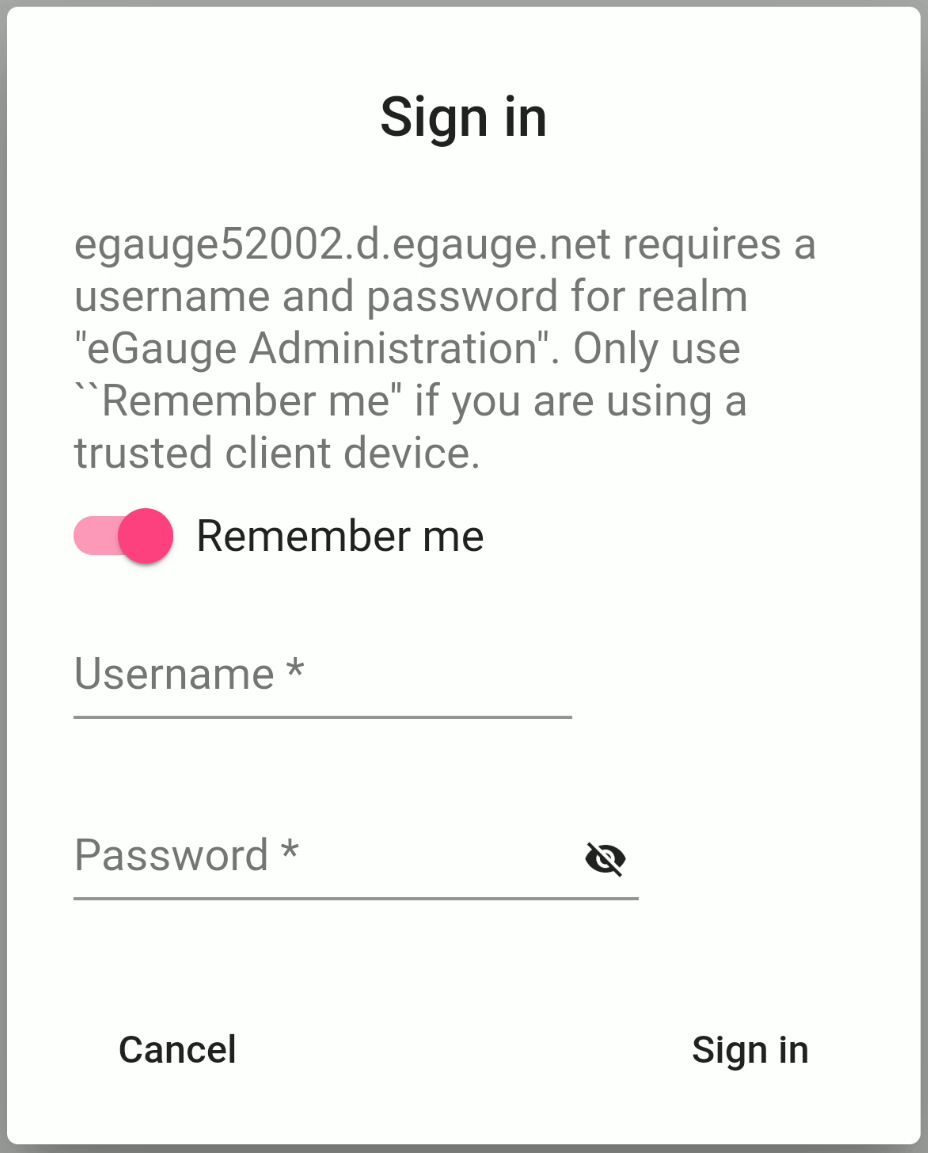
Make the appropriate selections and click "Done". Assuming "Connect now" was selected, the newly added meter will load. The user will be prompted to enter valid credentials for that meter. If "Remember me" is selected, the app will store these credentials and the user won't be prompted to enter them again.
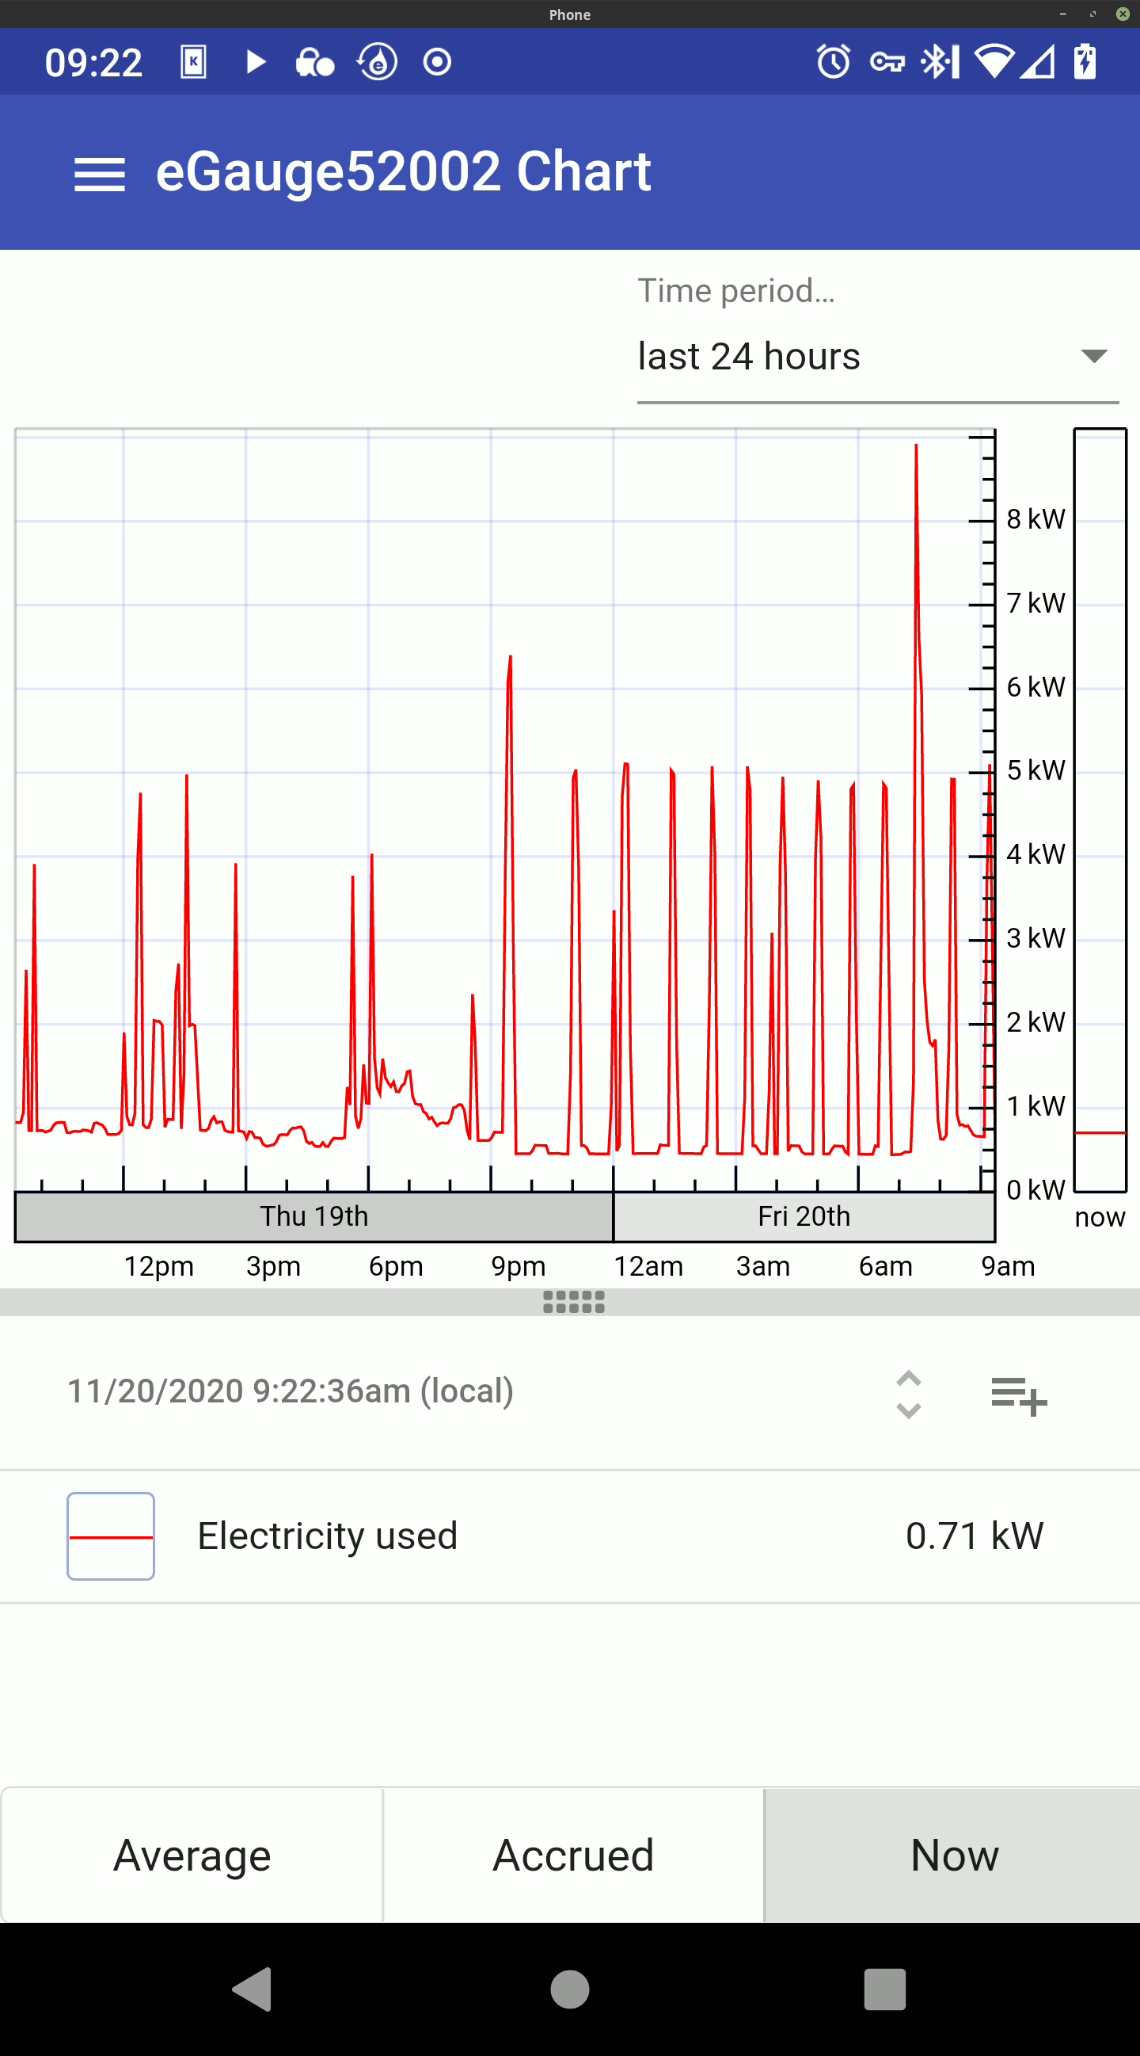
After providing valid credentials, the meter UI will load. By default, the user will be presented with the Chart view.
Navigating the App
When the app is opened, a list of saved devices will appear. If a meter has been set to open on startup, it will be necessary to open the notification bar (swipe down from the top of the screen on most android devices), locate the entry for the eGauge app, and click on it. This should look something like the example below:
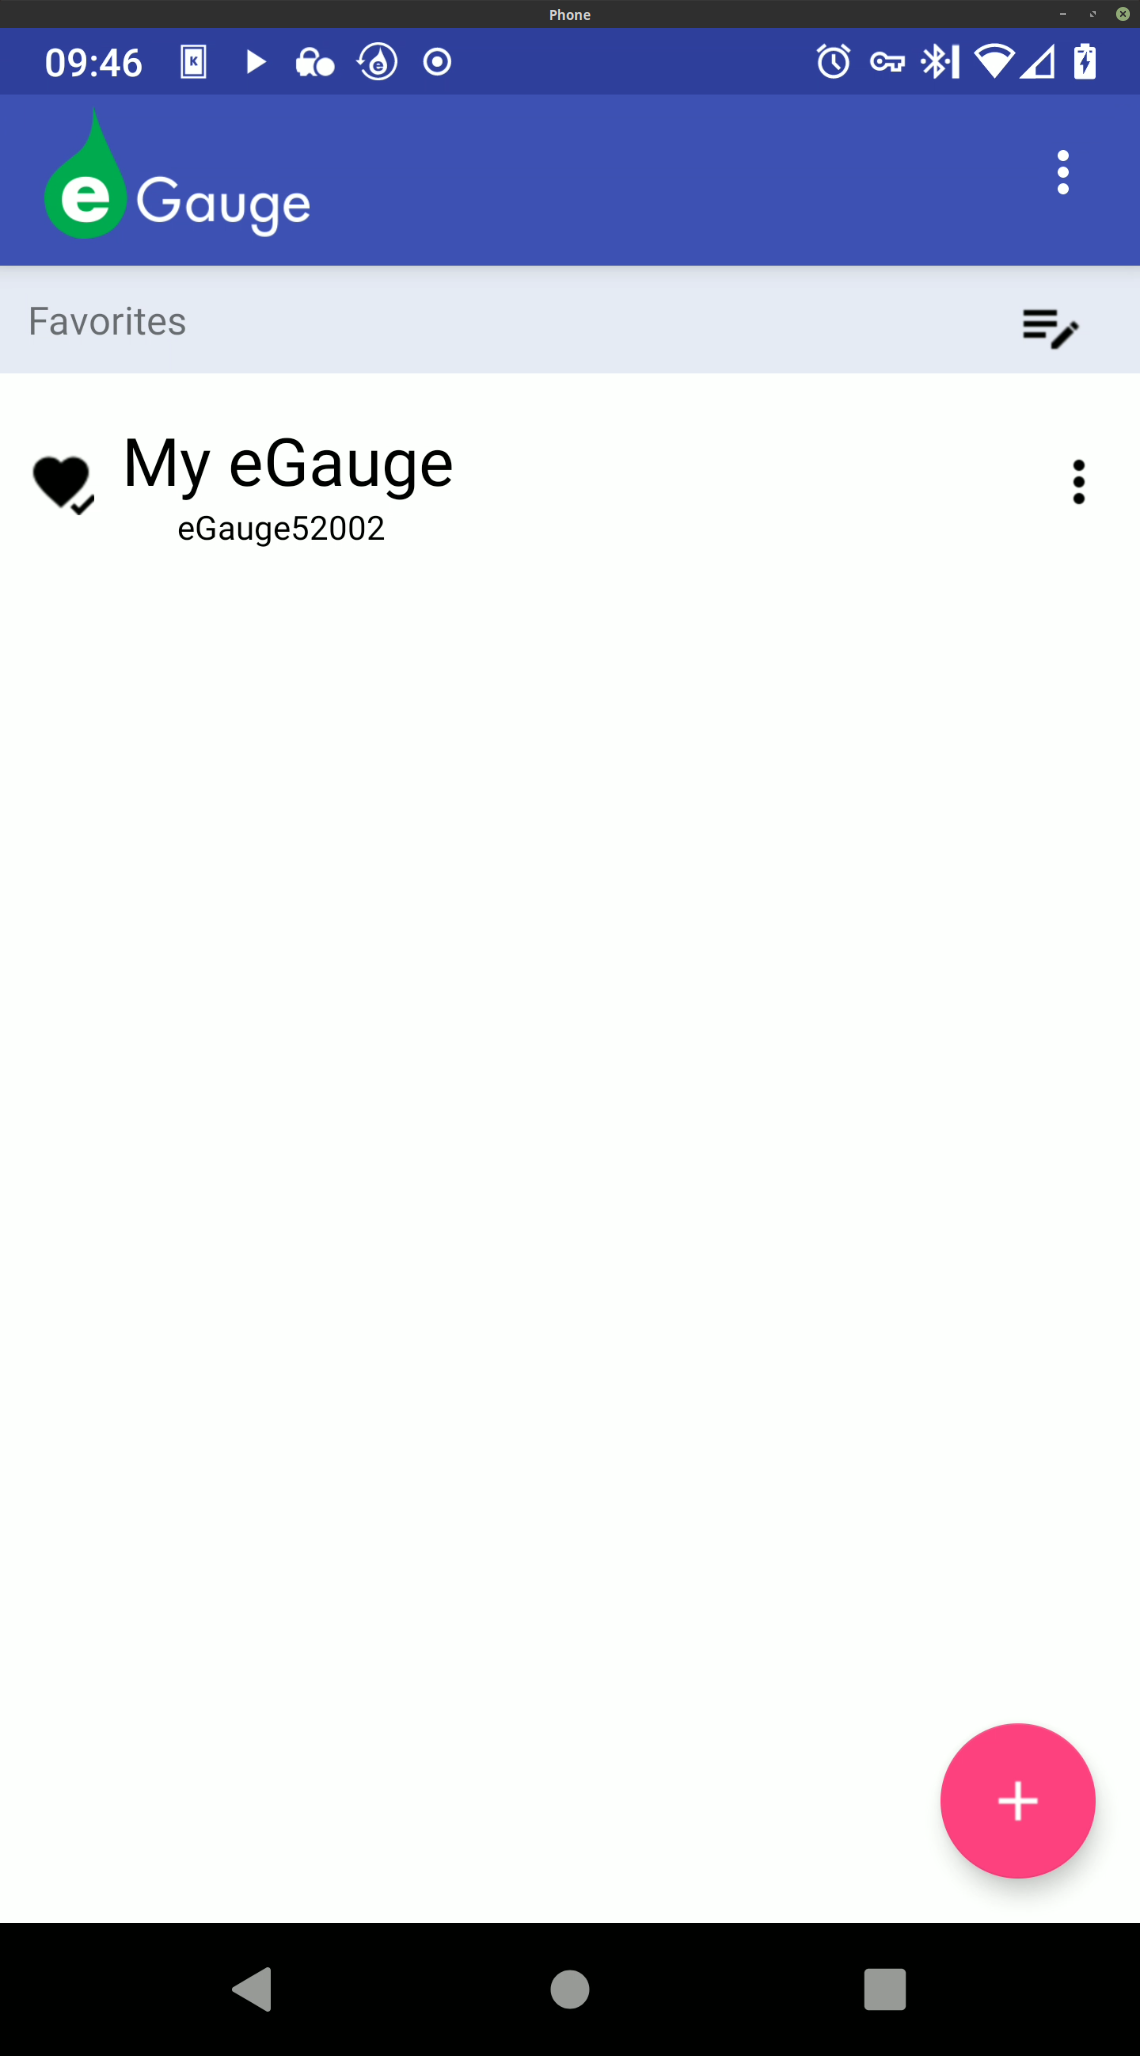
The main app page is shown below. Note that eGauge52002 or "My eGauge" from the setup example is listed.
Adding a new device
To add a new device, tap the "+" icon in the lower right corner of the page. The process to add a new device is identical to the initial setup.
Editing a device entry
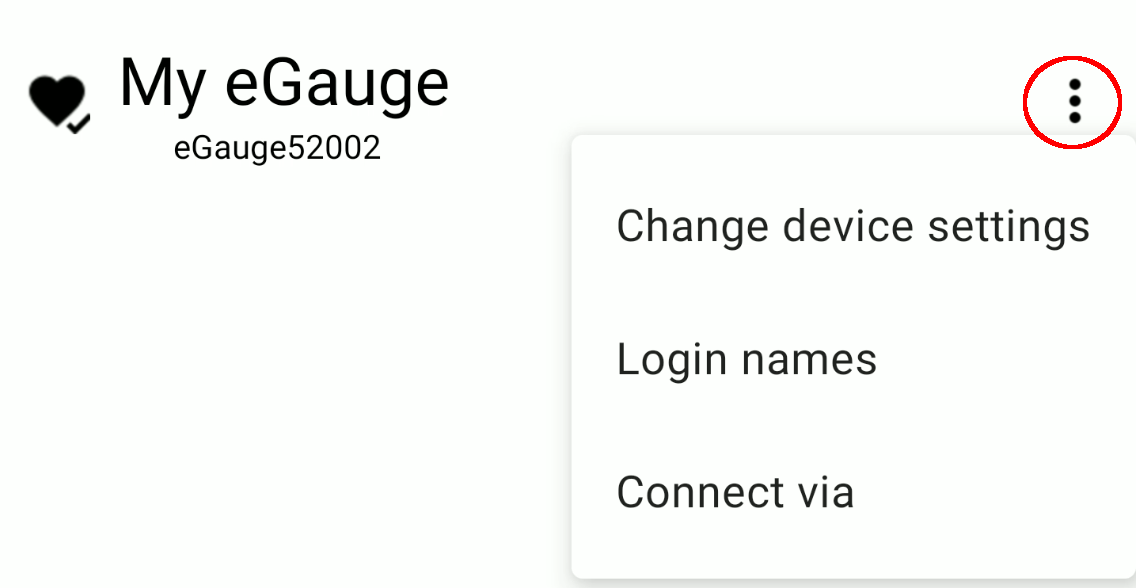
To edit a device entry, tap the three dot icon to the right of the device name. This will open a menu for that device:
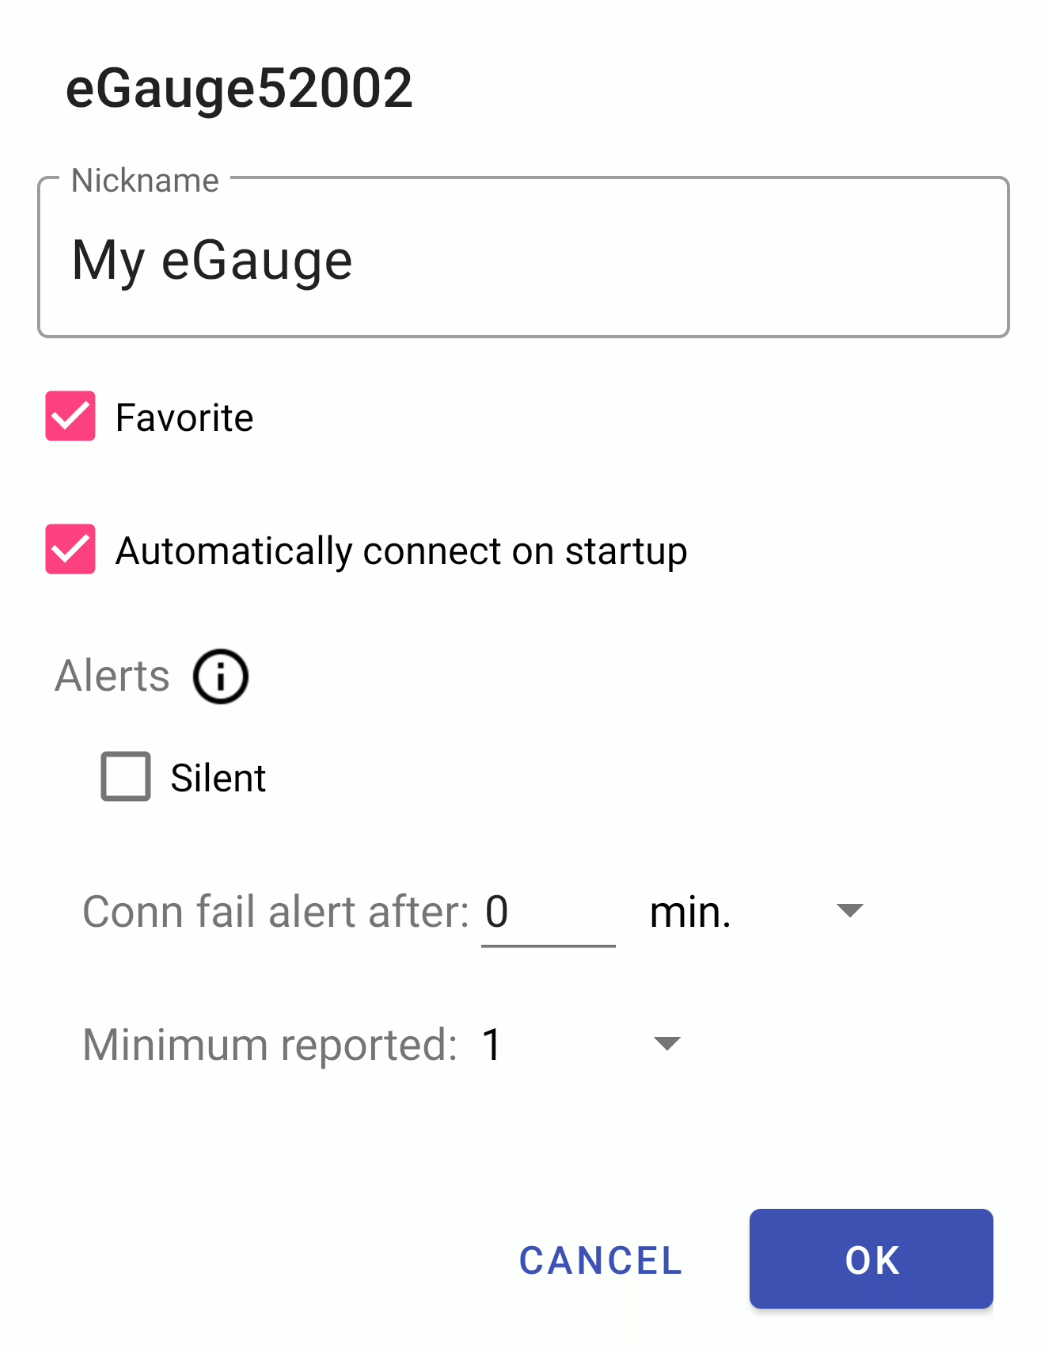
Change device settings - allows the user to modify the settings for an existing device. From here, the device nickname can be changed, the device can be favorited/unfavorited, automatic connect can be enabled/disabled, and alerts can be muted.
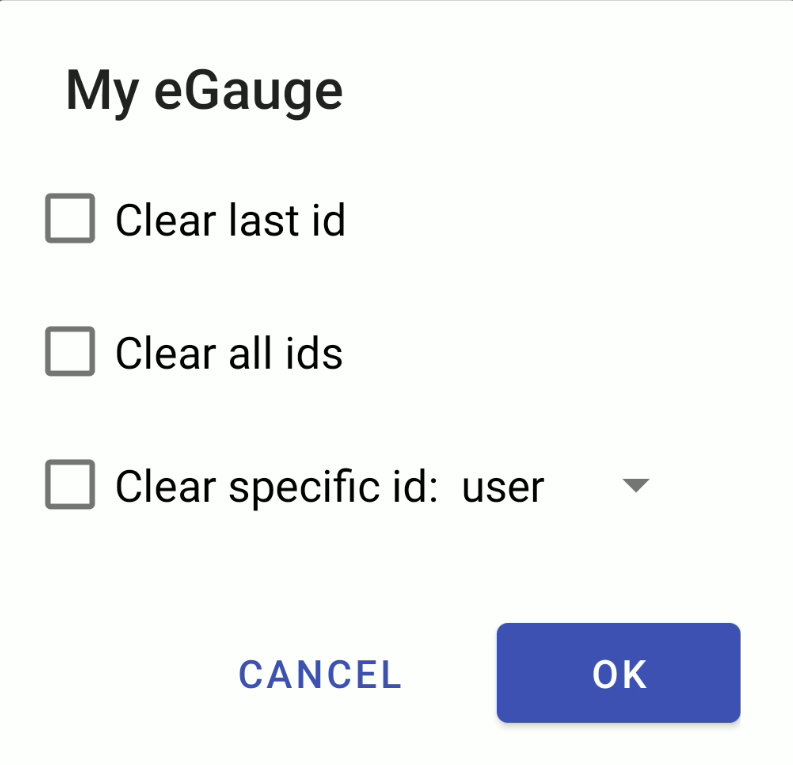
Login names - allows the user to clear credential sets (IDs) stored for a specific device. To clear a stored ID, select the appropriate option and tap "OK". This is useful if invalid credentials have been stored for a specific device, or if a user has accessed their device through the app on a mobile device they don't own.
- Clear last id - Clears the last set of credentials used to access the meter via the app. Useful if invalid credentials were entered.
- Clear all ids - Clears all credentials associated with a specific meter.
- Clear specific id: <dropdown> - Clear a specific set of credentials.
Clearing credentials will only remove stored credentials from the app. Credentials on the meter will not be modified/removed.
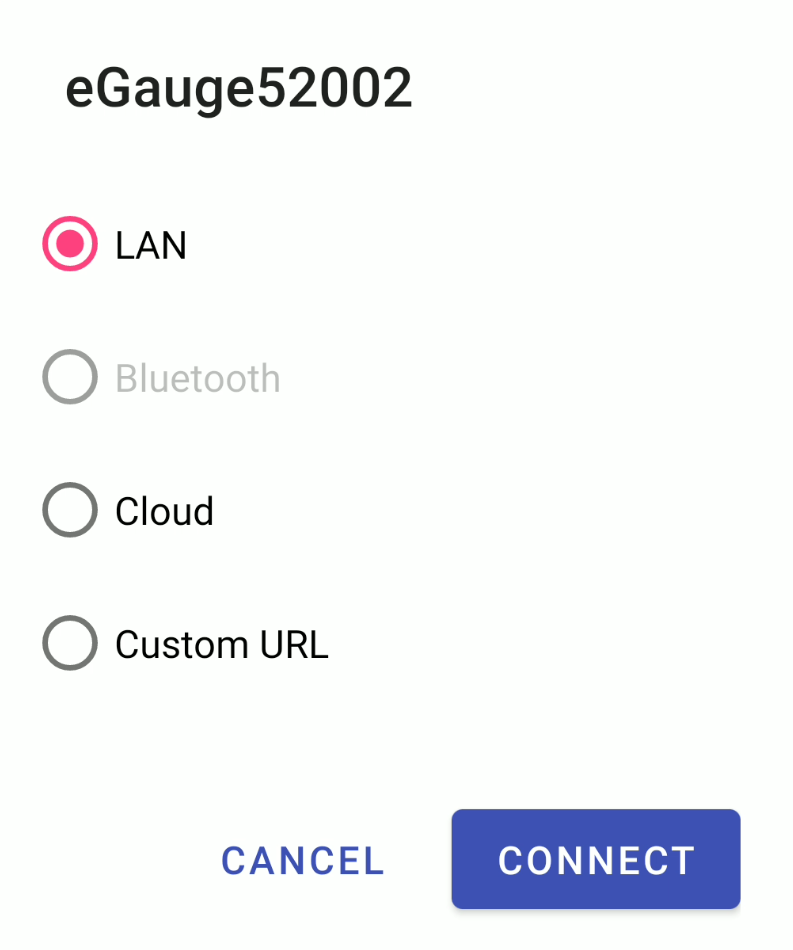
Connect via - allows the user to select from a variety of connection options.
- "LAN" is a local network connection (suitable when an eGauge is on the same network as the mobile device used to access the eGauge).
- "Bluetooth" allows for a bluetooth connection between the eGauge and mobile device (bluetooth support is required, and the devices must be within range). A supported bluetooth dongle must be connected to the eGauge meter. Bluetooth dongles are supported by the EG4xxx meter line only.
- "Cloud" uses a proxy server connection through d.egauge.net to communicate with the meter (suitable if the eGauge is on a different network than the mobile device).
- "Custom URL" can be used to force a specific URL to be used.
Reordering favorite devices
If more than one device is present, the user can tap the icon on the "Favorites" bar to reorder their favorite devices.
This will change the icon to the right of a device listing from three dots to four horizontal bars.
When this icon changes, the user can tap and drag the icon to reposition the location of the device in the list of favorite devices. When finished, tap the check mark in the "Favorites" bar to save changes.
App Settings
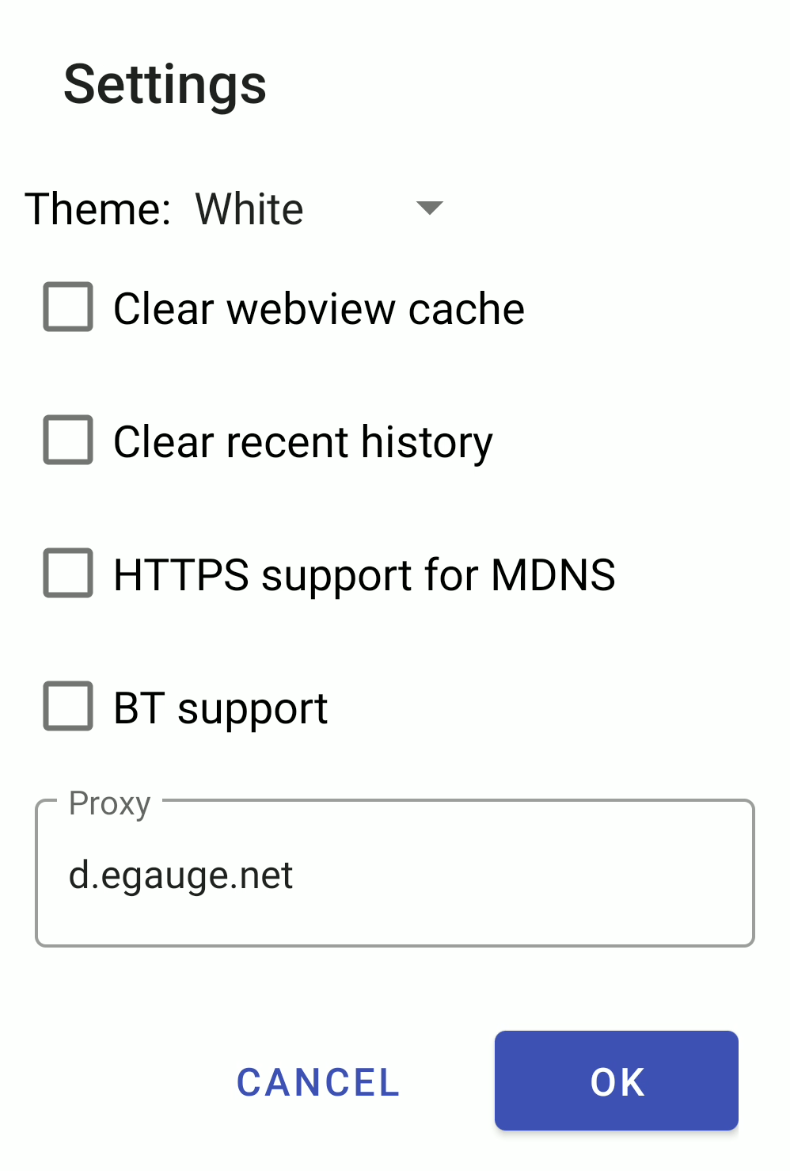
To access app settings, tap the three dots in the top right corner of the screen and select "Settings".
Theme - select either a white or dark theme.
Clear webview cache - clear the app cache, may be useful if elements are failing to render properly when loading a specific meter.
Clear recent history - clear recent meter browsing history.
HTTPS support for MDNS - allows HTTPS connections to local addresses (eg, DEVNAME.lan or DEVNAME.local).
BT support - enables bluetooth support. Only supported with EG4xxx meters using a supported bluetooth dongle.
Proxy - allows a different proxy server to be used. For example, lighthouse solar devices would need to use the d.lighthousesolar.com proxy.
Changing the proxy field to an unsupported value will disable remote connections to meters via the proxy server.
Alert Settings
The eGauge app can be used to monitor alerts trigger on an individual meter. For information on configuring alerts on a meter, refer to this article. To access alert settings, tap the three dots in the top right corner of the screen and select "Alerts".
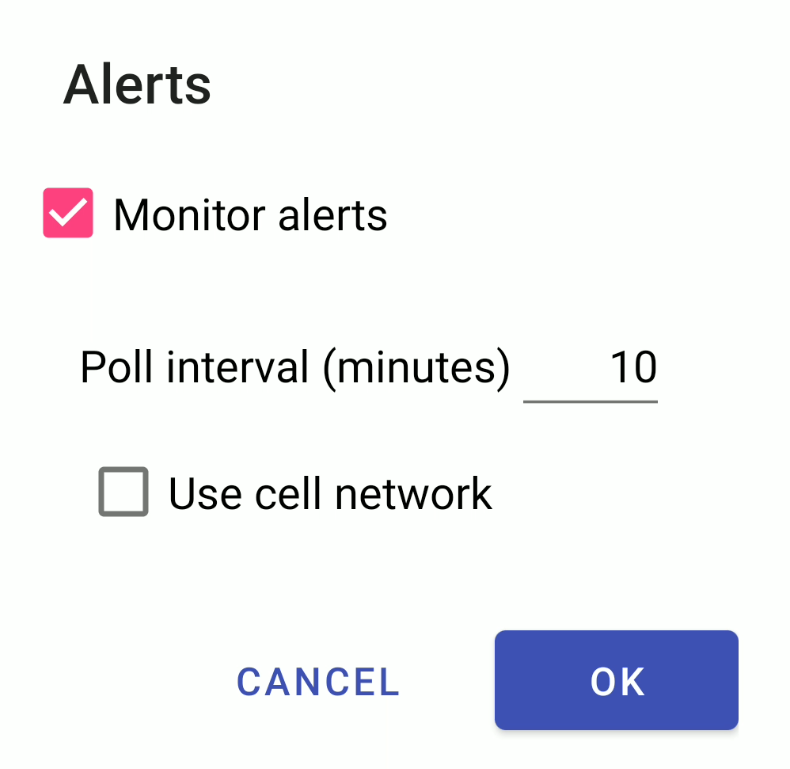
The alert settings menu will appear.
Monitor alerts - monitor alerts set on the meter. When an alert is triggered, a notification will appear on the mobile device. Alerts are unique to each eGauge meter and must be configured on a per-meter basis.
Poll interval (minutes) - how often the app checks meters for triggered alerts. Values under 1 (one minute) are not supported.
Use cell network - use mobile data to check meters for triggered alerts. Not recommended for large numbers of meters.
Using mobile data to poll for alerts can result in mobile data overages. Be cautious when using mobile data with short poll intervals.
About
In this section you can find information about the version and build of the eGauge app that you have installed on your device.
Log Buffer - The log buffer stores the app event log for a short period of time. Bug reporting for the app can also be accessed by viewing the log buffer and then tapping the 'Report Bug' button at the top left of the page. When reporting a bug, please include as much detail as possible. This tool will use the email client installed on your mobile device to send the message to eGauge developers.
When using the log buffer to report a bug, diagnostic information in the log will automatically be included in your message.
Configuration - This section contains diagnostic information that may be useful to eGauge developers for troubleshooting purposes.
Navigating the Mobile UI
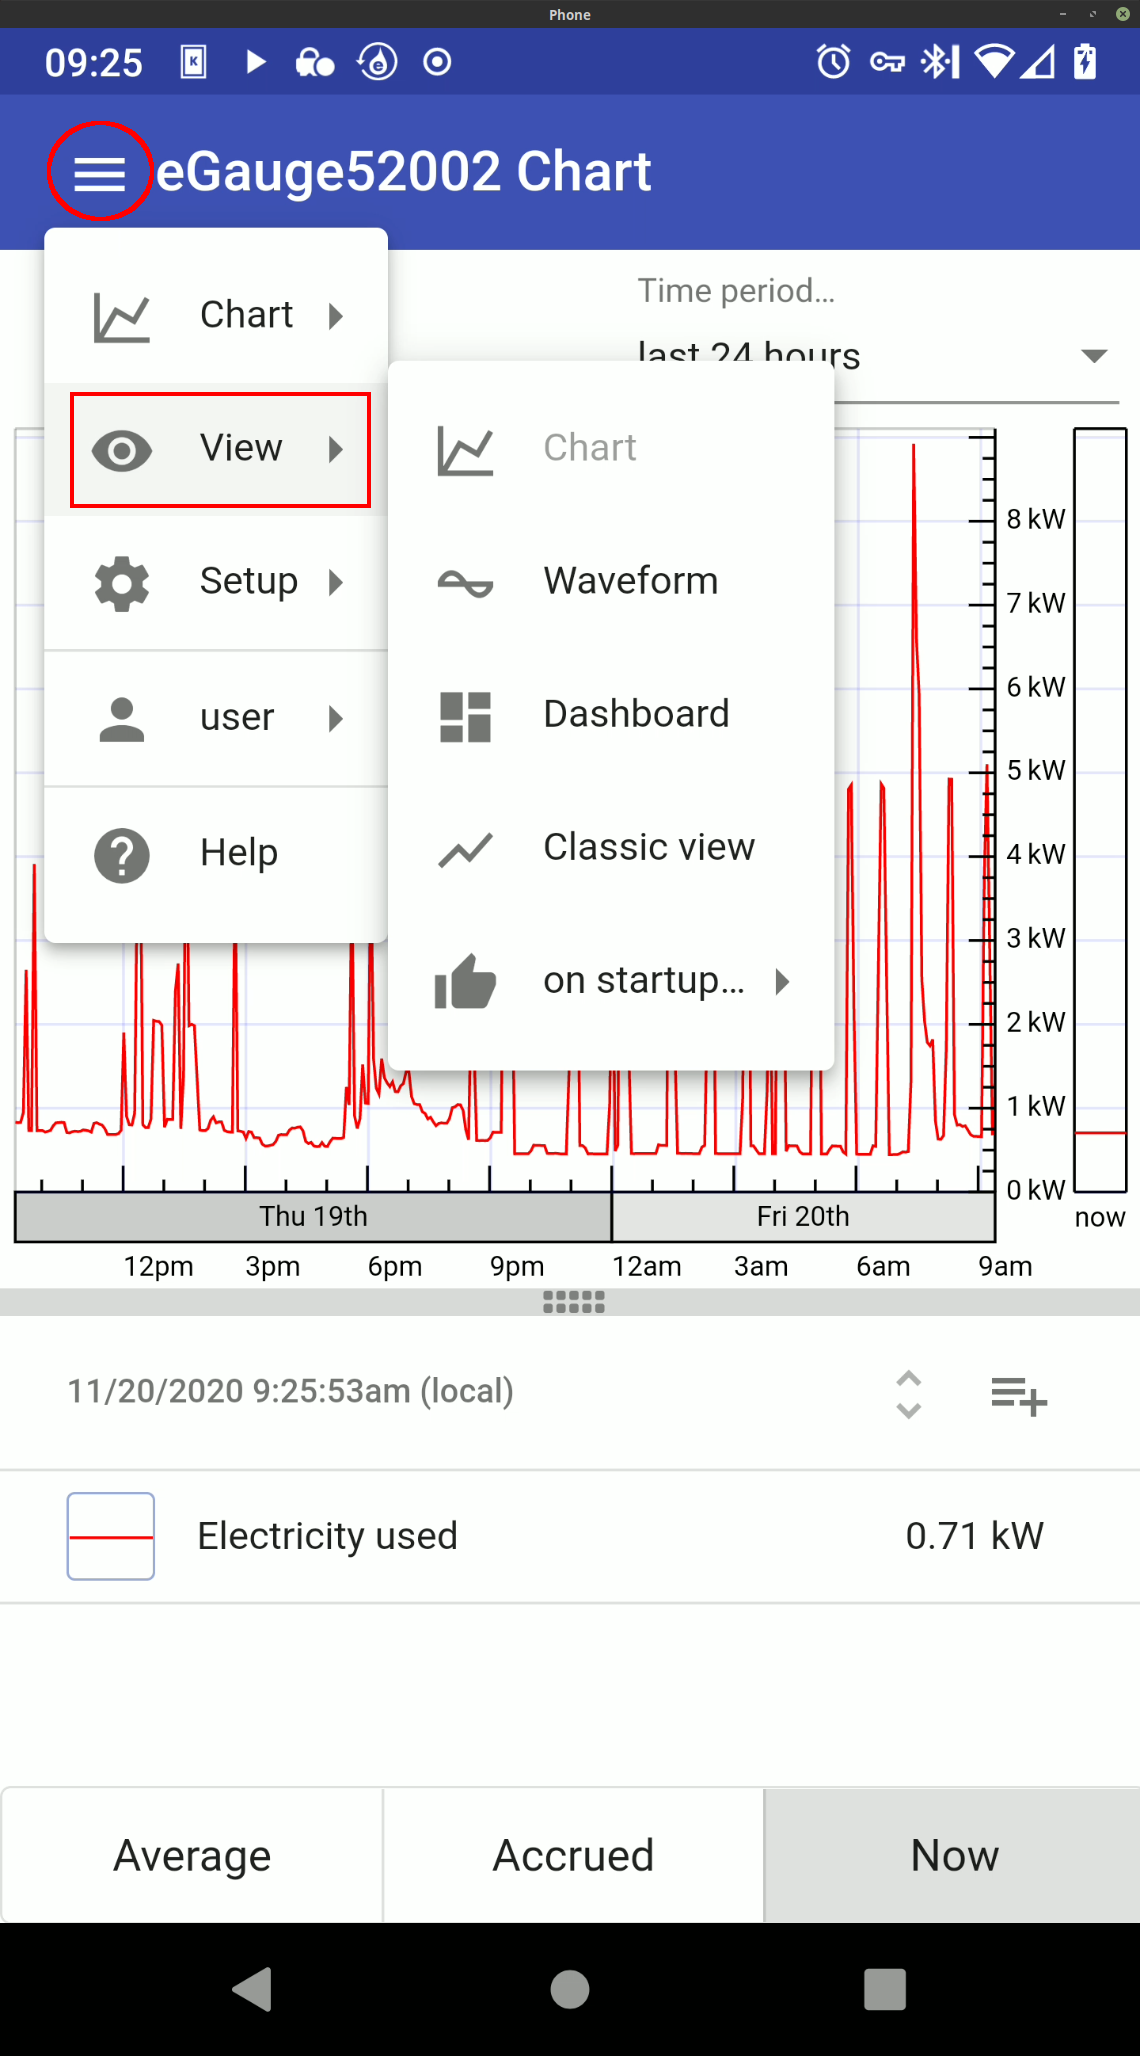
The mobile app features four primary display elements. Each element is designed to present different types of data in different ways. Some elements (such as the chart and dashboard) offer significant customization options. To switch between the various elements, tap the menu in the top left corner of the app and select "View". The current element will be greyed out (in the screenshot below, chart is greyed out because the chart is currently loaded). Use the "on startup..." option to select which element to display when a meter is first opened in the app (the chart is the default option).
Chart
The chart element provides clean and streamlined graph-based display. This element is similar to the original eGauge interface, but features additional customization options and is optimized for a mobile interface. More information on the chart element is available here.
Waveform
The waveform element allows for deep inspection of individual measurements taken by the eGauge. This tool is useful for phase checking and other analysis of raw sensor readings. More information on the waveform view is available here.
Dashboard
The dashboard element is a modular display which allows the user a great deal of customization. Multiple layouts can be created to get a better sense of how specific data points relate to one another. These layouts can be saved and utilized by others accessing the device. More information on the dashboard is available here.
Classic View
The classic view element simply redirects to the original eGauge interface. This interface is much more limited in terms of customization, but some users may prefer to work with the original interface depending on their needs. More information on the classic view is available here.

