Overview
The TP-Link TL-WR802N is a WiFi bridge that can be used to connect the eGauge to a wireless network. The bridge is powered by USB, so it may be powered directly from an EG40xx device's USB port for convenience. Ethernet is connected from the bridge to the eGauge to provide WiFi network access.
When the TP-Link TL-WR802N is configured in client mode as per instructions, any devices connected to the Ethernet port of the bridge will obtain their own unique IP address from the LAN. The TP-Link bridge itself will obtain a separate IP address from the LAN.
Prerequisites
To complete this setup you will need:
- A WiFi enabled laptop or other device to access the TP-Link router settings
- Valid login credentials for the existing WiFi network.
Note: This equipment is not compatible with captive portal networks. If the existing WiFi network requires captive portal access to connect, follow up with network administrators for another connection option.
Instructions
Step 1: Power the TP-Link bridge via USB. The bridge should be within WiFi range of the network it will connect to. You may power it from an EG40xx USB port using the included USB cable, or plug it into an available outlet using the included wall plug.
Do not connect Ethernet to the TP-Link bridge before the setup via WiFi is complete (Step 11 of this guide). If an eGauge meter or other device is connected via Ethernet to the TP-Link bridge, the initial setup will not work.
Step 2: Using a laptop with WiFi, connect to the wireless network broadcasted by the TP-Link bridge. The SSID (Wifi Network name) and password are located on a sticker card that comes with the wireless bridge. This information is also printed on the bottom of the bridge itself as shown below:

Step 3: When connected to the wireless bridge's network, open a web browser to http://tplinkwifi.net If you get an error message saying the site cannot be reached, verify that your browser is not redirecting you to https://tplinkwifi.net If it is, you will need to manually change it to begin with http://
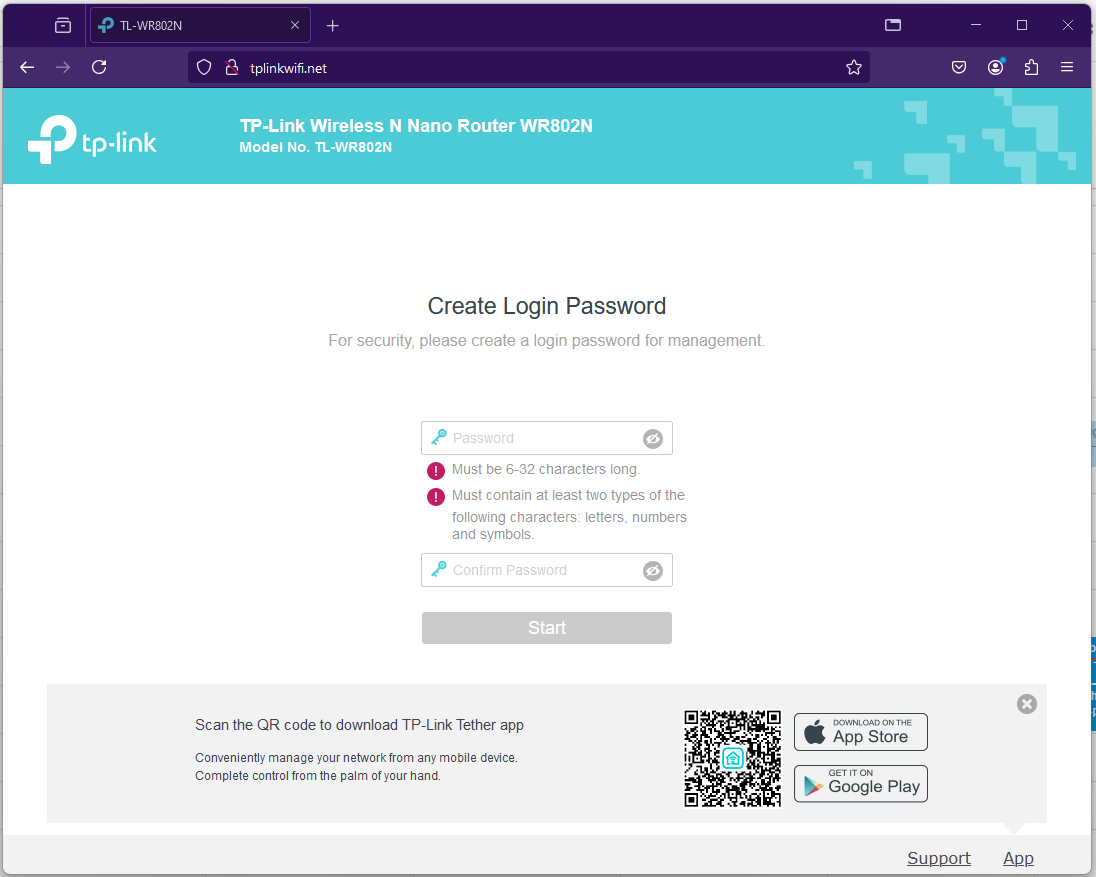
Step 4: To enter the setup, you must first create a new login password and confirm it. Follow the password requirements shown on the Create Login Password screen and click Start. Be sure to record your new password on the included WiFi info card and keep it in a secure location.

Step 5: Click Next to begin the Quick Setup.

Step 6: Choose Client as the operation mode and click Next.

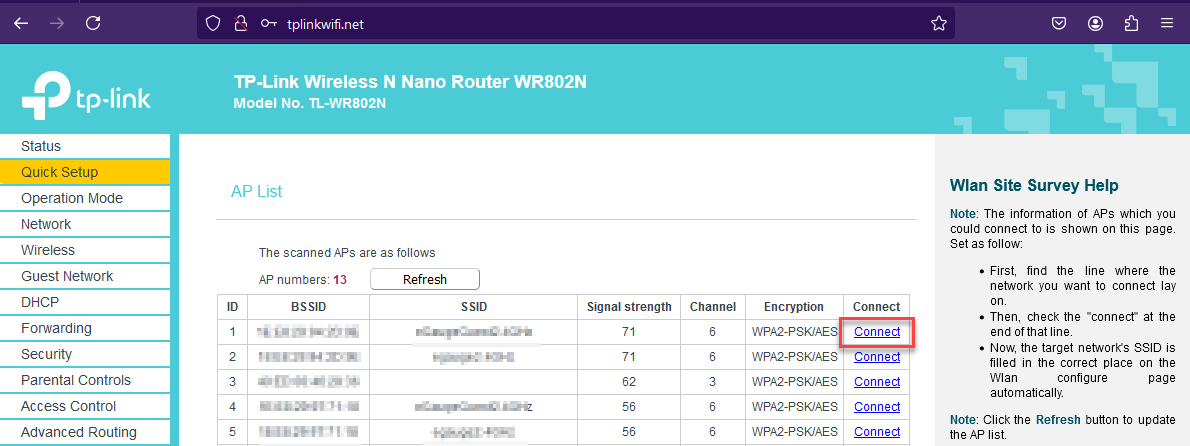
Step 7: A list of in-range WiFi networks are displayed. Click Connect next to the network you will connect the eGauge to.

Step 8: Enter the password for the WiFi network and click Next.

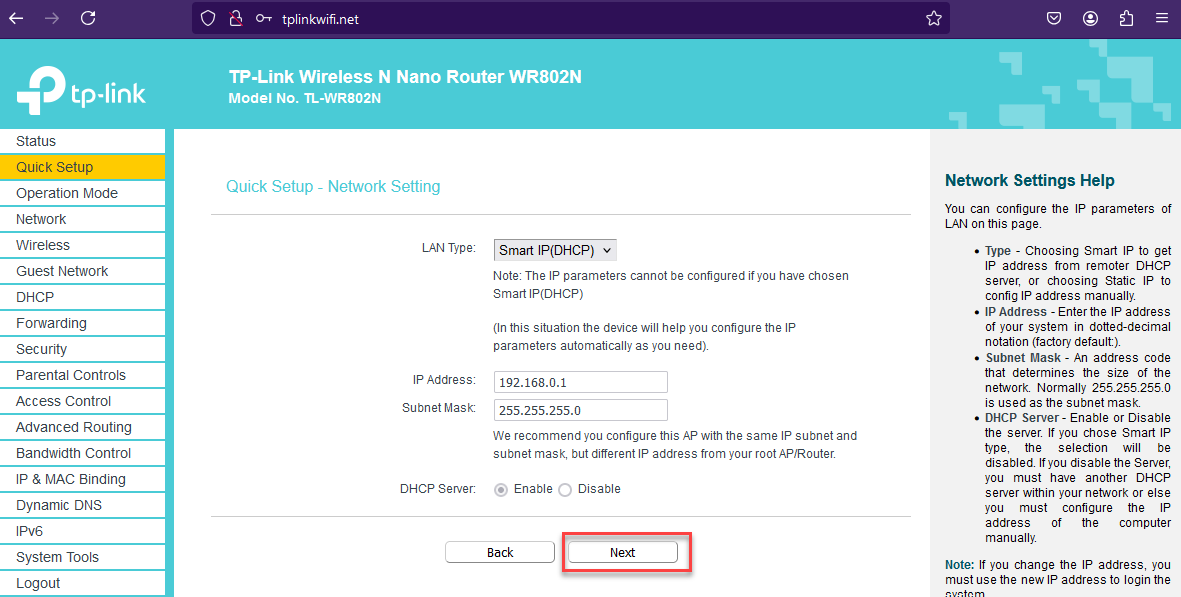
Step 9: Choose Smart IP for the LAN type. This will automatically assign the admin interface an IP address from the main network, and any other eGauge meters connected to the Ethernet port will obtain an IP address from the main network. Click Next to continue.

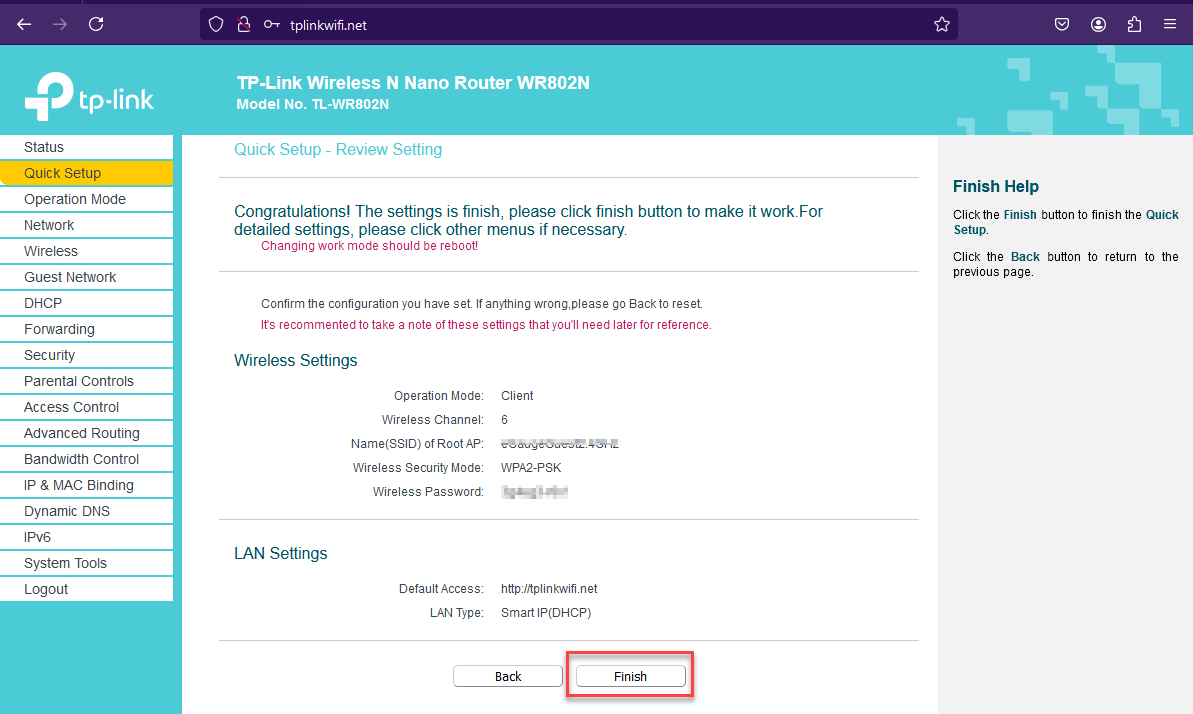
Step 10: Review the configuration and press Finish to save and reboot. After the reboot you will no longer be connected to the bridge with your computer as it will now be acting as a WiFi receiver for the eGauge.

Step 11: Connect Ethernet from the bridge to the eGauge meter LAN port and reboot the eGauge using the toggle switch through the LCD Tools menu.
Troubleshooting and Tips
-
Issue: There is no connectivity to the meter after going through the process.
- Solution: Confirm the login credentials to the network used during setup are correct. If an error is found, factory reset the USB router by depressing the recessed button on the back for 25 seconds and going through the setup process again.
- Solution: Be sure that the Ethernet was not connected from the USB router to the eGauge until the end of the setup process. If it was, factory reset the TP-Link router and go through the setup process again with the Ethernet disconnected.
- Solution: Confirm the signal strength at the install location is strong enough to transfer data. If WiFi signal strength is low Ethernet connectivity may be required.