# Large 50mm (2.00") AC Split-Core CTs
##### [ Visit the online store page](https://store.egauge.net/Split-Core-CT?quantity=1&custcol2=5 "Visit the online store now!")
Large AC Split-Core CTs are in principal the same as the standard sized [AC Split-Core CTs ](https://kb.egauge.net/books/ct-and-sensor-product-pages/page/ac-split-core-cts-%28jd%29 "AC Split-Core CTs (J&D)")but are physically much larger and have a lower accuracy. In most cases, it is better to use a [Rope CT](https://kb.egauge.net/books/ct-and-sensor-product-pages/page/ac-rope-cts-%28rogowski-coil%29 "AC Rope CTs (Rogowski Coil)") instead. For pricing and available models, see the [online store](https://store.egauge.net/Split-Core-CT?quantity=1&custcol2=5).
- 2" CTs are relatively large at 4.75" x 5" x 1.2", ensure there is enough room in the panel
- Low end accuracy is poorer than other CT options
- Special restock fees may apply if returned
- Lead time may be longer than other CT options
| [](https://kb.egauge.net/uploads/images/gallery/2020-02/image-1582839679988.png)
|
| *Large 2" split-Core CT* |
## Specifications
#### [Full specs (data-sheet PDF)](https://kb.egauge.net/attachments/17 "Full specs (data-sheet PDF)")
- 333 mVrms at rated output
- Accurate within 1% from 10% to 100% of rated amperage
- Operates from 50Hz to 400Hz
- Maximum primary insulation up to 600Vrms
- 8' twisted pair lead with CT connector
- 2" CTs are **4.75" x 5" x 1.2"**
- 1-year Limited Warranty
To reduce risk of electric shock, open or disconnect circuits from the power distribution system (or service) of the building before installing or serving CTs.
2. Open the CT by holding the bottom part of the CT still and pulling the top part off. **Do not touch the polished ferrite core surfaces**. Any oils or debris in that area worsens accuracy.
3. Slide the CT over the conductor of the circuit to be measured. Make sure the sticker on the CT points in the direction of the primary current flow (the current flow that should yield a positive power reading).
4. Close the CT by gently pushing the top part of the CT back onto the bottom part and it clicks shut.
5. Verify that the CT is fully closed by squeezing together the top and bottom parts of the CT.
6. Optional: secure the CT to the conductor with a cable tie.
7. Route the twisted pair wires of the CT to the meter such that they do not directly contact live terminals or bus bars.
8. Plug the 2-pin terminal at the end of the twisted pair wires into an unused port on the meter.
9. [Configure the sensor input](https://kb.egauge.net/books/egauge-meter-configuration/page/initial-configuration-steps) in the meter interface and complete the general configuration.
| [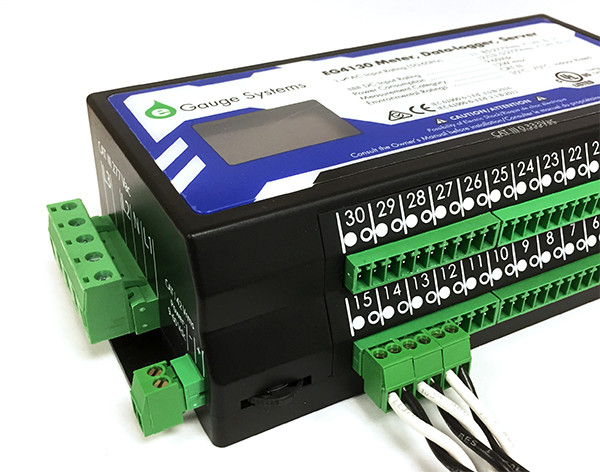](https://kb.egauge.net/uploads/images/gallery/2021-10/qsg-ct-plugs.jpg) |
| *CTs connected to eGauge meter.* |
## Documents
- [Spec Sheet](https://kb.egauge.net/attachments/17)
## Related Information
- [CT Selection Guide](https://kb.egauge.net/books/ac-and-dc-cts/page/ct-selection-guide "CT selection guide")
- [What CT do I choose from the configuration menu?](https://kb.egauge.net/books/configuration/page/what-ct-do-i-choose-from-the-ct-drop-down-selection)