
CTid-enabled AC Rope CT (ERA-XXX-YYYY)
Visit the online store page
This article is for the ERA-XXX-YYYY CTid enabled Rope CT. For the non-CTid enabled ropes (RCT-XXX-YYYY) please visit this article. In the upcoming future all Rope CTs will be CTid-enabled. Check the model number on the tag of the Rope CT to verify which version you have. CTid enabled Ropes start with ERA, and ones without CTid start with RCT.
Information on configuring CTid sensors can be found here.
Rope CTs (technically called Rogowski Coils) are large, flexible sensors for monitoring current like split-core CTs. Rope CTs are installed similar to standard split-core CTs, where a connector on the rope allows it to be opened and placed around a conductor without needing to thread the conductor through it. For pricing and available models, visit the online store.
The ERA Rope CT contains CTid. It is the same as the RCT-XXX-YYYY model but has a different style connector and contains CTid for auto-detection and has an onboard LED that can be used to identify which CT is connected to a given sensor port, which can be useful if the CT leads cannot be traced from the meter to the conductors being monitored.
The CTid-enabled Rope can measure a maximum of either 2775 amps or 6935 amps and is available in 106mm and 178mm window sizes.
Rope CTs are designed for 20-30 amps or greater load. Lower amperage results in lower accuracy readings.
Face the arrow on the rope towards what you want to measure. Positive power polarity when power is against the arrow, and negative when it is the same direction the arrow points.
The position of the Rope CT on the conductor affects accuracy. See this article for more information.
Why use a Rope CT?
Rope CTs are excellent for bus-bars and large switch-gear applications that standard split-core CTs cannot fit around. Rope CTs are flexible and easy to install but require a minimum amperage of approximately 30A for accuracy.
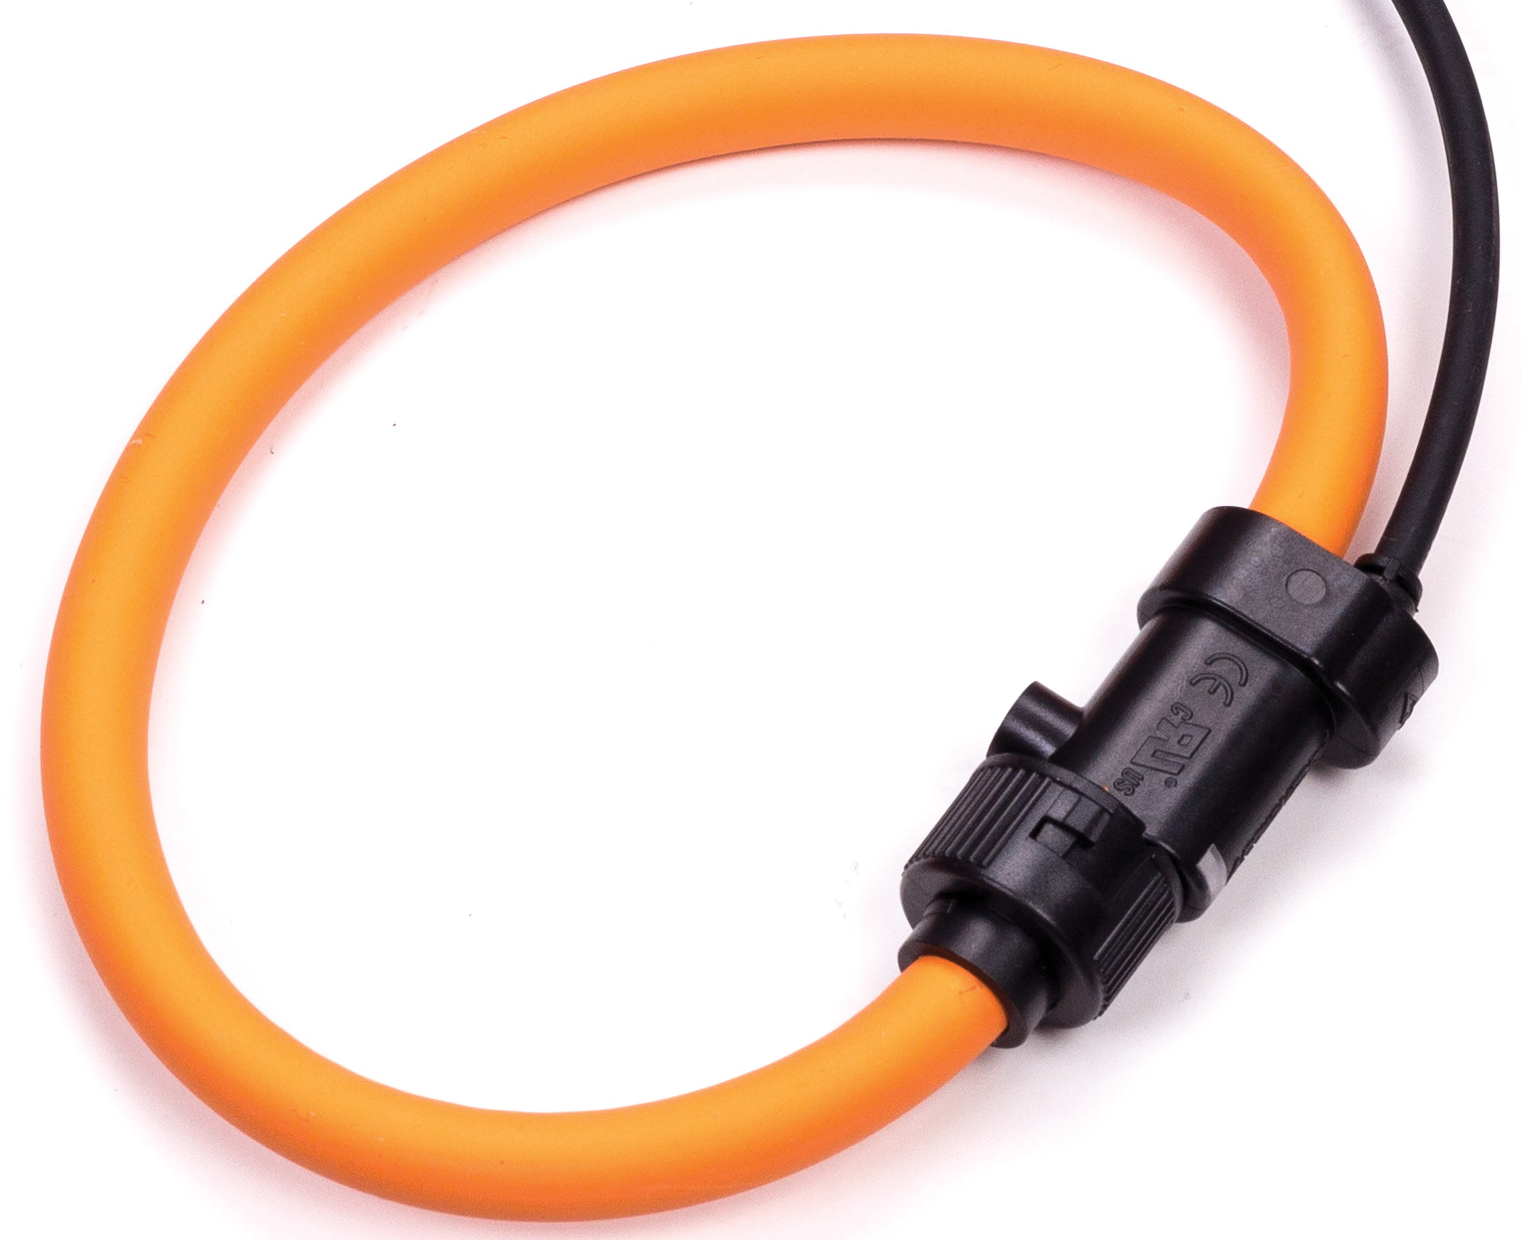 |
| ERA-106-2775 Rope CT |
Specifications
Full specs (data-sheet PDF)
- CTid Enabled
- Max Amperage: 2775 A or 6935 A
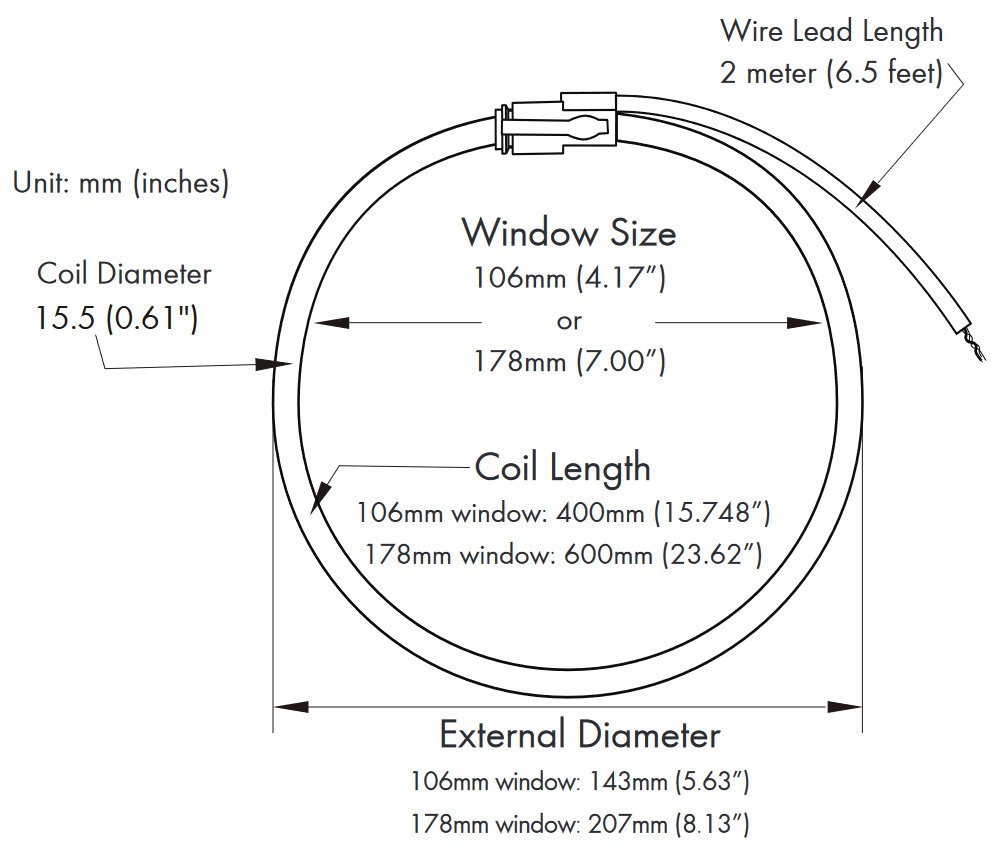
- Window sizes: 106mm (4.17") and 178mm (7.00")
- Frequency Range: 50/60Hz
- Operating Temperature: -20 °C to 70 °C
- Overvoltage Category: 1000V CAT III, 600V CAT IV
- Positional: Error Better than 4%
- Linearity: Better than 1%
- Material: Orange thermoplastic rubber; flame retardant UL 94 V-0 rated
- Cable: 1000V UL style 20940; External diameter 5mm; Wires 2x 26AWG
- 5-year Limited Warranty
Dimensions (click to enlarge)
Hardware included
- 1x Rope CT with built-in 8 foot leads and 2-pin plug affixed
Assembly/installation information
The ERA-XXX-YYYY is a CTid enabled sensor and is configured differently than conventional CTs. See this article for more information on configuring CTid enabled sensors.
See the Installation Overview Tips to get started.
-
To reduce risk of electric shock, open or disconnect circuits from the power distribution system (or service) of the building before installing or serving CTs.
- Open the rope CT by gripping and twisting the bayonet connector and pulling the end of the rope CT out. Do not touch the inside surfaces where the CT opens. Any oils or debris in that area worsens accuracy.
- Wrap the rope CT over the conductor of the circuit to be measured. Make sure the arrow on the rope CT points in the direction of the primary current flow (the current flow that should yield a positive power reading).
- Close the rope CT by gently squeezing the latch and inserting the other end inside the latching end and release the latch.
- Verify that the rope CT is fully closed.
- Optional: secure the CT to the conductor with a cable tie.
- Route the twisted pair wires of the CT to the meter such that they do not directly contact live terminals or bus bars.
- Plug the 2-pin terminal at the end of the twisted pair wires into an unused port on the meter.
- When connected to an EG4xxx meter, use the CTid® scanning feature to automatically detect the sensor type and its current rating. If using an older model meter, use the drop-down method to Configure the sensor input.
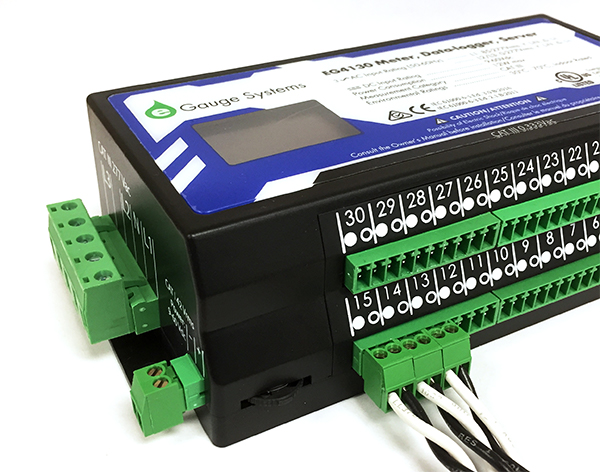 |
| CTs connected to eGauge meter. |