# Enclosures and Mounting Hardware
Complete kits which simplify installation on a variety of electrical services.
# Powered Enclosure Kit (120/240VAC, 120/208VAC)
##### [ Visit the online store page](https://store.egauge.net/powered_enclosure_kit_120 "Visit the online store now!")
##### SKU: PEK-120/PEK-120-XL
The Powered Enclosure Kit is designed for installation of the eGauge in combination with one of several communication protocol devices.
[](https://s3.amazonaws.com/cdn.freshdesk.com/data/helpdesk/attachments/production/25012074201/original/8F0SdQNeWoN6lXV61pGY_utqPRGAy4wN6g.png?1562968857) | [](https://s3.amazonaws.com/cdn.freshdesk.com/data/helpdesk/attachments/production/25012074196/original/20XnVNM84Hp2SC0SIcjHnXK6IHFEnEcx5A.png?1562968833) |
*Components included* | *Enclosure* |
The kit comes with components that complement the eGauge main unit, decreasing installation time and reducing complexity. Compatible services: 3-phase 4-wire 120/208Vac, split-phase 120/240Vac.
## Hardware included
Contains (un-assembled):
- NEMA 4X polycarbonate enclosure, hinged, lockable
- Regular: 12 in. x 10 in. x 6 in.
- Extra Large: 16 in. x 14 in. x 7 in.
- DIN rail lengths
- DIN Power distribution block
- 1x 120V power receptacle
- 1x Terminal cover plate
- 2x Terminal endstops
- 5x Terminal blocks
- Wire set (15’ each; black, red, blue, white)
- [eGauge Mounting Kit](https://kb.egauge.net/books/product-pages-f89/page/product-page-din-rail-mounting-kit "Product Page: DIN Rail Mounting Kit")
- 3x 6-32 x 3/16” Pan Head Machine Screws
- 4x Silver Screws (for connecting eGauge meter to DIN clip or L-bracket)
- EG4xxx DIN clip
- EG4xxx L-bracket
## Assembly/installation information
- [120V PEK installation guide (PDF)](https://www.egauge.net/media/support/docs/pek-120-guide.pdf)
- [120V PEK assembly tutorial (Video)](https://kb.egauge.net/books/other-egauge-hardware/page/powered-enclosure-kit-%28pek%29-assembly-tutorial "Powered enclosure kit (PEK) assembly tutorial")
## Documents
- Regular: [12"x10"x6" Integra Enclosure Datasheet](https://www.egauge.net/media/support/docs/12x10x6-Premium.pdf)
- Extra large: [16"x14"x7" Integra Enclosure Datasheet](https://www.egauge.net/media/support/docs/16x14x7-Premium.pdf)
- [120V PEK installation guide (PDF)](https://www.egauge.net/media/support/docs/pek-120-guide.pdf)
## Related Information
- [Product Page: Hinged Enclosure](https://kb.egauge.net/books/product-pages-f89/page/product-page-hinged-enclosure "Product Page: Hinged Enclosure")
- [Product Page: 277V Powered Enclosure Kit](https://kb.egauge.net/books/egauge-hardware-product-pages/page/product-page-powered-enclosure-kit-%28277480vac%29 "Product Page: Powered Enclosure Kit (277/480VAC)")
- [Product Page: DIN Rail Mounting Kit](https://kb.egauge.net/books/product-pages-f89/page/product-page-din-rail-mounting-kit "Product Page: DIN Rail Mounting Kit")
# Hinged Enclosure (IP66 rated)
##### [ Visit the online store page](https://store.egauge.net/search?keywords=hinged%20enclosure "Visit the online store now!")
*Current manufacturer information: Integra H------HLL (dashes replaced with dimensions, see spec sheets below)*
IP66 rated polycarbonate enclosure, hinged and lockable lid. Can be used to house eGauge meter(s) and accessories. Available in 16"x14"x7", 14"x12"x6", and 12"x10"x6" sizes.
Each enclosure comes with an eGauge Mounting Kit, and 2 DIN rail(s) (DIN rail(s) pre-installed).
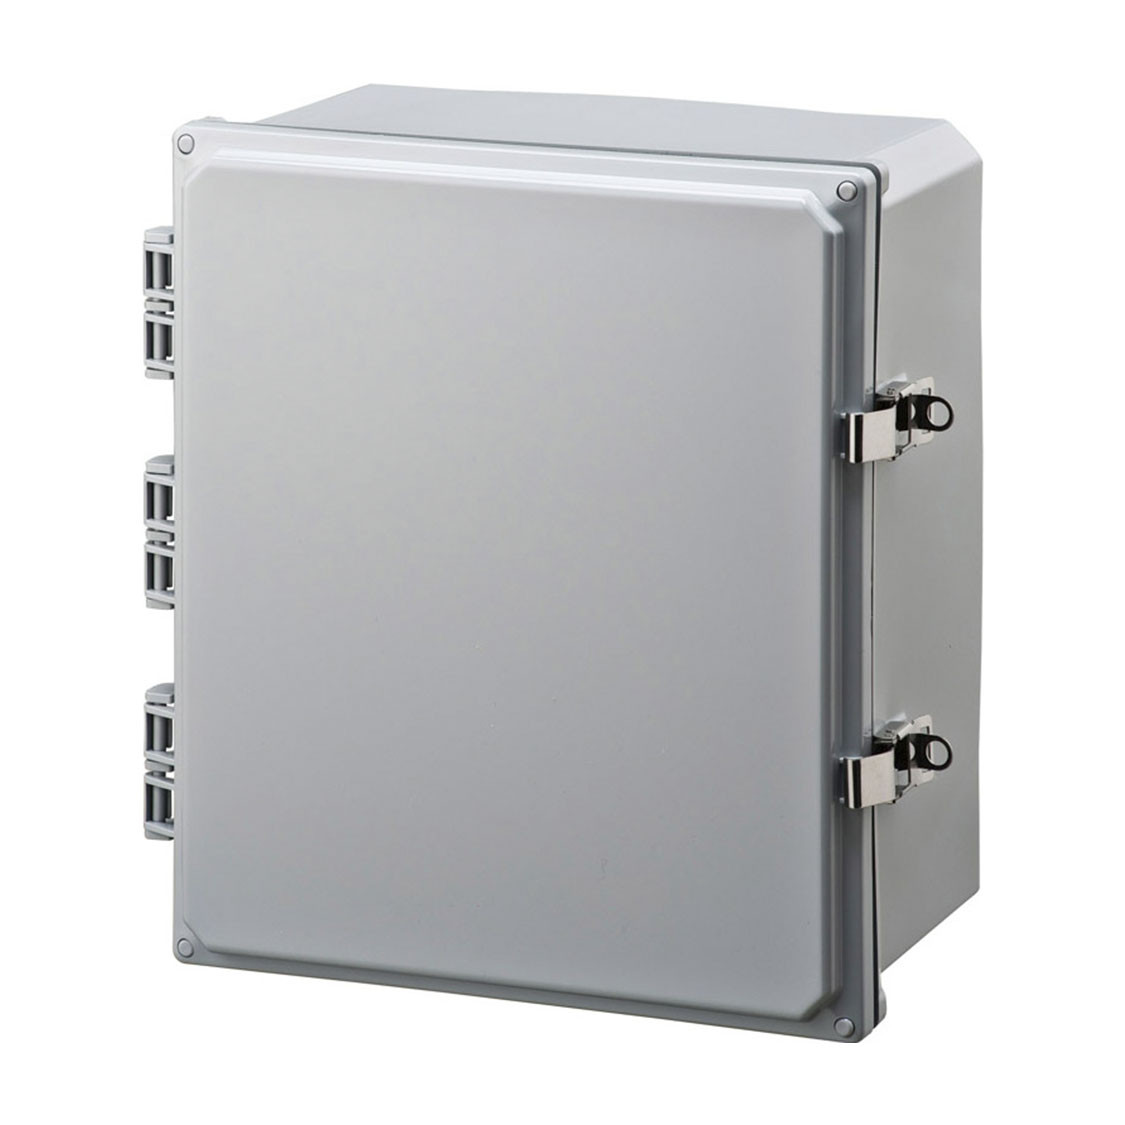
[](https://kb.egauge.net/uploads/images/gallery/2020-06/hinged-enclosure.jpg) |
*Hinged Enclsosure* |
## Specifications
Full specifications can be found in the Documents section.
- IP66
- UL-50 / c-UL Listed
## Hardware included
- 1x Hinged, lockable lid enclosure with DIN rail pre-installed
- 2x DIN rails on 14"x12"x6", 16"x14"x7 and 12"x10"x6"
## Assembly/installation information
1. Attach the DIN clip to the underside of eGauge using 4x silver screws
2. Optionally attach the L-Bracket to the DIN clip for alternative mounting options
3. Connect the eGauge and other equipment to the pre-installed DIN rail
## Documents
- [16x14x7 Enclosure spec sheet](https://www.egauge.net/media/support/docs/16x14x7-Premium.pdf)
- [14"x12"x6" Enclosure spec sheet](https://www.egauge.net/media/support/docs/enclosure_14x12x6.pdf)
- [12x10x6 Enclosure spec sheet](https://www.egauge.net/media/support/docs/12x10x6-Premium.pdf)
- [14"x12"x6" Enclosure STEP file (3D CAD)](https://www.egauge.net/media/support/docs/14x12x6-Hinged-1.stp)
## Related Information
- [277V Powered Enclosure Kit install document](https://www.egauge.net/media/support/docs/277V-PEK-Guide.pdf)
- [120V Powered Enclosure Kit assembly document and video](https://kb.egauge.net/books/other-egauge-hardware/page/powered-enclosure-kit-%28pek%29-assembly-tutorial "Powered enclosure kit (PEK) assembly tutorial")
- [eGauge DIN Rail Mounting Kit](https://kb.egauge.net/books/product-pages-f89/page/product-page-din-rail-mounting-kit "Product Page: DIN Rail Mounting Kit")
# Powered Enclosure Kit (277/480VAC)
##### [ Visit the online store page](https://store.egauge.net/powered_enclosure_kit_277 "Visit the online store now!")
##### SKU: PEK-277/PEK-277-XL
The Powered Enclosure Kit is designed for installation of the eGauge Meter on a 277/480V service where 120V is needed for third party hardware.
The kit comes with components that complement the eGauge main unit, decreasing installation time and reducing complexity. Compatible with 277/480V. Includes 277V:120V step-down transformer for powering 120V accessories.
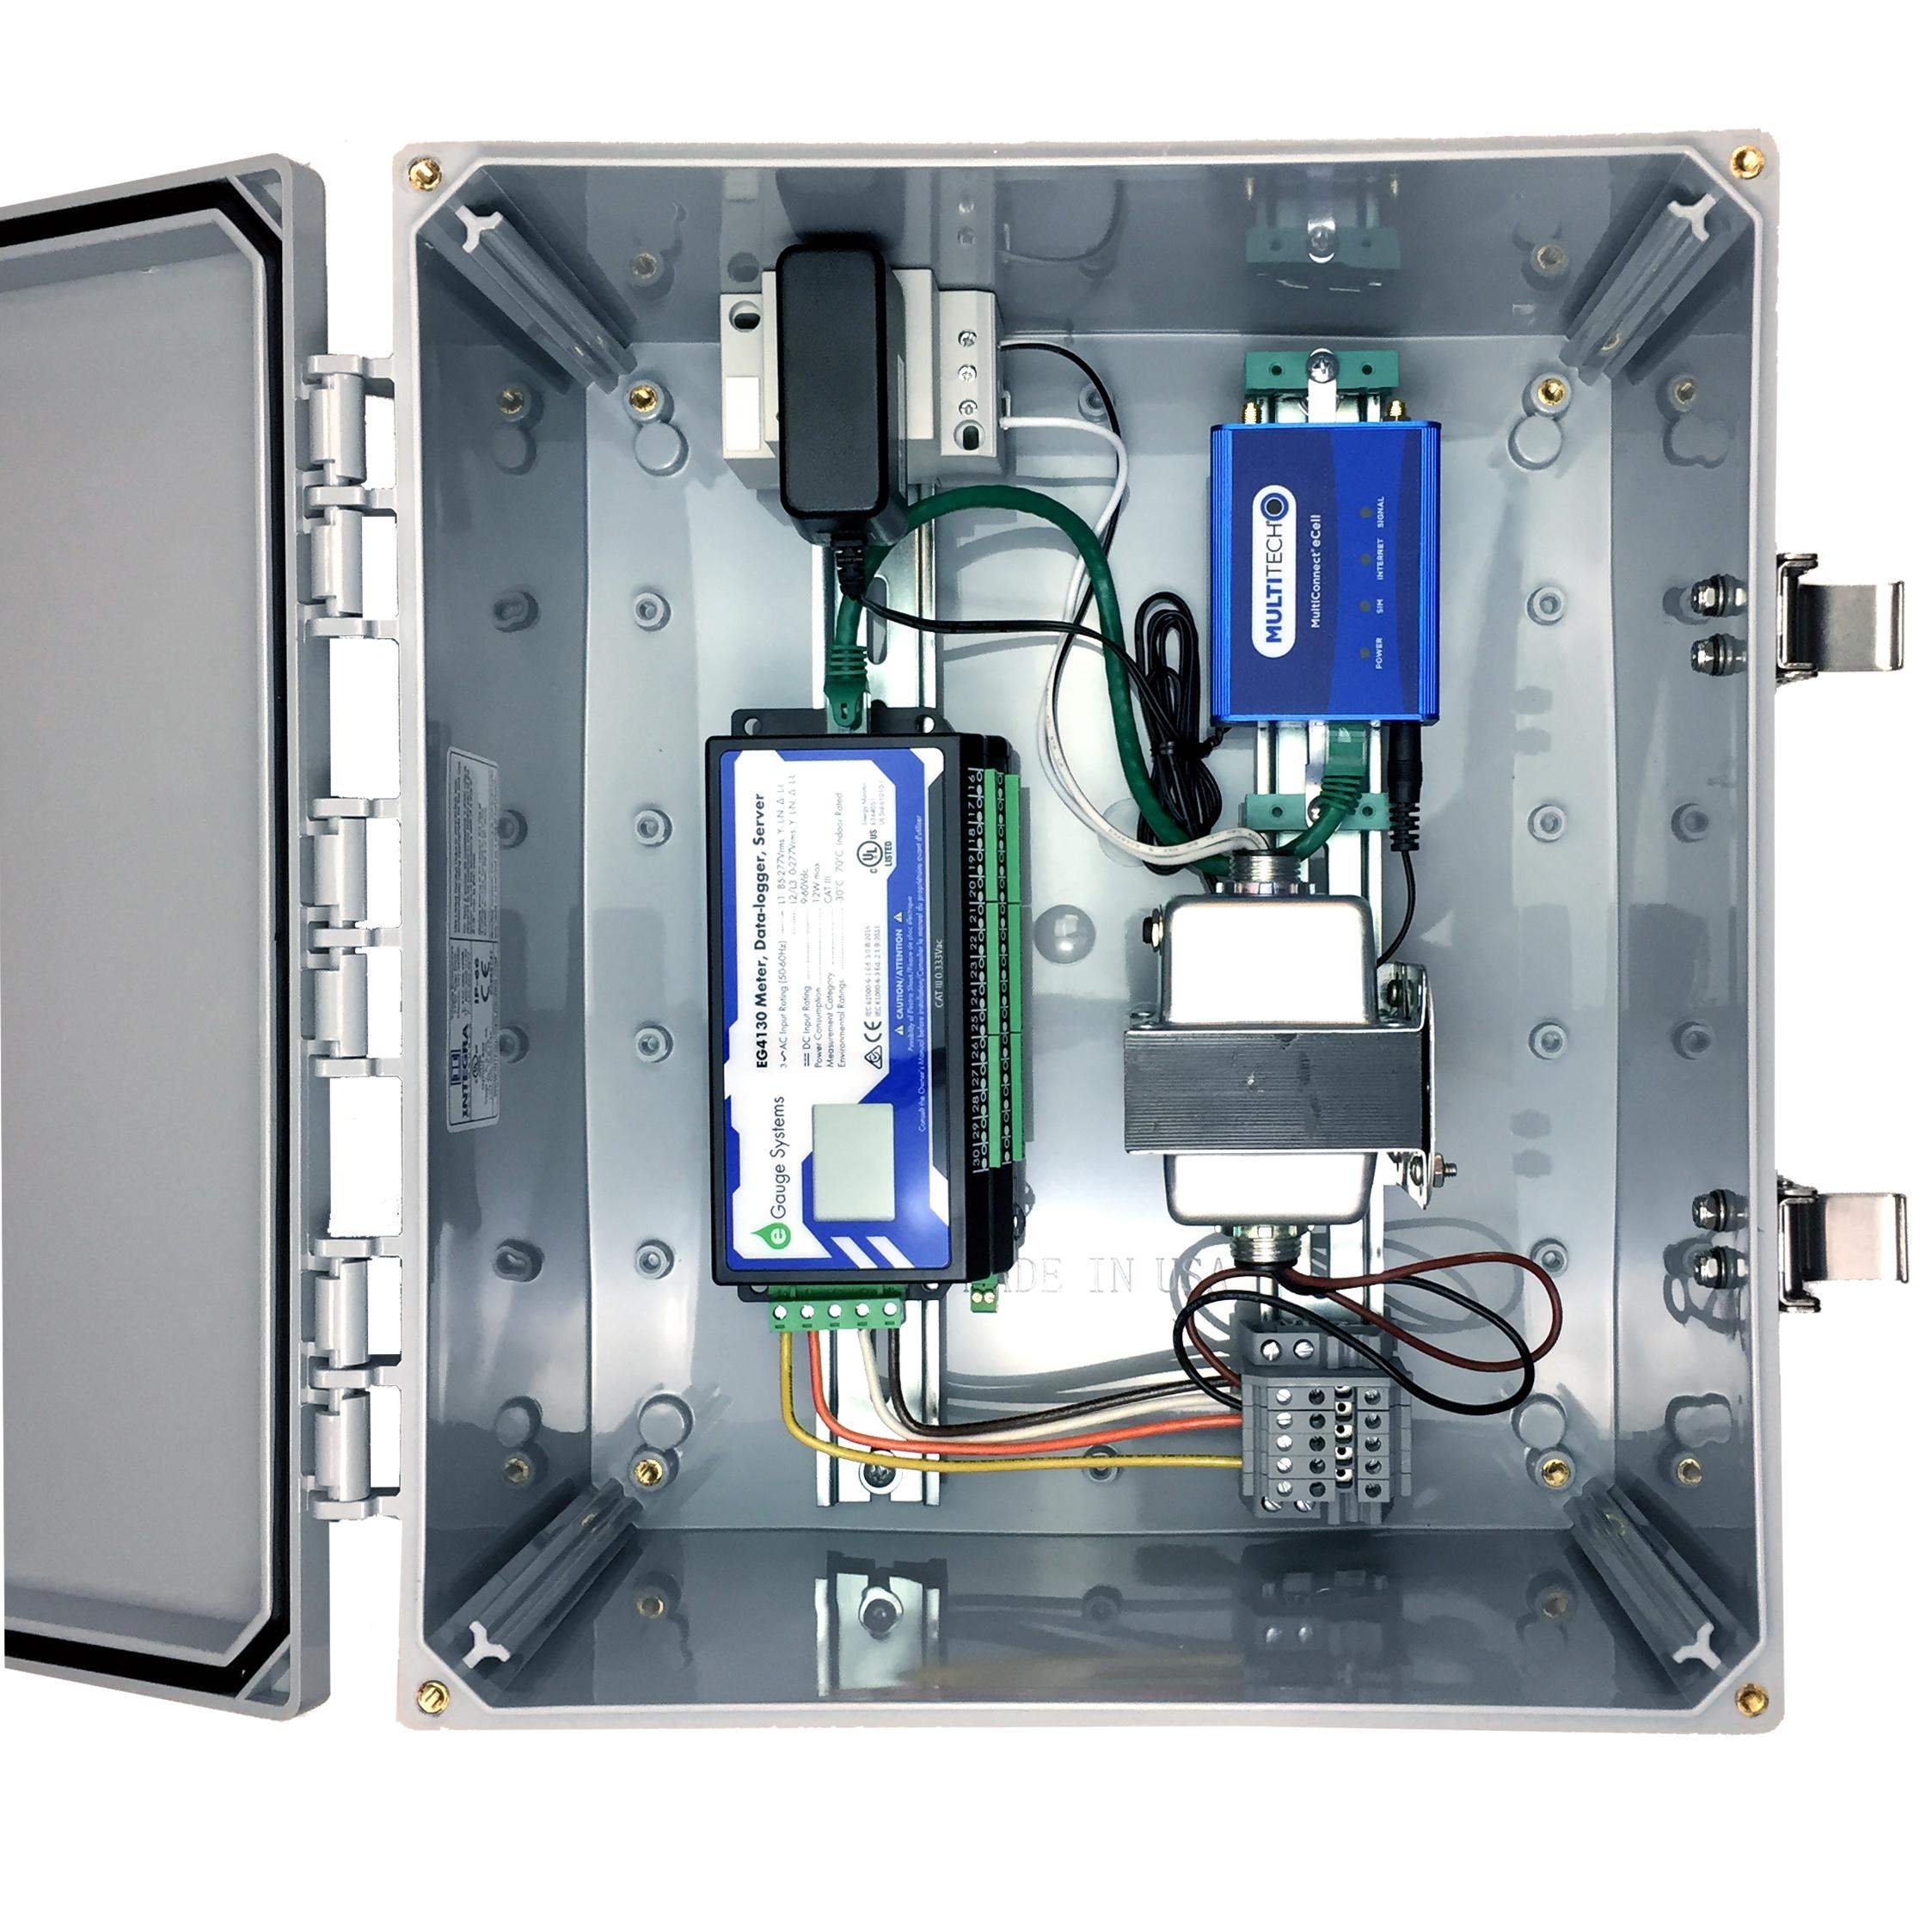
[](https://kb.egauge.net/uploads/images/gallery/2020-06/powered_enclosure_kit_277-pek277.jpg) |
*277/480VAC Powered Enclosure Kit* |
## Hardware included
Contains (unassembled):
- NEMA 4X polycarbonate enclosure, hinged, lockable
- Regular: 14 in. x 12 in. x 6 in.
- Extra Large: 16 in. x 14 in. x 7 in.
- DIN Power distribution block
- 1x 120V power plug receptacle
- 1x Terminal cover plate
- 2x Terminal endstops
- 5x Terminal blocks
- Wire set (15’ each; black, red, blue, white)
- [eGauge Mounting Kit](https://kb.egauge.net/books/product-pages-f89/page/product-page-din-rail-mounting-kit "Product Page: DIN Rail Mounting Kit")
- 3x 6-32 x 3/16” Pan Head Machine Screws
- 4x Silver Screws (for connecting eGauge meter to DIN clip or L-bracket)
- EG4xxx DIN clip
- EG4xxx L-bracket
- 2x DIN rail lengths
- Potential Transformer with DIN rail mounting clip
- Mounting plate for transformer
## Assembly/installation information
[277V Powered Enclosure Kit installation guide](https://www.egauge.net/media/support/docs/277V-PEK-Guide.pdf)
## Documents
Regular: [14"x12"x6" Enclosure spec sheet](https://www.egauge.net/media/support/docs/enclosure_14x12x6.pdf)
Extra large: [16"x14"x7" Enclosure spec sheet](https://www.egauge.net/media/support/docs/16x14x7-Premium.pdf)
---
## Related Information
- [Product Page: Hinged Enclosure](https://kb.egauge.net/books/product-pages-f89/page/product-page-hinged-enclosure "Product Page: Hinged Enclosure")
- [Product Page: Powered Enclosure Kit (120/240VAC, 120/208VAC)](https://kb.egauge.net/books/egauge-hardware-product-pages/page/product-page-powered-enclosure-kit-%28120240vac-120208vac%29 "Product Page: Powered Enclosure Kit (120/240VAC, 120/208VAC)")
- [Product Page: DIN Rail Mounting Kit](https://kb.egauge.net/books/product-pages-f89/page/product-page-din-rail-mounting-kit "Product Page: DIN Rail Mounting Kit")
# DIN Rail Mounting Kit
##### [ Visit the online store page](https://store.egauge.net/mounting_kit "Visit the online store now!")
##### SKU: EGMK
The DIN Rail Mounting Kit is used to attach the eGauge Core or Pro to a piece of DIN rail or another surface. The kit comes with one DIN clip that is screwed directly into the meter, one L-bracket for using the DIN clip at a 90-degree angle to the mounting surface, and all necessary screws to connect each piece.
Make sure to only use the included machine screws for mounting the DIN clip or bracket to the eGauge. Other screws could be too long and damage the meter.
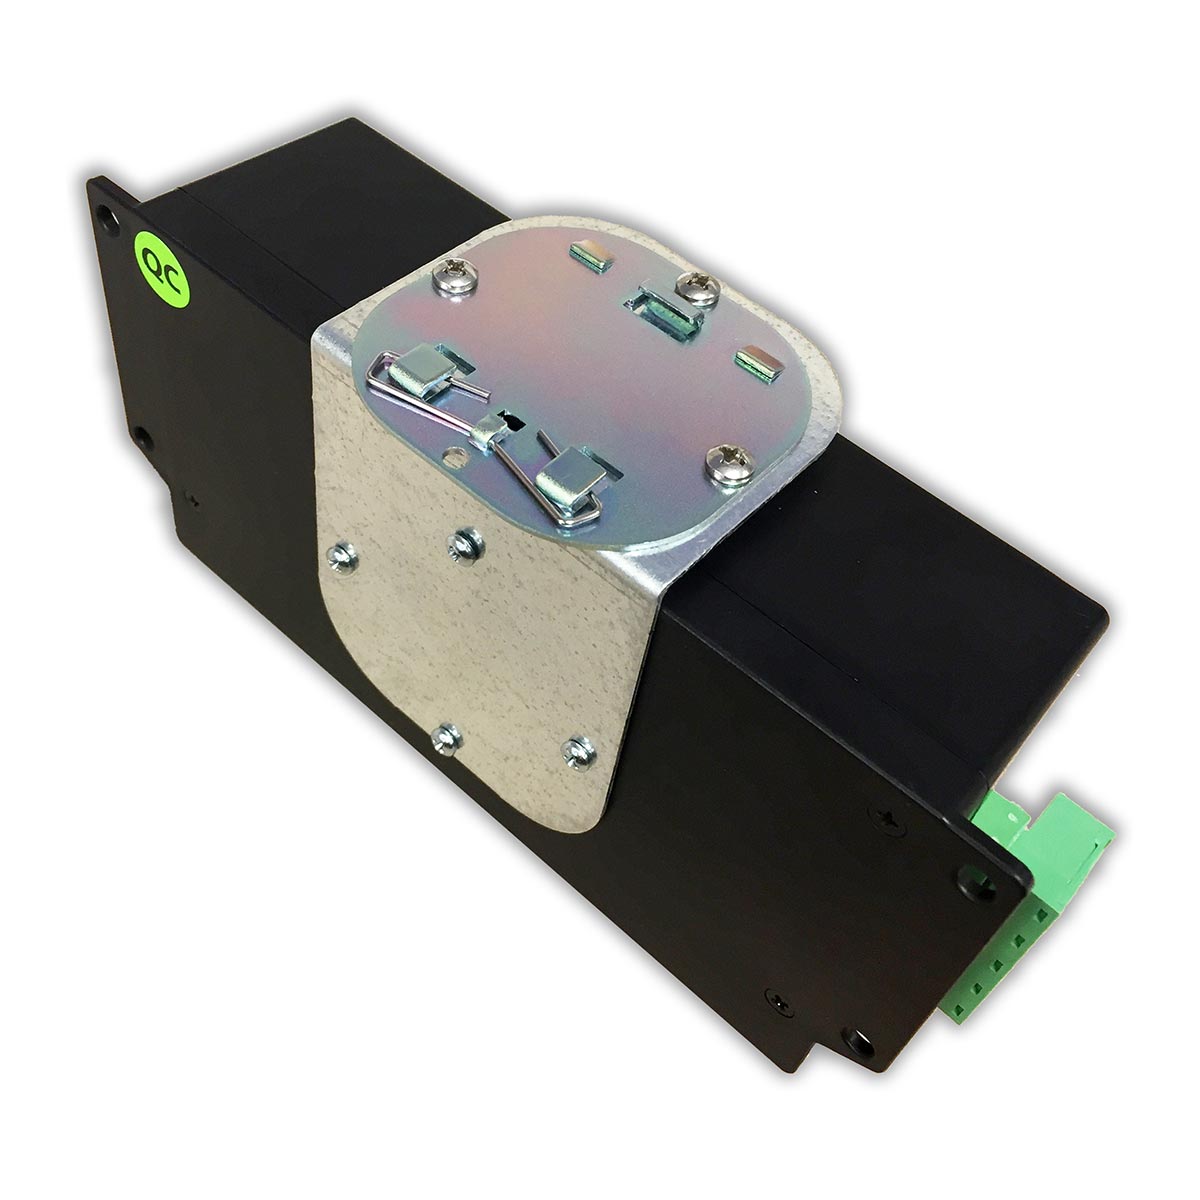
[](https://kb.egauge.net/uploads/images/gallery/2020-06/eg4xxx-mountingkit-mounted-side.jpg) |
*eGauge Mouting Kit* |
## Hardware included
- 3x 6-32 x 3/16” Pan Head Machine Screws
- 4x Silver Screws (for connecting eGauge meter to DIN clip or L-bracket)
- EG4xxx DIN clip
- EG4xxx L-bracket
## Assembly/installation information
[DIN Rail Mounting Kit video](https://www.youtube.com/watch?v=gFMVDynlEjw&feature=youtu.be)
### Software configuration Information
Depending on the orientation the eGauge is installed, the LCD menu can be rotated using the LCD menu button to navigate to Settings -> Display -> Orientation. Orientation can be set to “normal”, “counter clock-wise”, “upside-down”, or “clockwise”. [See LCD manual for LCD information](https://www.egauge.net/media/support/docs/eg4xxx-lcd-manual.pdf)
## Related Information
- [Product Page: Hinged Enclosure](https://kb.egauge.net/books/product-pages-f89/page/product-page-hinged-enclosure "Product Page: Hinged Enclosure")
- [Product Page: 120/208V and 120/240V Powered Enclosure Kit](https://kb.egauge.net/books/egauge-hardware-product-pages/page/product-page-powered-enclosure-kit-%28120240vac-120208vac%29 "Product Page: Powered Enclosure Kit (120/240VAC, 120/208VAC)")
- [Product Page: 277/480V Powered Enclosure Kit](https://kb.egauge.net/books/egauge-hardware-product-pages/page/product-page-powered-enclosure-kit-%28277480vac%29 "Product Page: Powered Enclosure Kit (277/480VAC)")