A compatible T-Mobile dataplan can be purchased through eGauge Systems. eGauge cannot guarantee support for dataplans from other parties. eGauge supplied data plans are for use with eGauge meters and not third party products, line suspension or termination will occur if there is excessive data usage from third-party devices or general internet usage.
Modems sold by eGauge systems are pre-configured for the T-Mobile service provided by eGauge and utilize InHand Networks device manager for remote troubleshooting and customer assistance.
Metered (not unlimited) data plans can accrue charges for data overages. eGauge recommends against using metered data plans without extensive testing for data usage. Data usage is not fully predictable and will greatly vary with interface access. See **[this article](https://kb.egauge.net/books/connectivity/page/how-much-data-%28bandwidth%29-does-the-egauge-use)** for additional information on data usage.
If installing in an underground or high electrical noise area, a custom antenna solution or separate mounting location for the cellular modem may be necessary in order to have sufficient cellular signal.
| [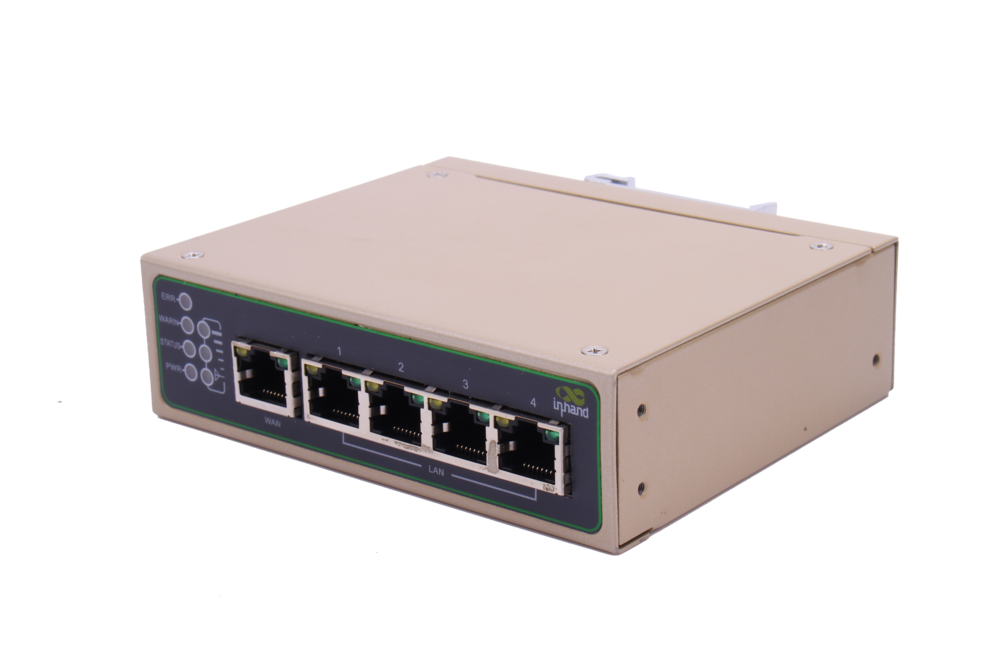](https://kb.egauge.net/uploads/images/gallery/2021-04/ir615.png) |
| ***Inhand Networks IR615*** |
The cellular antennas must be located on the outside of any enclosure. Even plastic enclosures can degrade or block a cellular signal.
1. If the modem is ordered with a data plan, an activation instruction sheet will be included with a SIM card. Insert the SIM card into the modem as shown above, **if there are multiple SIM card slots, use the one labeled "SIM 1"**. Follow the data plan activation instructions provided to activate the data plan. 2. Locate a suitable location to install the cell modem. If installing in a Powered Enclosure Kit (PEK), mount on the DIN rail. 3. If using the PEK or other suitable enclosure, use the 2x short SMA extension cables to connect from the ANT and AUX connectors on the modem to create a bulkhead connector on the enclosure. 4. Connect the antennas to the bulkhead connectors on the enclosure, or directly to the cell modem if not using an enclosure. 5. Connect the power cord to the cellular modem. 6. Connect the eGauge meter via Ethernet to a LAN port on the modem. ## Software configuration and troubleshootingModems provided by eGauge are pre-configured to work on the T-Mobile network using data plans provided by eGauge Systems.
The APN for plans provided by eGauge with the IR615 modem is `iot.tmowholesale` and is automatically set in the configuration files provided below.
If the modem is not functioning and configuration may have been modified after shipment, perform a factory reset and upload the eGauge-specific cellular configuration if using a dataplan provided by eGauge Systems. ### LED indicator description The modem has 3 signal LEDs to indicate signal strength: 1 LEDs: Signal strength 1-9 (Signal strength is weak, please check antenna and the signal strength of current location). 2 LEDs: Signal strength 10-19 (signal strength is adequate, and the modem can be used). 3 LEDs: Signal strength 20-31 (signal strong). The other LED behavior is described below: [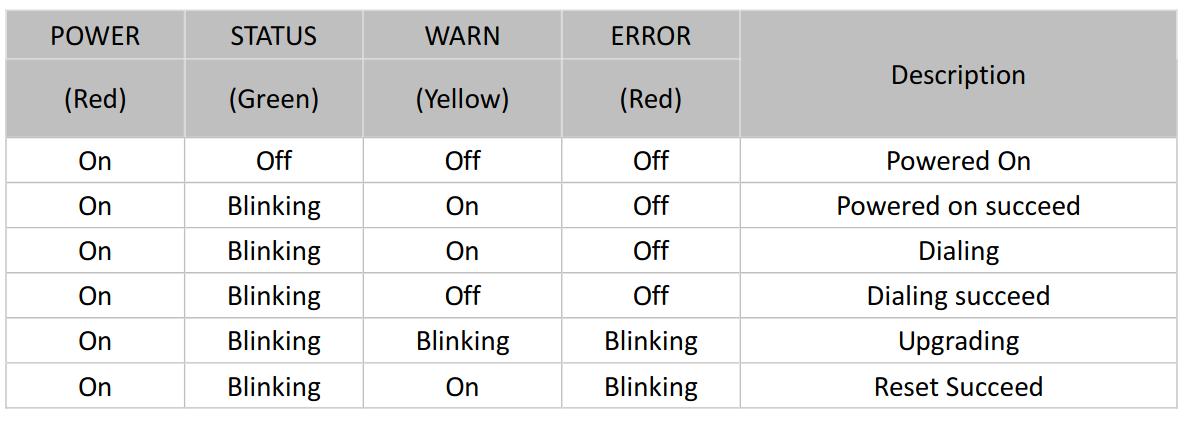](https://kb.egauge.net/uploads/images/gallery/2020-11/image-1605818316027.png) ### Factory Reset 1. Power on the modem and allow it at least 60 seconds to fully start running. Locate the Reset button below the antenna connections and find a paperclip or pin to push the button. [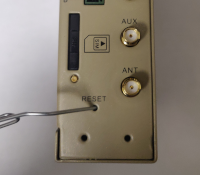](https://kb.egauge.net/uploads/images/gallery/2020-11/image-1605818815944.png) 2. Use a push-pin or paperclip to hold down the "Reset" button on the side of the modem until the "STATUS" LED starts flashing and the "ERROR" LED remains solid, then release the button. 3. When the button is released, the "ERROR" LED will turn off. Within 30 seconds, press and hold the "RESET" button again until the "ERROR" LED starts flashing and then release it. 4. The unit will now restore factory default settings. The STATUS, WARN, and ERROR LEDs will all light up solid during the factory reset process. Allow the unit at least 60 seconds to fully factory reset, and then perform the initial configuration steps below. ### Configuration stepsModems provided by eGauge are pre-configured to work on the T-Mobile network using data plans provided by eGauge Systems.
1. Identify the firmware version on the cell modem. On the bottom of the modem near the label is a sticker that indicates the firmware version. Below shows the modem uses firmware version **2.3.0**.[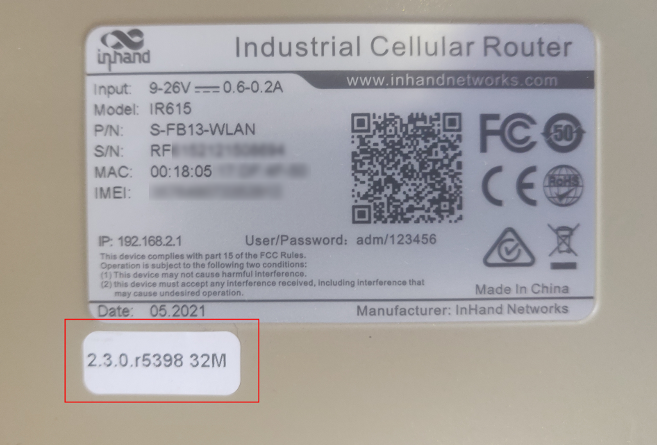](https://kb.egauge.net/uploads/images/gallery/2021-06/image-1624647978591.png) If logged into the modem interface, the firmware version may be found on the main page. This modem shows it runs firmware version **2.4.3**: [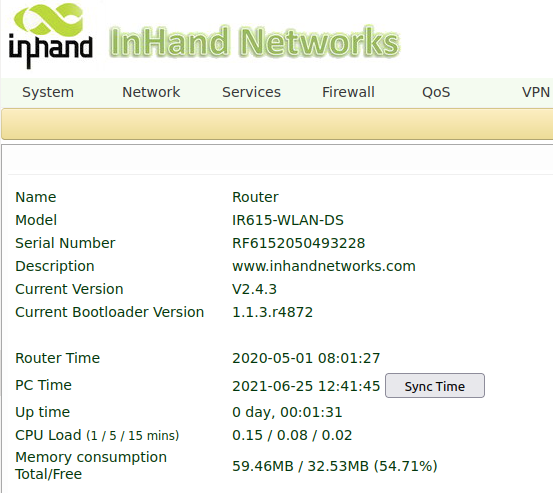](https://kb.egauge.net/uploads/images/gallery/2021-06/image-1624648107190.png) 2. Download the configuration file that corresponds to your firmware version where *x* is any number. This file will be uploaded to the modem in a later step.| 2.3.*x* | [v2.3.x-egauge-ir615-DS-cell-config\_qts.dat](https://kb.egauge.net/attachments/39) |
| 2.4.x | [v2.4.x-egauge-ir615-DS-cell-config.dat](https://kb.egauge.net/attachments/38) |
| **Page location** | **Description** |
| Tools -> Ping | Have the modem ping an external IP or domain. |
| Status -> Modem | Contains signal level, RSSI, SIM card number, network type and other modem-related information |
| Status -> Network Connections | Dialup (cellular) IP information from cellular provider |
| Status -> Device List | DHCP list of connected devices to the LAN ports |
| Status -> Log | Raw log from modem |
The Multitech cellular offering has been replaced by the [Inhand Networks IR615](https://kb.egauge.net/books/egauge-hardware-product-pages/page/cellular-modem-%28inhand-networks-ir615%29) cellular modem starting in November 2020.
- Starting May 2022, cellular plans using the **fast.t-mobile.com** APN must have a new SIM card and new APN configured for continued service. The new APN is **iot.tmowholesale** and requires a new SIM card to be installed. Please follow the **SIM card installation** and **Initial Configuration** instructions in the **[Multitech setup instructions article](https://kb.egauge.net/books/other-hardware-documentation/page/multitech-cell-modem-setup-%28mte-lat6-b07%29)**. - Old SIM cards will not function after May 2022 and can be identified by having a pink T-Mobile logo on it. The new/current SIM cards are white and do not have any branding on them. *Current manufacturer information: Multitech model MTE-LAT6-B07*A compatible T-Mobile dataplan can be purchased through eGauge Systems. eGauge cannot guarantee support for dataplans from other parties.
Metered (not unlimited) data plans can accrue charges for data overages. eGauge recommends against using metered data plans without extensive testing for data usage. Data usage is not fully predictable and will greatly vary with interface access. See **[this article](https://kb.egauge.net/books/connectivity/page/how-much-data-%28bandwidth%29-does-the-egauge-use)** for additional information on data usage.
The Multitech cellular modem is a cellular to Ethernet modem that can provide the eGauge unit with internet access on a 4G LTE T-Mobile or AT&T network.| [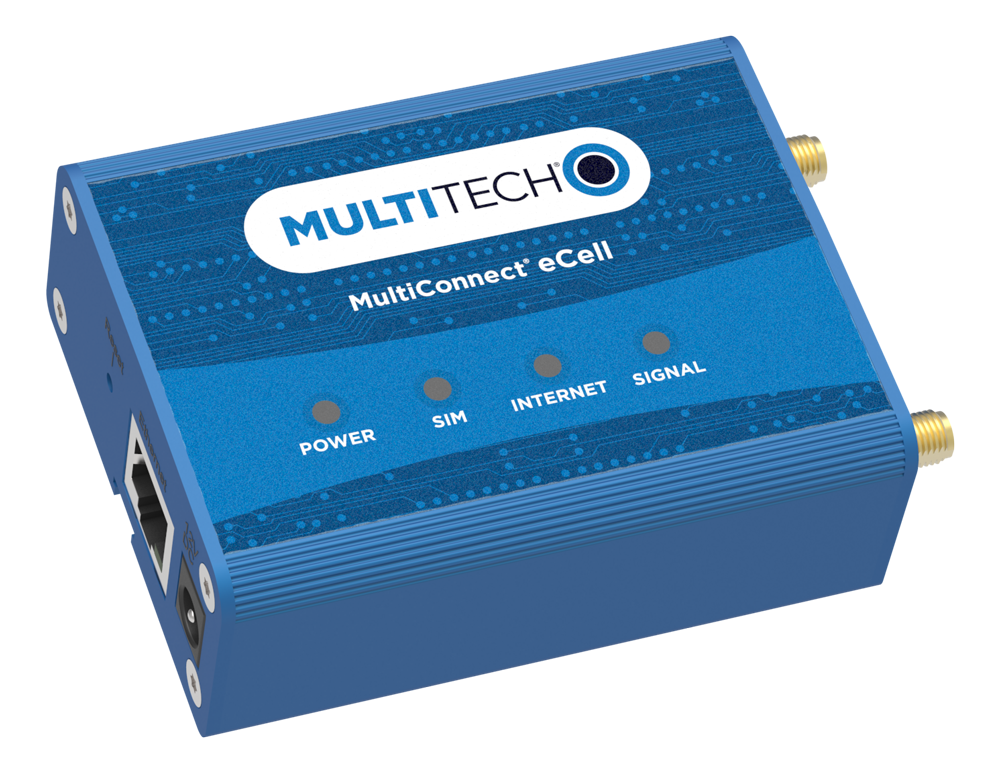](https://kb.egauge.net/uploads/images/gallery/2020-06/multitech-cell-modem.png) |
| *Multitech Cell Modem* |
|  |
| *TP-Link USB powered WiFi adapter* |
| [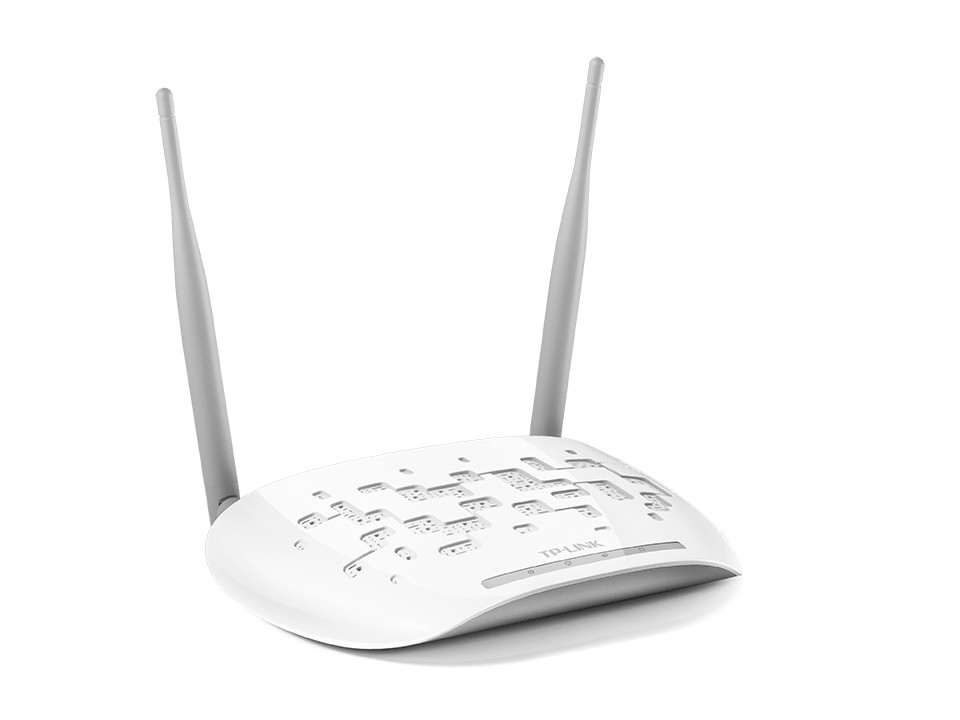](https://kb.egauge.net/uploads/images/gallery/2020-06/tp-link-wifi-ap.jpg) |
| *TP-Link Wifi Access Point* |
This is a discontinued product. eGauge Systems no longer offers HomePlug-compatible devices. If wireless communication is required, please utilize the [WiFi-enabled EG42xx series meter](https://kb.egauge.net/books/egauge-hardware-product-pages/page/meter-egauge-core-and-pro-with-wifi).
The HomePlug AV adapter is used by compatible eGauge models to bring network communication over the existing building power lines. The HomePlug AV adapter plugs directly into a 120V outlet, connects to the router/switch using Ethernet, and allows compatible eGauge models to communicate over the the building's electrical wiring. - HomePlug communication is only recommended for residential use, and is not needed when using an alternative communication method, such as Ethernet direct, cellular, or WiFi. - Ensure HomePlug adapter is powered by same phase as eGauge meter L1 connection and is not more than 100 feet of wiring distance from the eGauge meter. - Do not plug HomePlug adapter into surge protector or UPS. - Do not push or hold the button on the HomePlug adapter without full knowledge of pair/reset process. Pushing the button on the HomePlug adapter may result in communication loss. - The HopmePlug AV is only for EG301x and EG41xx (Pro/Core Residential). eGauge2 models cannot use this HomePlug. Contact eGauge Support if you are unsure what model you have.| [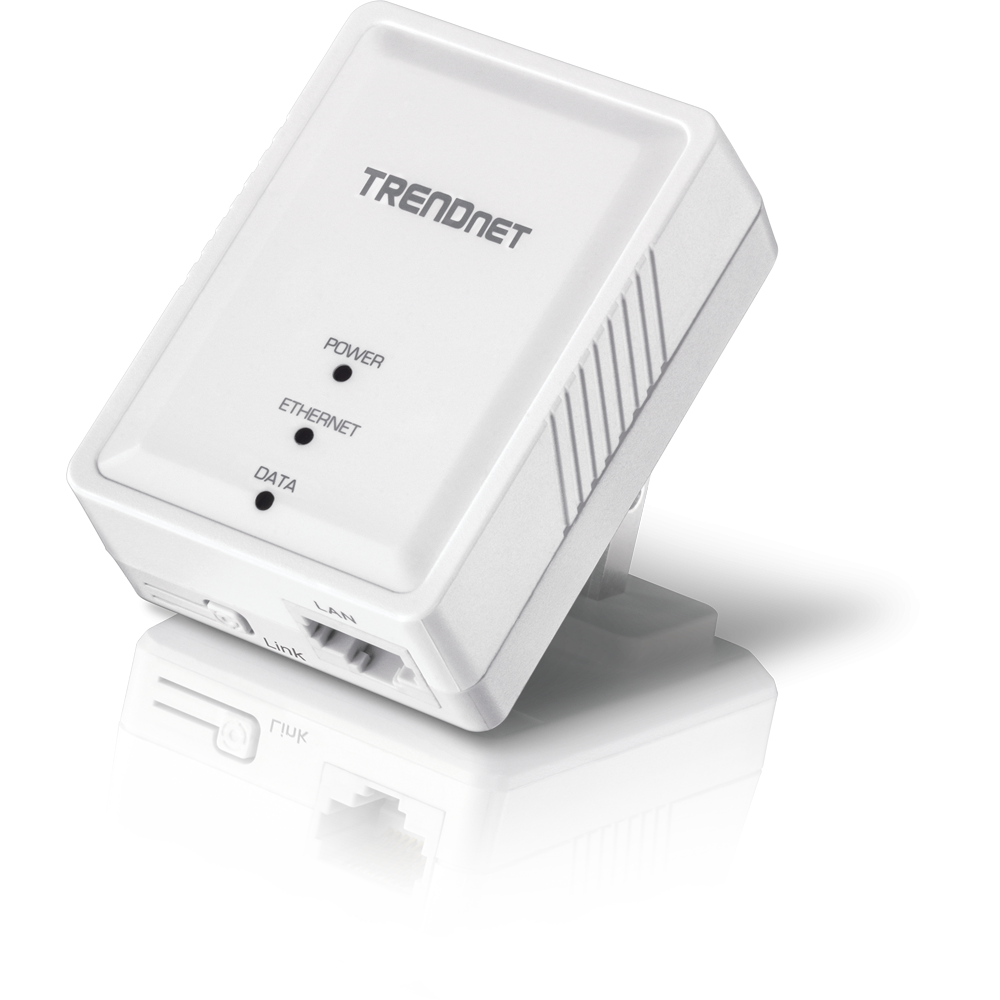](https://kb.egauge.net/uploads/images/gallery/2020-06/trendnet-homeplug-av-tpl-406e.png) |
| *TRENDnet HomePlug AV* |
EG4xxx (Pro and Core) are recommended to utilize the **[eGauge USB485](https://kb.egauge.net/books/egauge-hardware-product-pages/page/egauge-serial-usb-converter-%28usb485%29)** (serial to USB) adapter instead if possible.
Power can be provided (9-30V) to either terminals or barrel jack plug. eGauge sells a **[compatible 12Vdc](https://kb.egauge.net/books/egauge-hardware-product-pages/page/product-page-12-volt-power-supply)** power supply.
The Chiyu BF-430 is an RS-485/RS-232 to Ethernet converter. It is required for serial communication to third-party devices (for example, Modbus RTU) on older eGauge models without USB ports or to communicate over a network rather than serial line directly to the eGauge.| [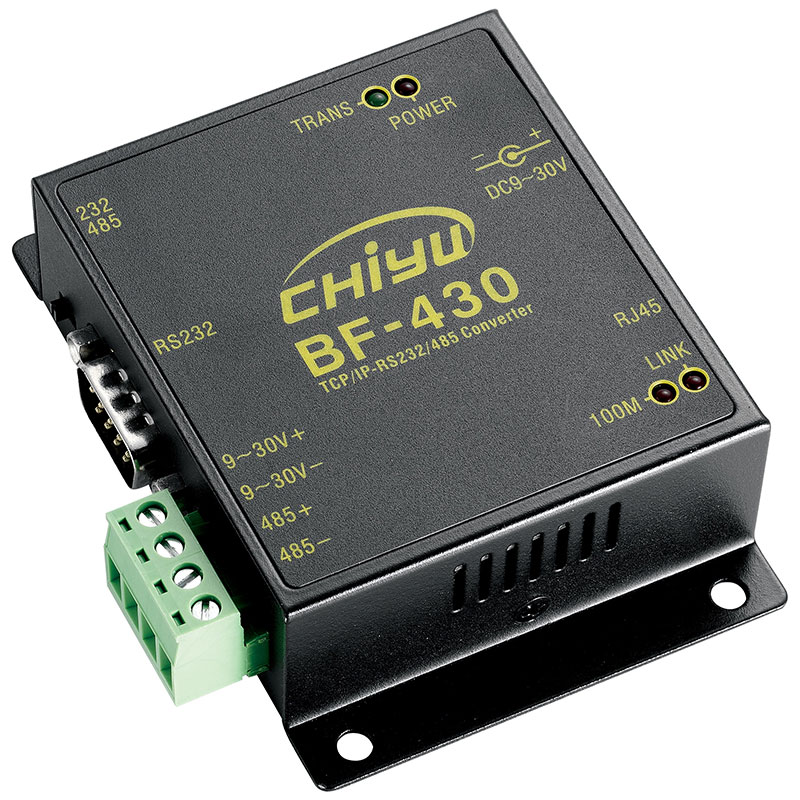](https://kb.egauge.net/uploads/images/gallery/2020-06/chiyu-bf430.jpg) |
| *BF430 Serial-to-Ethernet Converter* |
Do not apply power to both barrel jack and voltage terminals.
Serial settings are configured in software on the BF-430 and must be set correctly through web interface for use.
1. Set the DIP switch in the upper left to 485 (or 232, if using the RS232 terminal connections). 2. Connect the Ethernet (RJ45) to the local network. 3. Connect the 485+ and 485- to the appropriate connections on the remote serial device (or RS232 if used instead). 4. Apply power to the BF-430 using a barrel jack or 9~30V+ and 9~30V- terminals appropriately. ### Software configuration Information [BF-430 Manual](https://www.egauge.net/media/support/docs/BF430_manual.pdf) ## Documents [BF-430 Manual](https://www.egauge.net/media/support/docs/BF430_manual.pdf) ## Related Information - [RS485 to USB converter (USB485)](https://kb.egauge.net/books/egauge-hardware-product-pages/page/product-page-rs485-usb-converter "Product Page: RS485-USB Converter") - [IMT irradiance and weatherstation wiring information](https://kb.egauge.net/books/third-party-hardware-documentation/page/imt-si-rs485tc-2t-v-mb-irradiance-sensor-wiring-diagrams "IMT Si-RS485TC-2T-v-MB irradiance sensor wiring diagrams") - [Reading from any remote Modbus device](https://kb.egauge.net/books/egauge-meter-communication/page/custom-modbus-definitions-%28read-from-any-modbus-device%29 "Custom Modbus definitions (read from any Modbus device)") # eGauge USB-Serial Converter (USB485) ##### [ Visit the online store page](https://store.egauge.net/USB_485 "Visit the online store now!") ##### Model: USB485 The eGauge USB485 is used to receive and send serial data between a RS485 serial chain and a host's USB port. Primarily it is used for compatible eGauge meters (EG4xxx Core and Pro) to record data from remote Modbus devices (such as inverters, temperature sensors, and other meters), or for other systems (such as a building automation system or other data loggers) to read data from the eGauge via Modbus RTU. It may be used for other non-eGauge applications as it utilizes a well known FT230X chipset from FTDI. However, eGauge Systems does not provide support for these applications.| [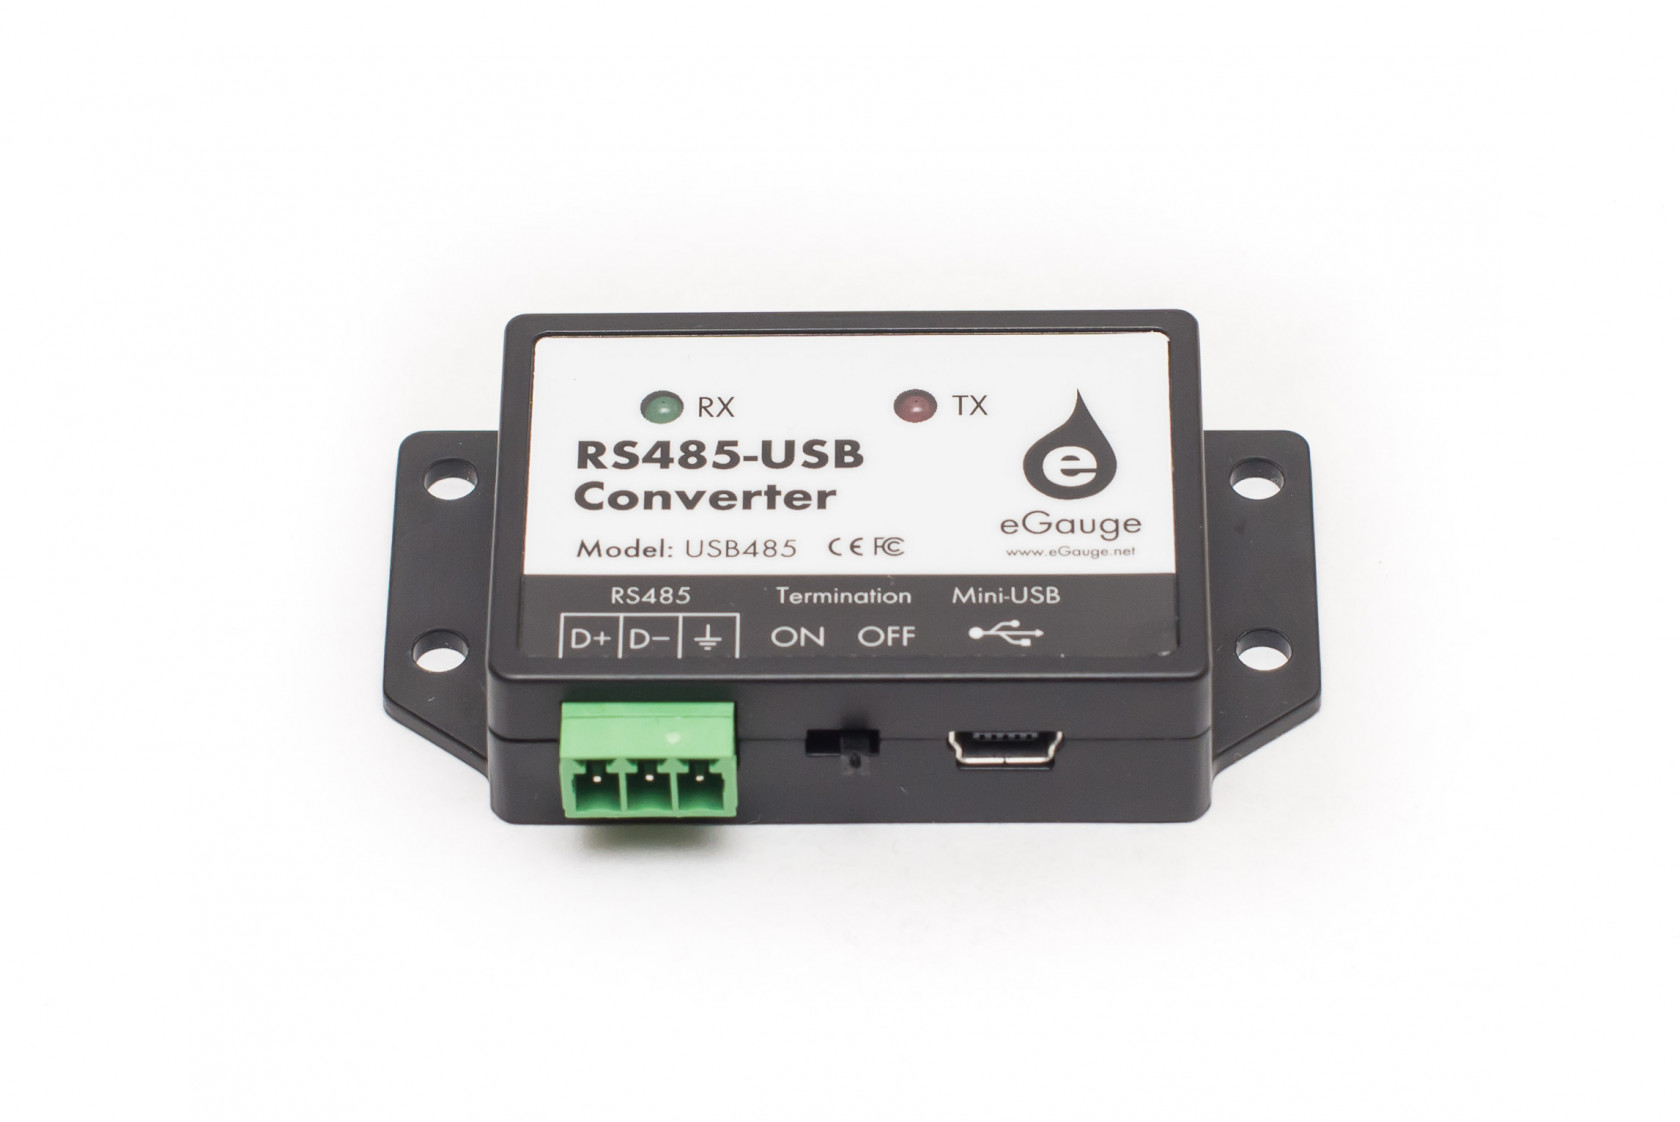](https://kb.egauge.net/uploads/images/gallery/2020-06/usb485.jpg) |
| *eGauge RS485-USB Converter* |
Ensure proper wiring between serial devices. Only connect data signals, and signal ground (not earth ground).
1. Wire the serial line to the D+, D-, and signal ground. Use twisted pair wire for D+ and D- connections. 2. Turn the termination DIP switch to ON if it is the **last** connection on the serial line. Termination should be OFF if it is daisy chained in-between devices. 3. Connect the Mini USB cable to the EG4xxx USB1 or USB2 port. Take note of which port is used. ### Multiple serial devices can be daisy chained on the same line as shown in the diagram below: [](https://s3.amazonaws.com/cdn.freshdesk.com/data/helpdesk/attachments/production/25012072323/original/AqpfSqLc1M0n61_BcyOkobwnb69vKwug5g.png?1562955781) --- ### Software configuration Information - If exporting eGauge data via Modbus RTU to another system, see the [Modbus output communication article here](https://kb.egauge.net/books/egauge-meter-communication/page/modbus-output-communication "Modbus Output Communication"). - If importing data from a remote Modbus RTU device to the eGauge, see the [Modbus input article here](https://kb.egauge.net/books/egauge-meter-communication/page/custom-modbus-definitions-%28read-from-any-modbus-device%29 "Custom Modbus definitions (read from any Modbus device)"). ## Documents - [Datasheet](https://www.egauge.net/media/support/docs/usb485_datasheet.pdf) ## Related Information - [Modbus output communication](https://kb.egauge.net/books/egauge-meter-communication/page/modbus-output-communication "Modbus Output Communication") - [BF-430 serial-to-Ethernet converter](https://kb.egauge.net/books/product-pages-f89/page/product-rs485-to-ethernet-converter-%28bf430%29 "Product: RS485 to Ethernet Converter (BF430)") - [Remote device via eGauge USB485](https://kb.egauge.net/books/egauge-meter-communication/page/remote-device-via-egauge-usb485-adapter "Remote device via eGauge USB485 adapter") - [Using the USB485 with a Windows 10 PC](https://kb.egauge.net/books/egauge-meter-communication/page/using-the-usb485-converter-with-windows-10 "Using the USB485 converter with Windows 10") # Cellular Modem (Inhand Networks IR302) ##### [ Visit the online store page](https://store.egauge.net "Visit the online store now!") Inhand Networks IR302 is a cellular to Ethernet modem that can provide the eGauge unit and related supported equipment with internet access on a 4G LTE T-Mobile network.A compatible T-Mobile dataplan can be purchased through eGauge Systems. eGauge cannot guarantee support for dataplans from other parties. eGauge supplied data plans are for use with eGauge meters and not third party products, line suspension or termination will occur if there is excessive data usage from third-party devices or general internet usage.
Modems sold by eGauge systems are pre-configured for the T-Mobile service provided by eGauge and utilize InHand Networks device manager for remote troubleshooting and customer assistance.
Metered (not unlimited) data plans can accrue charges for data overages. eGauge recommends against using metered data plans without extensive testing for data usage. Data usage is not fully predictable and will greatly vary with interface access. See **[this article](https://kb.egauge.net/books/connectivity/page/how-much-data-%28bandwidth%29-does-the-egauge-use)** for additional information on data usage.
If installing in an underground or high electrical noise area, a custom antenna solution or separate mounting location for the cellular modem may be necessary in order to have sufficient cellular signal.
| [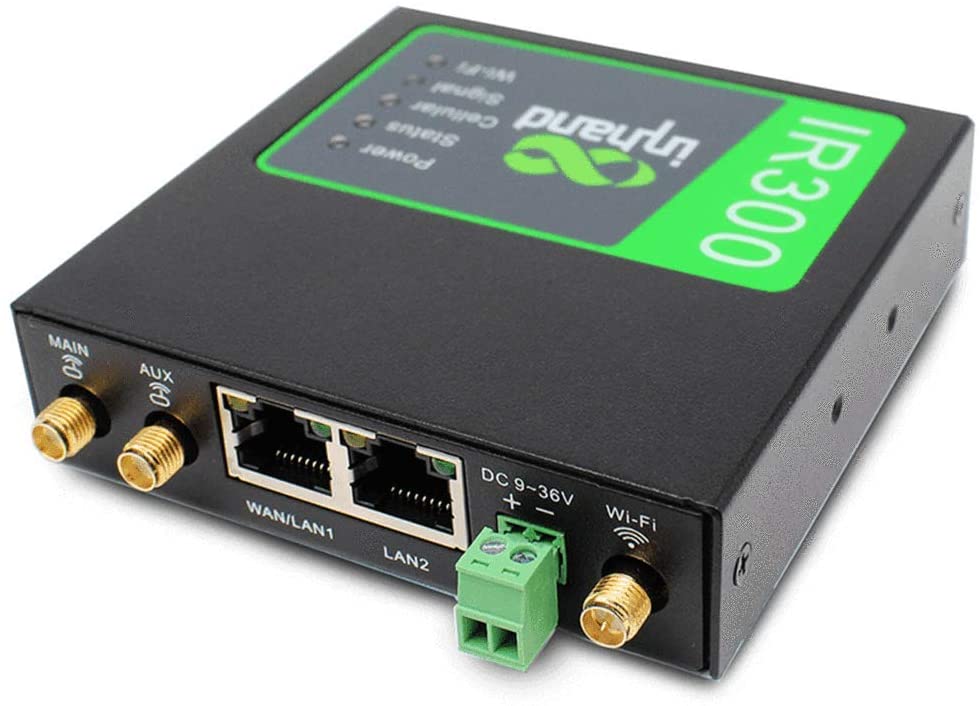](https://kb.egauge.net/uploads/images/gallery/2022-04/ir302.jpg) |
| ***Inhand Networks IR302*** |
The cellular antennas must be located on the outside of any enclosure. Even plastic enclosures can degrade or block a cellular signal.
1. If the modem is ordered with a data plan, an activation instruction sheet will be included with a SIM card. Insert the SIM card into the modem as shown above, ensuring the SIM card is in the "SIM 1" position. Follow the data plan activation instructions provided to activate the data plan. 2. Connect the DIN rail to either the left or right side of the modem using the included bracket and screws. 3. Locate a suitable location to install the cell modem. If installing in a Powered Enclosure Kit (PEK), mount on the DIN rail. 4. If using the PEK or other suitable enclosure, use the 2x short SMA extension cables to connect from the Cellular1 and Cellular2 connectors on the modem to create a bulkhead connector on the enclosure. 5. Connect the antennas to the bulkhead connectors on the enclosure, or directly to the cell modem if not using an enclosure. 6. Connect the power cord to the cellular modem. 7. Connect the eGauge meter via Ethernet to a LAN port on the modem. #### Detailed SIM card install instructions 1. Use the SIM card remover tool to eject the SIM card tray.| [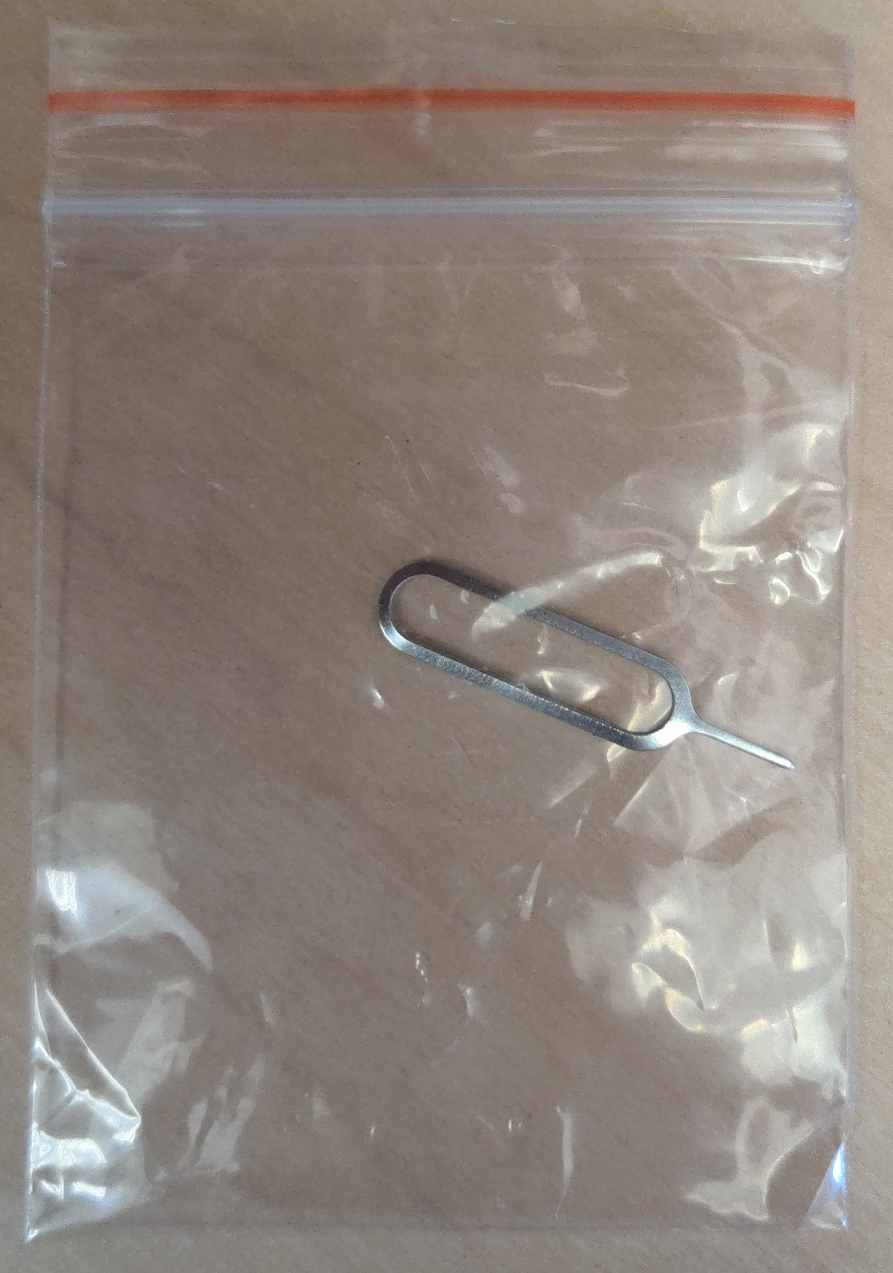](https://kb.egauge.net/uploads/images/gallery/2022-10/image.png) | [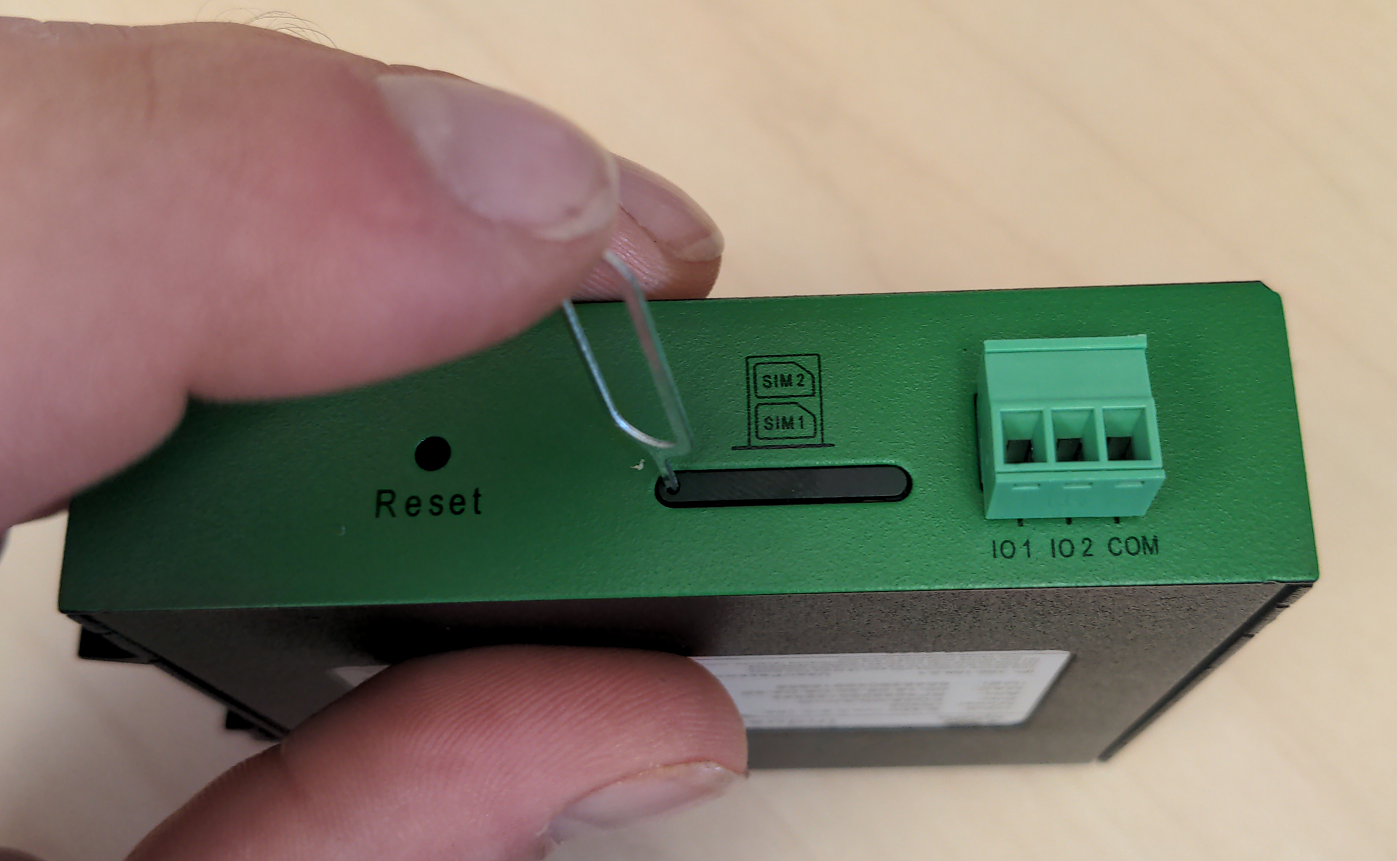](https://kb.egauge.net/uploads/images/gallery/2022-10/MRMimage.png) |
| *SIM card remover tool* | *Insert SIM card removal tool into SIM card ejection port* |
| [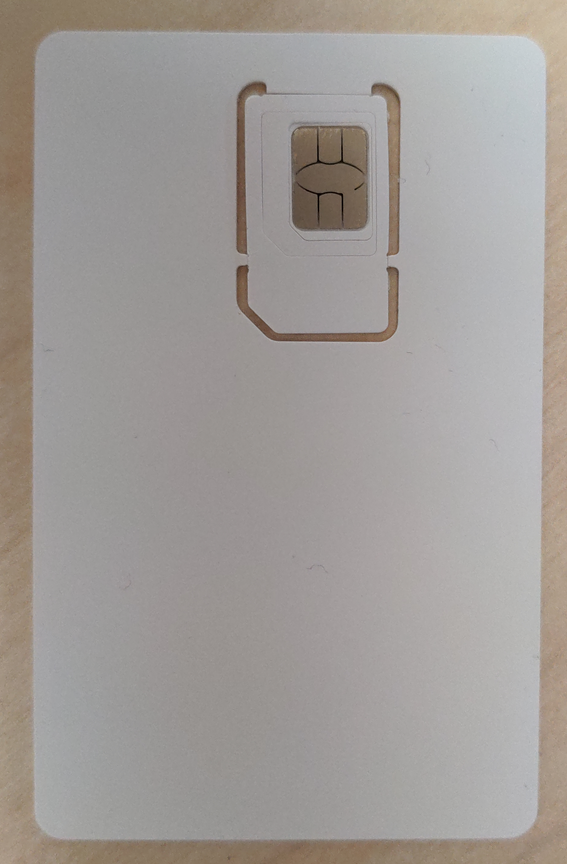](https://kb.egauge.net/uploads/images/gallery/2022-10/TYBimage.png) | [](https://kb.egauge.net/uploads/images/gallery/2022-10/sGOimage.png) |
| *Full SIM card* | *SIM card with 2 outer shells removed* |
| [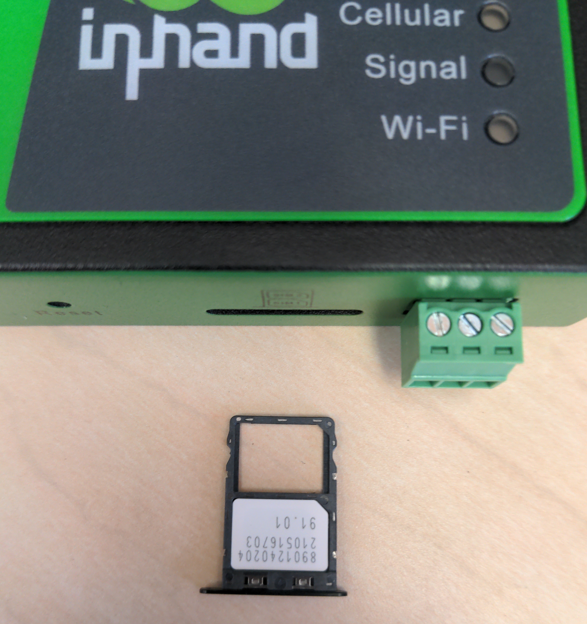](https://kb.egauge.net/uploads/images/gallery/2022-10/y2Iimage.png) |
| *SIM card in holder before inserted* |
Modems provided by eGauge are pre-configured to work on the T-Mobile network using data plans provided by eGauge Systems.
The default DHCP range of IR302 modems provided by eGauge is 192.168.2.2 to 192.168.2.100. Devices may be given static IPs in the range of 192.168.2.101 to 192.168.2.254. A particular static IP must not be used on more than one device on a single modem.
If the modem is not functioning and configuration may have been modified after shipment, perform a factory reset and upload the eGauge-specific cellular configuration if using a dataplan provided by eGauge Systems. ### LED indicator description The modem has a "Signal" LED with 3 different colors to indicate the signal strength level: Red: Signal strength 0-10 (Signal strength is weak, please check antenna and the signal strength of current location). Yellow: Signal strength 11-20 (signal strength is adequate, and the modem can be used). Green: Signal strength 21-30 (signal strong). The other LED behavior is described below:| **Power** **(Red)** | **Status** **(Green)** | **Cellular** **(Yellow)** | **Description** |
| Off | Off | Off | Powered Off |
| On | Off | Off | System failure |
| On | On | Off | The module or SIM card is not recognized |
| On | On | Blinking | Dialing (Connection attempt is being made) |
| On | On | On | Dialing Succeeded (A connection to the provider was made. This does not guarantee the SIM card data plan is active) |
| On | Blinking | On | Software Upgrade in progress |
| On | Blinking, then On | Off | A reset is being performed |
Modems provided by eGauge are pre-configured to work on the T-Mobile network using data plans provided by eGauge Systems. These steps are only needed if the modem was factory reset or configuration was modified. The APN for T-Mobile plans provided by eGauge is `iot.tmowholesale`
1. Download the [IR302 eGauge configuration for T-Mobile here.](https://kb.egauge.net/attachments/43) 2. Connect a computer to a LAN port of the cell modem. 3. Open a web browser to [http://192.168.2.1/](http://192.168.2.1/) and log in with username `adm` and password `123456`. [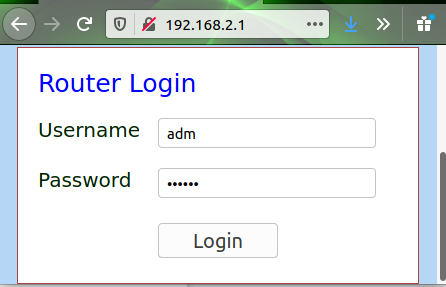](https://kb.egauge.net/uploads/images/gallery/2020-11/image-1605809939644.png) 4. The modem may prompt to opt-in to a User Experience Program from InHand. You may click "CANCEL" on this. It may be toggled on or off later in Services -> User Experience Plan. 5. Navigate to System -> Config Management. [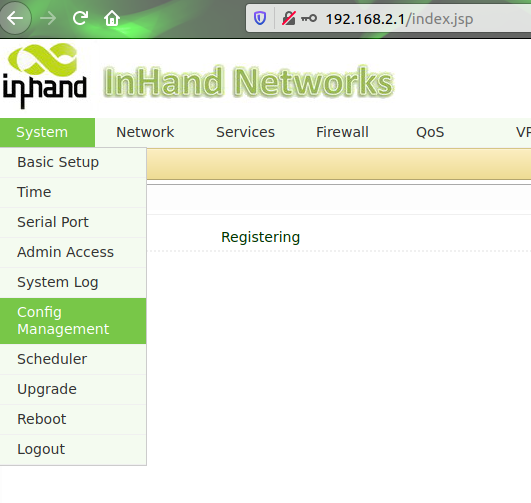](https://kb.egauge.net/uploads/images/gallery/2020-11/image-1605809785399.png) 6. Under "Router Configuration", click the "Browse" button and choose the file downloaded earlier. [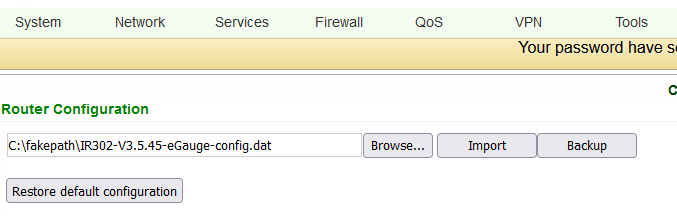](https://kb.egauge.net/uploads/images/gallery/2022-06/image-1655916417303.png) 7. Press "Import", choose "OK" when it asks if you are sure, and finally press "Reboot" when it prompts to be rebooted. [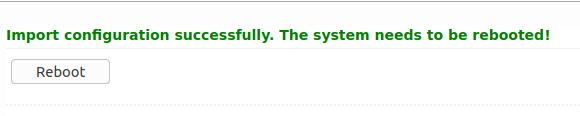](https://kb.egauge.net/uploads/images/gallery/2020-11/image-1605809825184.png) ### Additional diagnostics and troubleshooting The following pages provide information and diagnostics that can be helpful in identifying poor signal or other issues. Connect a computer to a LAN port of the modem and visit [http://192.168.2.1/](http://192.168.2.1/) logging in with username `adm` and password `123456`. If this does not work, perform a factory reset and initial configuration as described in the above sections.| **Page location** | **Description** |
| Tools -> Ping | Have the modem ping an external IP or domain. |
| Status -> Modem | Contains signal level, RSSI, SIM card number, network type and other modem-related information |
| Status -> Network Connections | Dialup (cellular) IP information from cellular provider |
| Status -> Device List | DHCP list of connected devices to the LAN ports |
| Status -> Log | Raw log from modem |
| **Condition** | **RSRP (dBm)** | **RSRQ (dB)** | **SINR (dB)** |
| Excellent ✓✓✓ | `>=-80` | `>=-10` | `>=20` |
| Good ✓✓ | `-80 to -90` | `-10 to -15` | `13 to 20` |
| Medium ✓ | `-90 to -100` | `-15 to -20` | `0 to 13` |
| Weak | `<=-100` | `<-20` | `<=0` |
Dataplans sold by eGauge Systems are intended for use with models sold by eGauge Systems and in the U.S.
You must have an eGauge.net account before activating a data plan. If you do not already have an eGauge.net account, please create and confirm an eGauge.net account at **[https://www.egauge.net/account/register/](https://www.egauge.net/account/register/)**. To confirm the account you must click on a link that is emailed to you.
Data Plans belong to the eGauge.net user and email that activated it. Invoices and bills will be sent to the eGauge.net account email that activated the data plan.
Only data plans sold directly by eGauge Systems may be activated through the data plan portal. Only modems currently and previously sold by eGauge Systems are supported.
For information on using the IR302 modem provided by eGauge Systems, view our **[IR302 product page](https://kb.egauge.net/egauge.net/support/m/ir302)**.
## Data Plan Service eGauge Systems provides cellular modems along with a SIM card that provides T-Mobile service compatible with modems sold by eGauge Systems in the U.S. ## Modem Information For particular information on your modem, including hardware and SIM card installation and configuration, please find the model number in our [Communication Hardware](https://kb.egauge.net/books/egauge-hardware-product-pages/chapter/communication-hardware) chapter. All modems sold by eGauge Systems are pre-configured to work with the dataplans provided. ### Data Plan Activation Each Data Plan sold is provided with a sheet of paper with a QR code and link to activate the plan. An example is shown here: [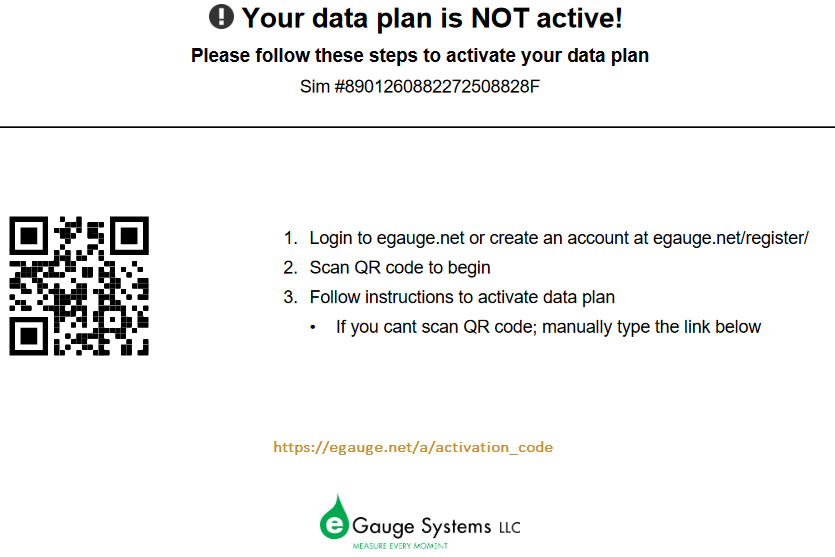](https://kb.egauge.net/uploads/images/gallery/2022-08/image-1661811280544.png) *Note: the QR code and "link below" link goes to a unique URL for that particular data plan activation* If you do not already have an eGauge.net account you will be requested to create one. After you create and confirm the account Scan the QR code or enter the link and follow the instructions for activating the data plan. eGauge Systems utilizes [Stripe Billing ](https://stripe.com/)for billing and recurring payments. #### Without QR code, link, or paperwork If you do not have the QR code or link from the paperwork that came with the SIM card, you may log into eGauge.net and activate the data plan by clicking Support → Activate a Data Plan, and entering the SIM card number in the form. [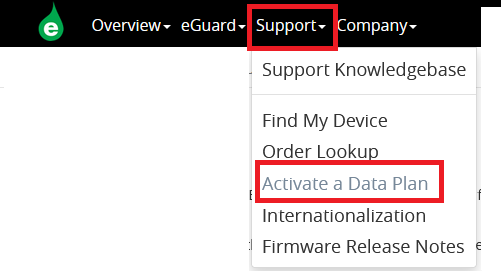](https://kb.egauge.net/uploads/images/gallery/2022-08/image-1661813268537.png) ### Data Plan Cancellation To cancel a data plan, log into your Data Plan Management portal as shown below and choose the Cancel button. If payment lapses for a user's data plans, the plans will automatically be cancelled. ## Data Plan Management eGauge.net provides a simple portal to manage data plans purchased and activated through eGauge Systems. To begin, log into your eGauge.net account which has one or more active data plans. Click your user in the upper right-hand menu and choose "Account Settings": [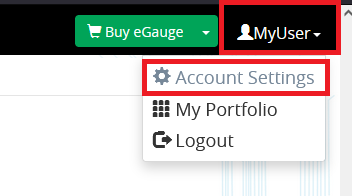](https://kb.egauge.net/uploads/images/gallery/2022-08/image-1661813429227.png) Next, choose "Manage Data Plans": [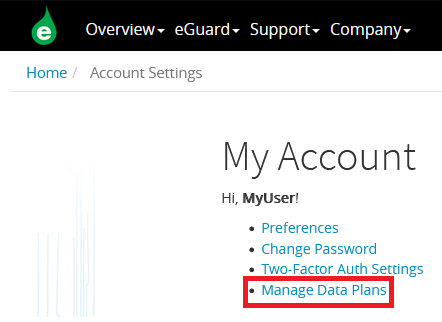](https://kb.egauge.net/uploads/images/gallery/2022-08/image-1661813523726.png) You will be presented with a list of data plans that have been activated under your account. Plans may be cancelled or reactivated here (in the case you cancelled them after activating). [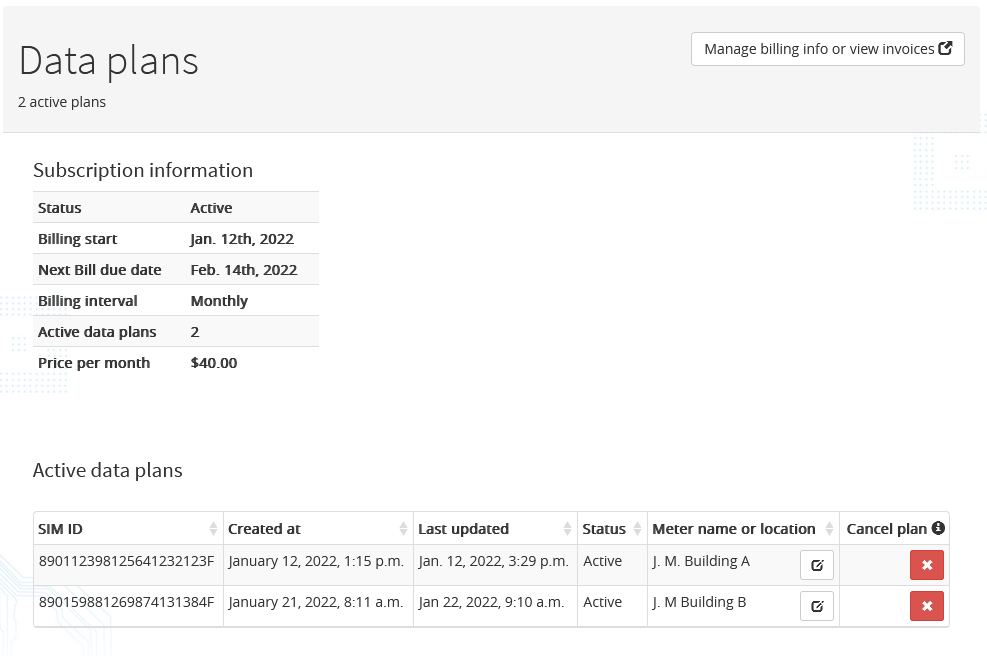](https://kb.egauge.net/uploads/images/gallery/2022-08/image-1661818583404.png) You may cancel plans using the "Cancel plan" button. After a plan is cancelled, it will display in your portal with a "reactivate" button. A deactivated plan may be activated by a different user, for example if a different user is responsible for ongoing payment of a data plan, it may be deactivated and the new user may activate it using either the original QR code or link the data plan came with, or using the "Activate a Data Plan" link in the Support menu on eGauge.net. It is recommended to add a description for the particular data plan by clicking the notepad icon under "Meter name or location". ## Billing All billing for data plans is performed through Stripe, under a single bill that starts when the first data plan on a users account is activated. Any additional plans activated while an existing data plan is active will be billed for on the billing date of the first plan activation date. You may update and set the default credit card and view previous bills through the portal shown above, using the "Manage billing info or view invoices" button in the upper right-hand corner of the page. Upcoming payment notifications and invoices are sent to the email used when registering the eGauge.net account that activated the plan. ## Transferring plans to another user A data plan cannot be "transferred" between users as the billing information is linked to Stripe and the eGauge.net user. To transfer a plan to another user, the original activator of the plan must [cancel the plan](#bkmrk-data-plan-cancellati), and the new user may [activate the plan](#bkmrk-data-plan-activation) using the QR code or entering the SIM card number manually.